In the realm of Monster Hunter Wilds, I’ve found myself often grasping the familiarity of the Sword & Shield. Unlike some complex weapons, this one is straightforward yet incredibly potent. It might not be flashy, but when it comes to tackling the toughest monsters, regardless of the challenge, it always gets the job done for me.
Regardless of whether you’re a fresh player or a seasoned veteran, Sword & Shield stands as your reliable companion, ensuring that your hunting adventures are smooth sailing. If you’re considering diving into Sword & Shield and aim to make your gaming experience effortless, here’s an in-depth build designed to equip you for the game’s end stages.
In my experience as a dedicated Monster Hunter World: Iceborne player, it’s fascinating to note that this game is still evolving, with ongoing tweaks to optimize the most effective build combinations for maximum damage output. This means that strategies, like the one I’m about to share regarding the Sword and Shield setup, are subject to change as we continue to explore the game’s depths. So let’s dive in!
Sword & Shield Build Overview
Using the Sword & Shield is quite straightforward, however, preparing the build can require a bit of finesse. The Sword serves as your primary damage source, while you’ll want to utilize offensive enhancements such as Critical Boost and Weakness Exploit for optimal performance.
When dealing with the Shield, it’s crucial to master Offensive Guard. This skill will enhance your blocking ability by boosting the damage inflicted on attacking monsters. Furthermore, aim for precision in guarding (perfect guard), and don’t hesitate to perform a power clash when required. In essence, having Offensive Guard is generally advantageous whenever a shield is involved.
Keep in mind that, much like in Monster Hunter Wilds, certain customizations or enhancements are limited by restrictions. Specifically, decorations for armor and weapons are distinct. This means you’ll likely need to invest a substantial amount of time gathering all the necessary Decorations to prepare this build.
Ideally, it is recommended to farm Tempered Arkveld and Tempered Gore Magala for the best loot.
Sword & Shield Build Guide

Here’s a rundown of your armor and Decorations for an endgame Sword & Shield build:
| Gear Slot | Gear Name | Decorations |
|---|---|---|
| Weapon | Jager-Ankh (Gore Magala Weapon) | Guardian/Dragon Jewel (3), Critical Jewel (2), Critical Jewel (1) |
| Head | G. Ebony Helm Beta (Guardian Odogaron Gear) | Phoenix Jewel (2) |
| Chest | Arkvulcan Mail Beta (Arkveld Gear) | Tenderizer Jewel (3), Phoenix Jewel (2) |
| Hand | G. Ebony Bracers Alpha (Guardian Odogaron Gear) | – |
| Waist | Gore Coil Beta (Goro Magala Gear) | Tenderizer Jewel (3), Phoenix Jewel (2) |
| Legs | Gore Greaves Beta (Gore Magala Gear) | Chain Jewel (3), Sane Jewel (1) x2 |
| Charm | Exploiter Charm 2 | – |
As a devoted fan, I’d recommend equipping the Jager-Ankh in your weapon slot. This bad boy is paired with the mighty Gore Magala Sword & Shield. Now,
For an intense Dragon Attack experience, consider discarding the Guardian/Dragon Jewel in favor of upgrading to Dragon Jewel Level 3. Nevertheless, it’s crucial to keep the Offensive Guard enhancement as it optimizes the effectiveness of your shield during defensive maneuvers.
In the top position or slot, choose G. Ebony Helm Beta. This item features a Level Two Jewel slot. Insert Phoenix Jewel Two into that slot, and it will provide the Coalescence buff, boosting your elemental damage and status effect build-up whenever you remove a debuff. When battling monsters like Arkveld, you’ll frequently encounter blights, making the activation of this skill effortless.
Place Arkvulcan Mail Beta in the chest compartment. This item includes a Level Three Jewel slot and a Level Two Jewel slot. To enhance the “Weakness Exploit” ability, insert a Tenderizer Jewel Level Three. Additionally, add another Phoenix Jewel Level Two to boost the “Coalescence” level. Notably, this armor piece also offers a Level Two bonus for “Weakness Exploit”.
In this slot called “hand,” you should equip the G. Ebony Bracers Alpha. This item includes Burst Level Two and Divine Blessing Level One. Unfortunately, it doesn’t have a Decoration slot, but don’t worry about that since the armor’s bonuses are what truly matter in this case.
In the designated slot for your waist, opt for the Gore Coil Beta, which includes both a Level Three and a Level Two Jewel slot. To amplify the effectiveness of Weakness Exploit and Coalescence, you’ll want to add an additional Tenderizer Jewel Level Three and a Phoenix Jewel Level Two in these slots.
In the end, opt for Gore Greaves Beta in the equipment slot referred to as “legs”. You’ll need to attach a Chain Jewel Level Three and two Level One Sane Jewels. The Chain Jewel Level Three boosts the “Burst level,” while the Sane Jewel offers the “Antivirus buff.” If you prefer, you can replace the Chain Jewel Level Three with a Challenger Jewel Level Three for Agitator, which amplifies your attack and affinity when monsters are enraged.
With the Exploiter Charm, you gain a Weakness Exploit Level Two, which maximizes the buff on affinity when striking vulnerable monster areas. Alternatively, if you’re not focusing on wounding weak spots but prefer a boost in overall attack and affinity, consider using Challenger Charm 2 for its Agitator effect instead.
The Gear called Gore Magala comes equipped with the Black Eclipse effect. This effect causes the player to become Frenzied. Clearing this condition grants a 10% Affinity bonus, and additionally activates Antivirus, which in turn rewards an additional 15% Affinity increase. To remove the Frenzy debuff, simply attack a monster forcefully.
Sword & Shield Build Skill Overview
The skill overview for the Sword & Shield build is as follows:
- Critical Boost Level 3
- Offensive Guard Level 3
- Critical Element Level 3
- Dragon Attack Level 1
- Weakness Exploit Level 5
- Burst Level 5
- Coalescence Level 3
- Antivirus Level 3
- Constitution Level 2
- Divine Blessing Level 1
- Flinch Free Level 1
Tips To Play This Sword & Shield Build
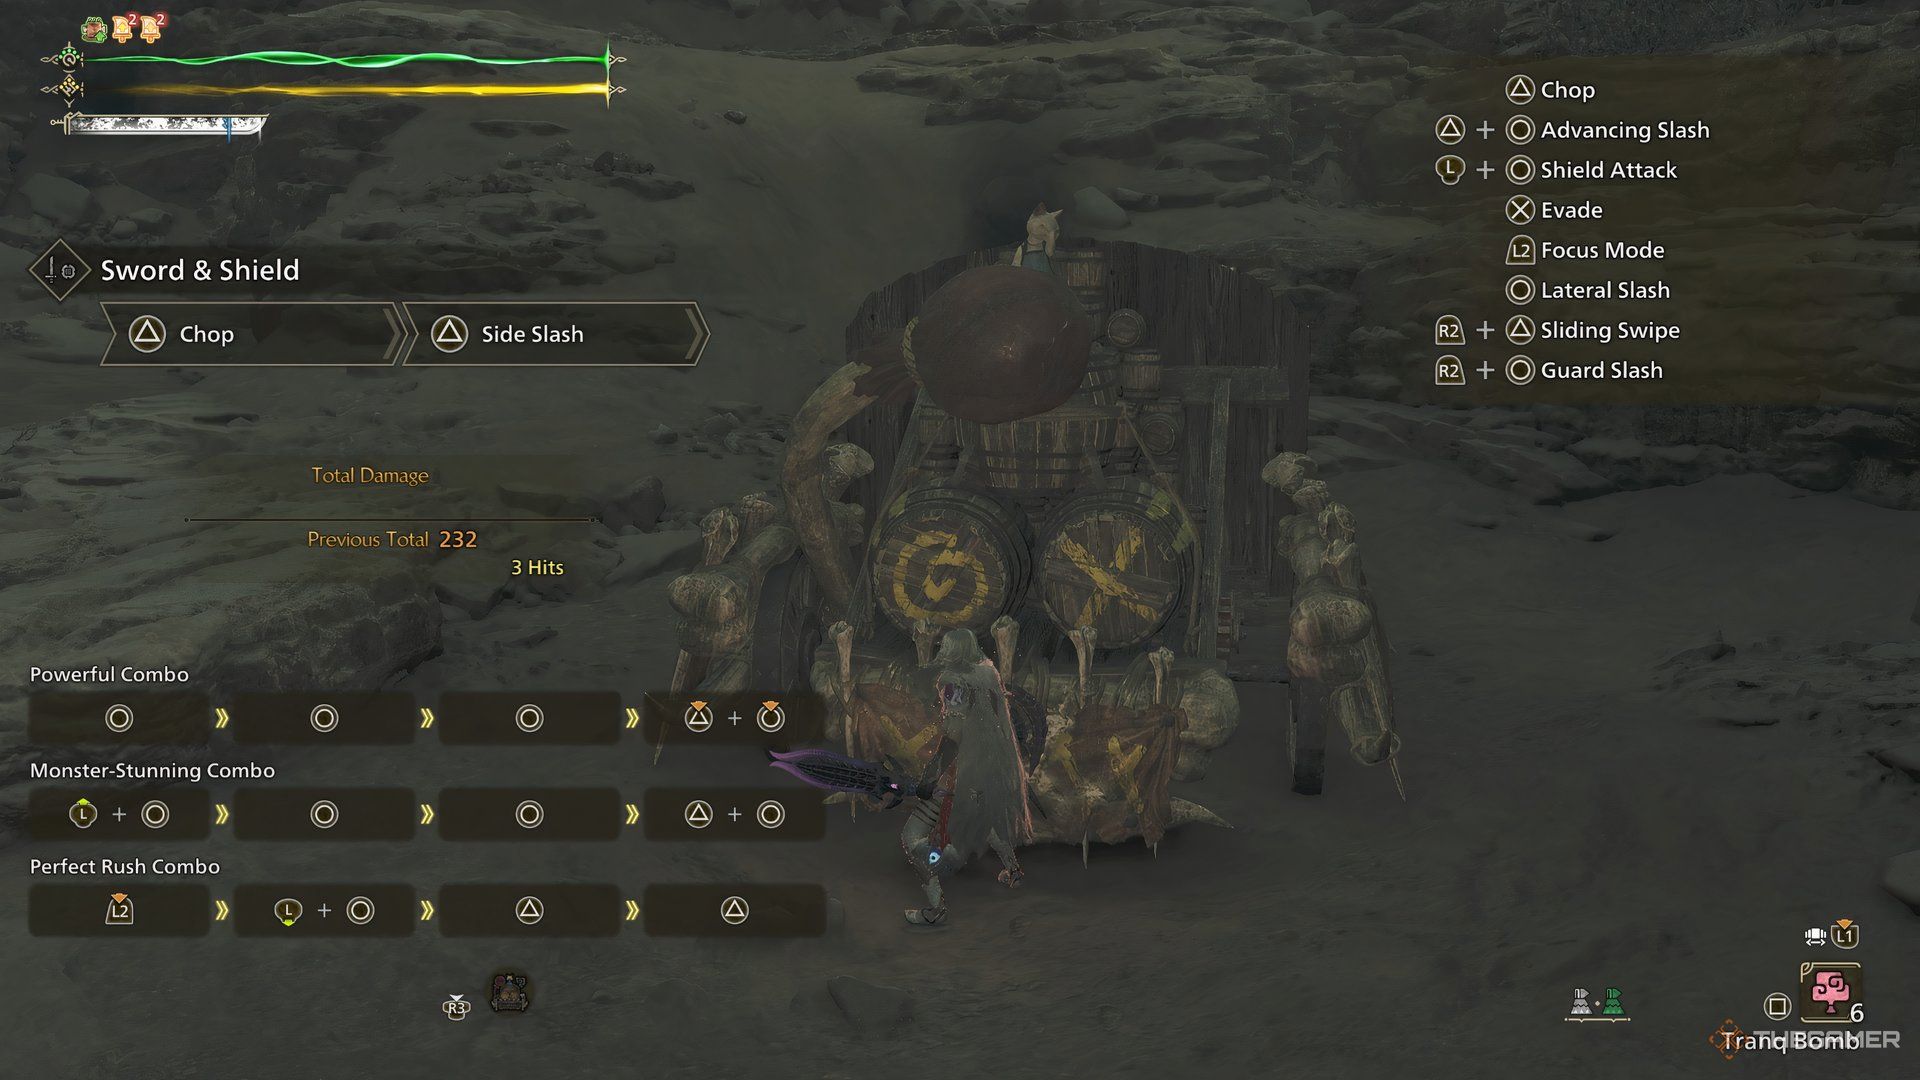
In essence, The Sword & Shield gameplay is straightforward, primarily requiring you to master the art of parrying monster assaults and executing a flawless block. This skill will activate your Offensive Guard, resulting in a significant boost to your offensive capabilities.
Beyond that, familiarize yourself with some fundamental combo moves using your Sword and Shield. This will help you maintain a steady attack on the monster. Notably, one of the key benefits of this weapon is that it carries minimal risk yet offers significant rewards.
One problem with using Sword & Shield is that the sharpness wears down very quickly. In this case, opting for Razor Sharp instead of Critical Boost might be a good choice. Alternatively, periodically sharpening your weapon would be more beneficial overall.
As a gamer, I’ve found a unique balance: the agility of wielding Dual Blades combined with the robust defense of a Greatshield. My moves are fluid yet uncommitted, keeping me safely from harm’s edge. When the odds seem insurmountable, I just block, buying time to spot an opportunity for healing and carrying on.
Read More
- Clash Royale Best Boss Bandit Champion decks
- Mobile Legends: Bang Bang (MLBB) Sora Guide: Best Build, Emblem and Gameplay Tips
- Vampire’s Fall 2 redeem codes and how to use them (June 2025)
- Best Hero Card Decks in Clash Royale
- Clash Royale Furnace Evolution best decks guide
- Best Arena 9 Decks in Clast Royale
- Dawn Watch: Survival gift codes and how to use them (October 2025)
- Clash Royale Witch Evolution best decks guide
- Wuthering Waves Mornye Build Guide
- ATHENA: Blood Twins Hero Tier List
2025-03-12 16:06