At the start of the game “Avowed“, players can embark on the intriguing side quest called “Dawntreader“. The outcome of this quest can vary greatly based on a critical decision. Throughout the mission, you’ll come across an enigmatic figure called the “Oracle“. Your actions will significantly impact the quest by either supporting or hindering the Oracle’s experiments. Making the right call might be challenging, as players must consider long-term narrative impacts versus immediate gaming advantages. This guide aims to assist you in making the optimal choice for interacting with the Oracle during Avowed’s “Dawntreader” side mission.
How to Start Dawntreader in Avowed
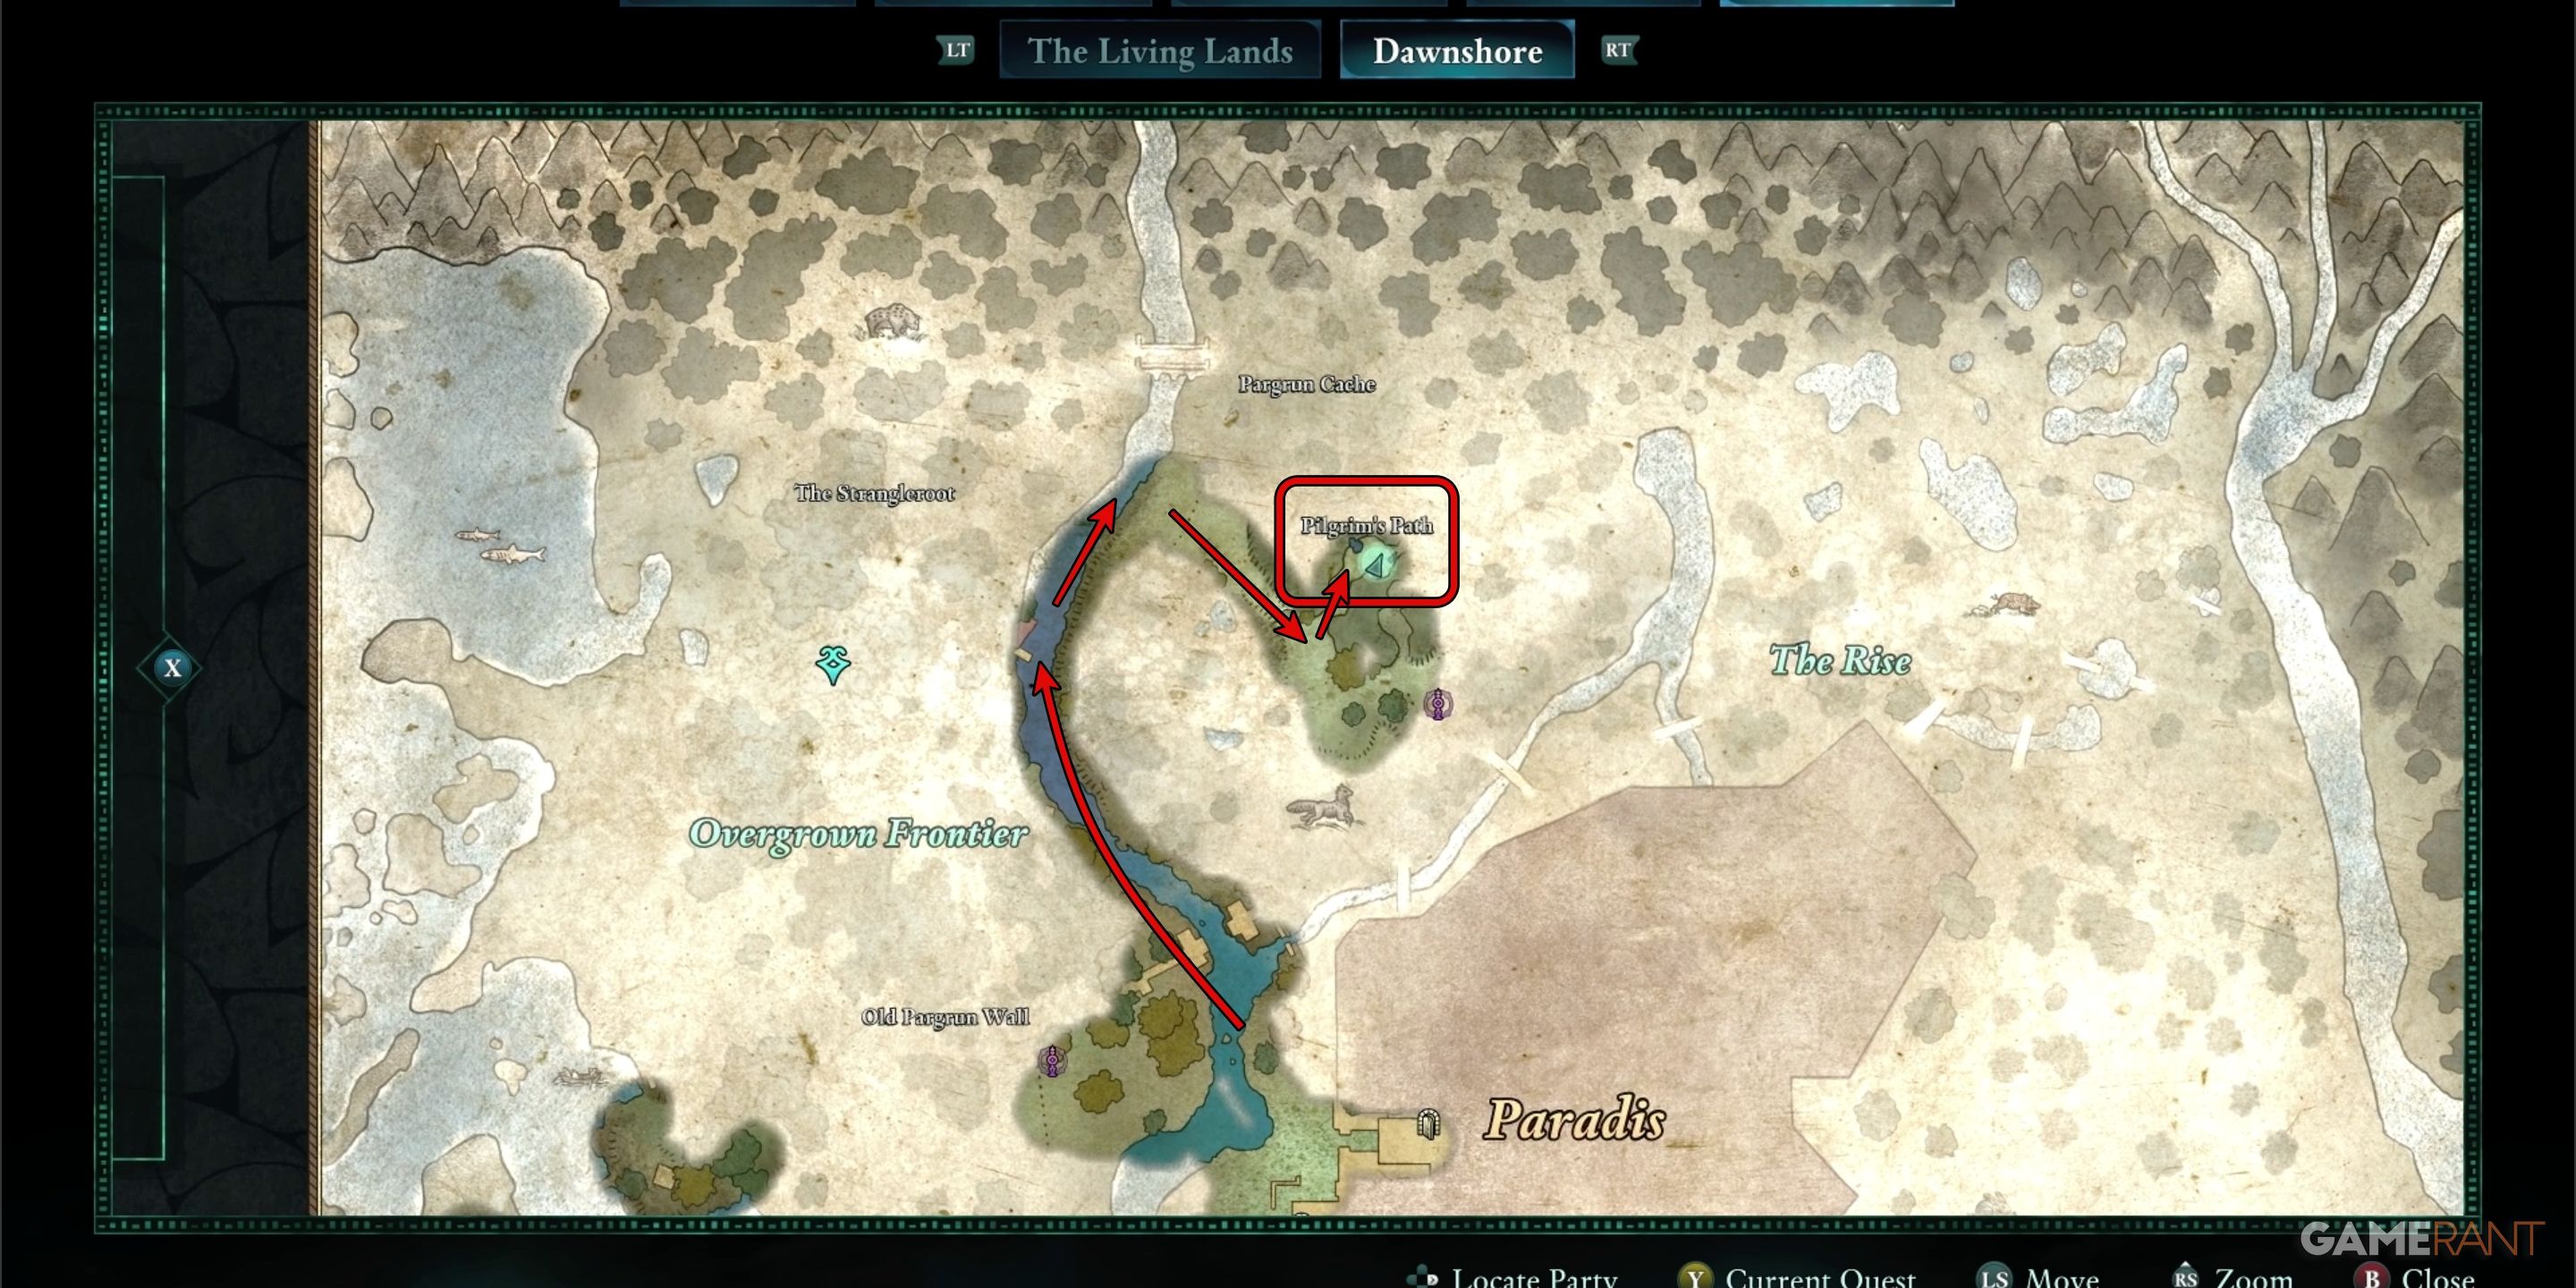
At the start, the “Dawntreader” quest from Avowed is quite simple to follow. You’ll embark on this journey in the northern part of Dawnshore, which is close to the Pilgrim’s Path. This remote location lies to the north of the northwestern tip of Paradis. Alternatively, you can head north along the western bank of the river from Paradis, then veer inland at approximately the same height as the ‘Strangleroot’ mark on the map.
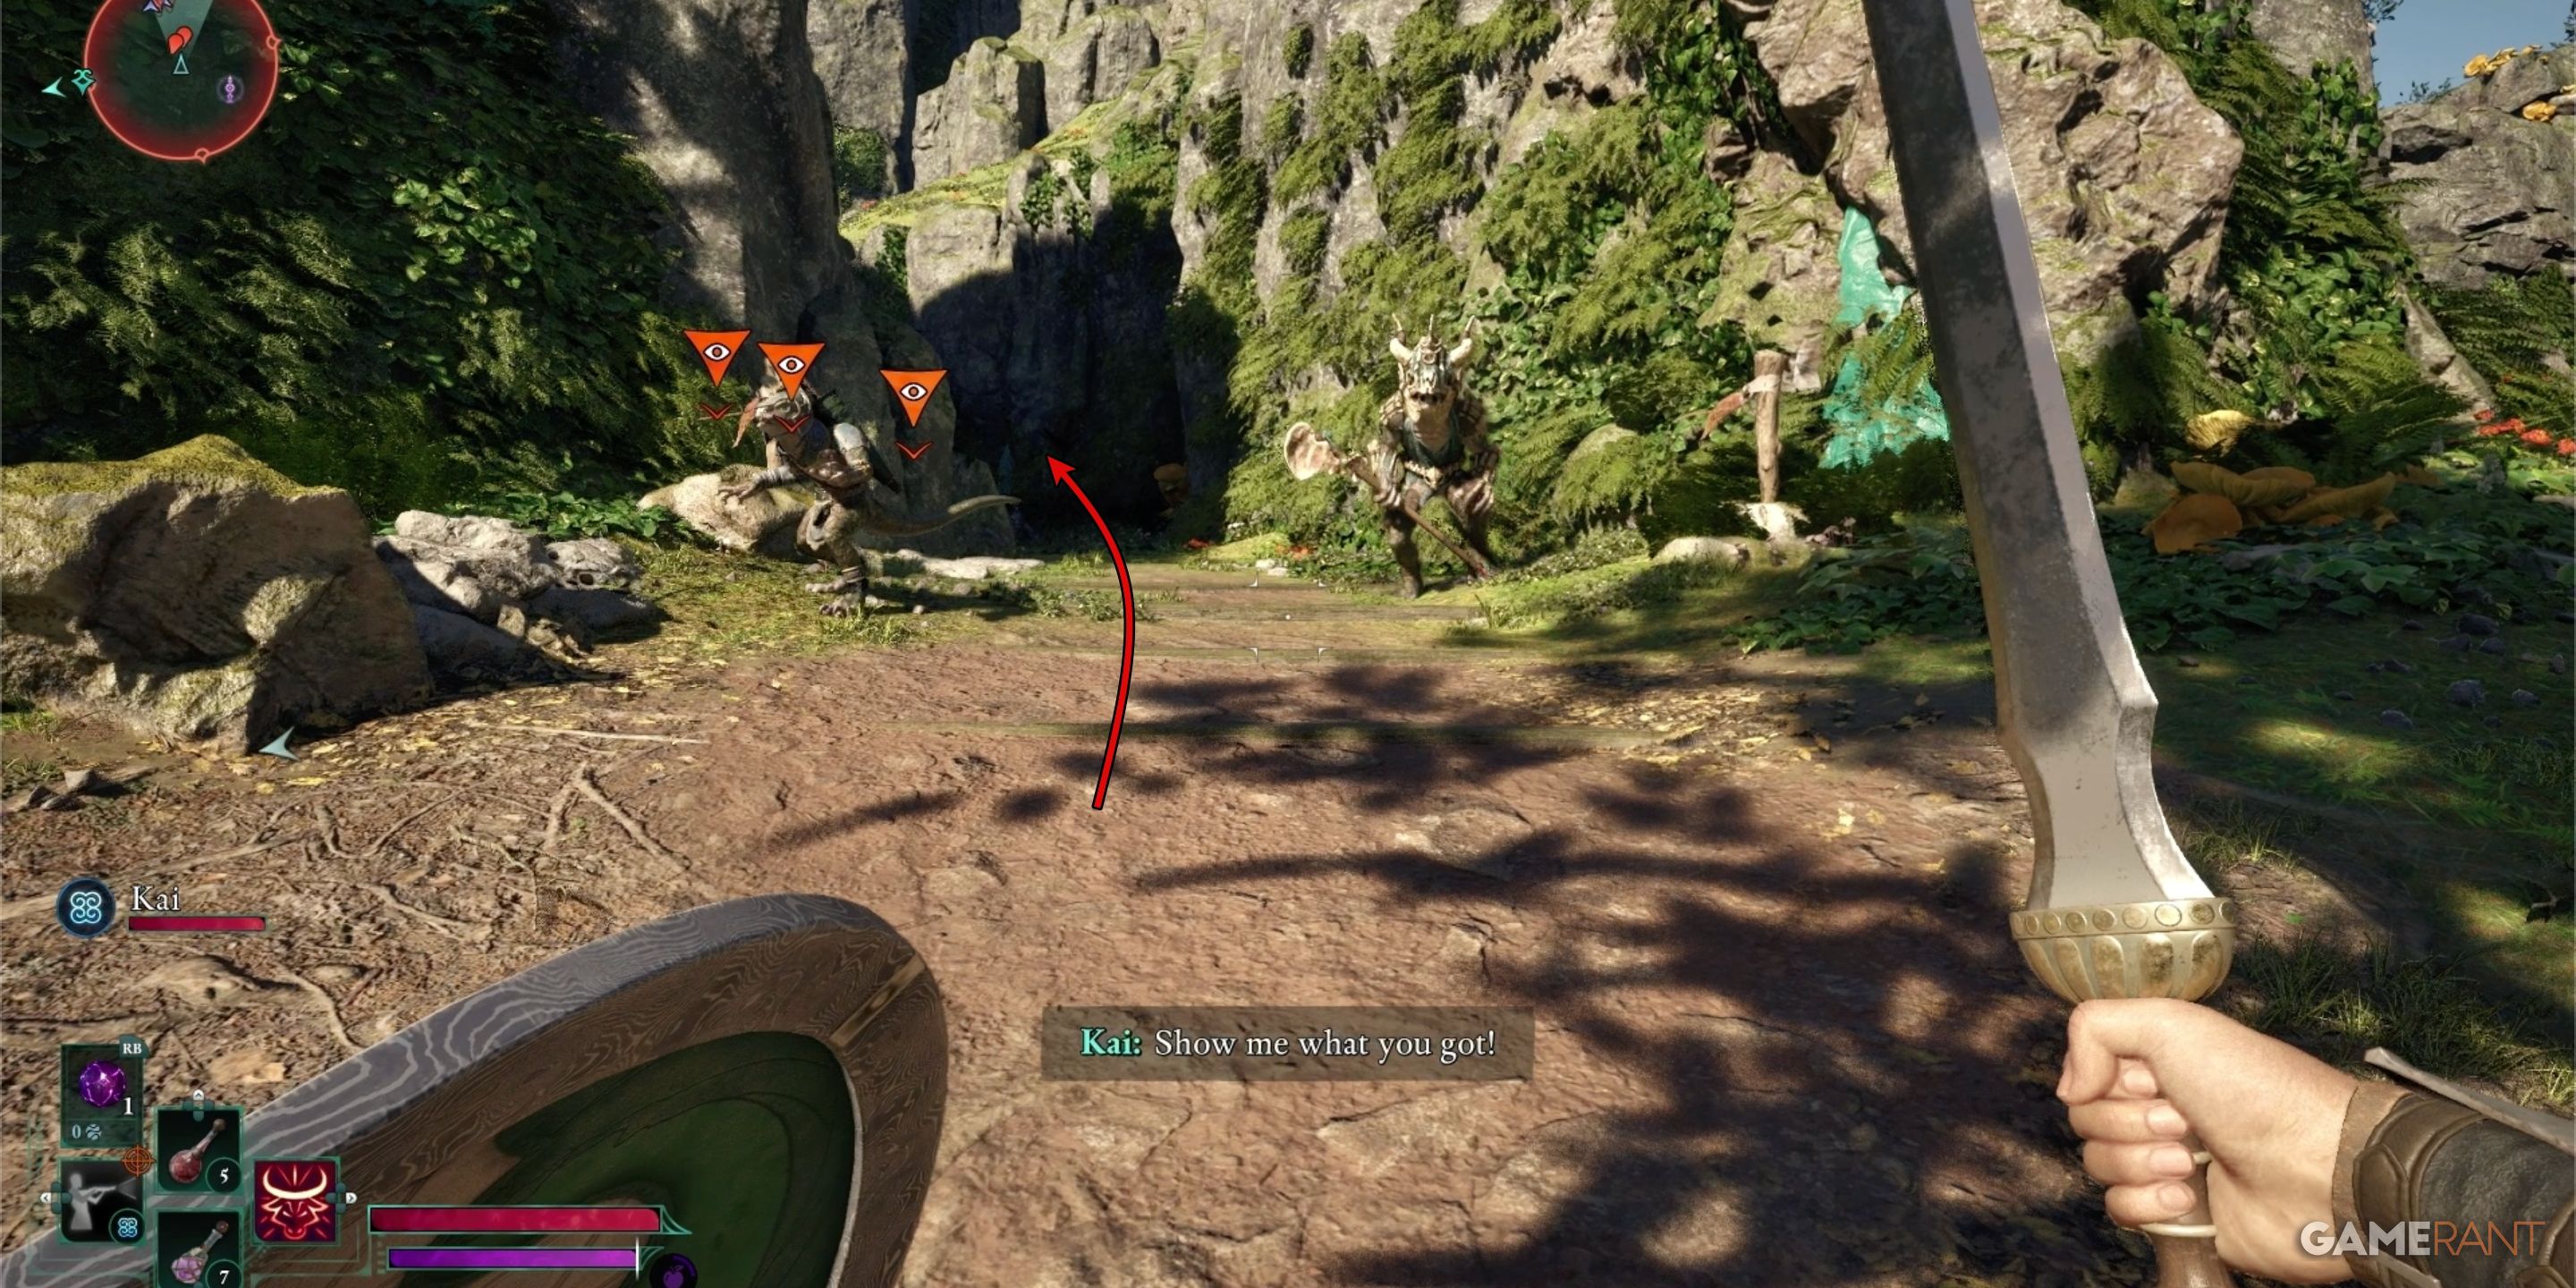
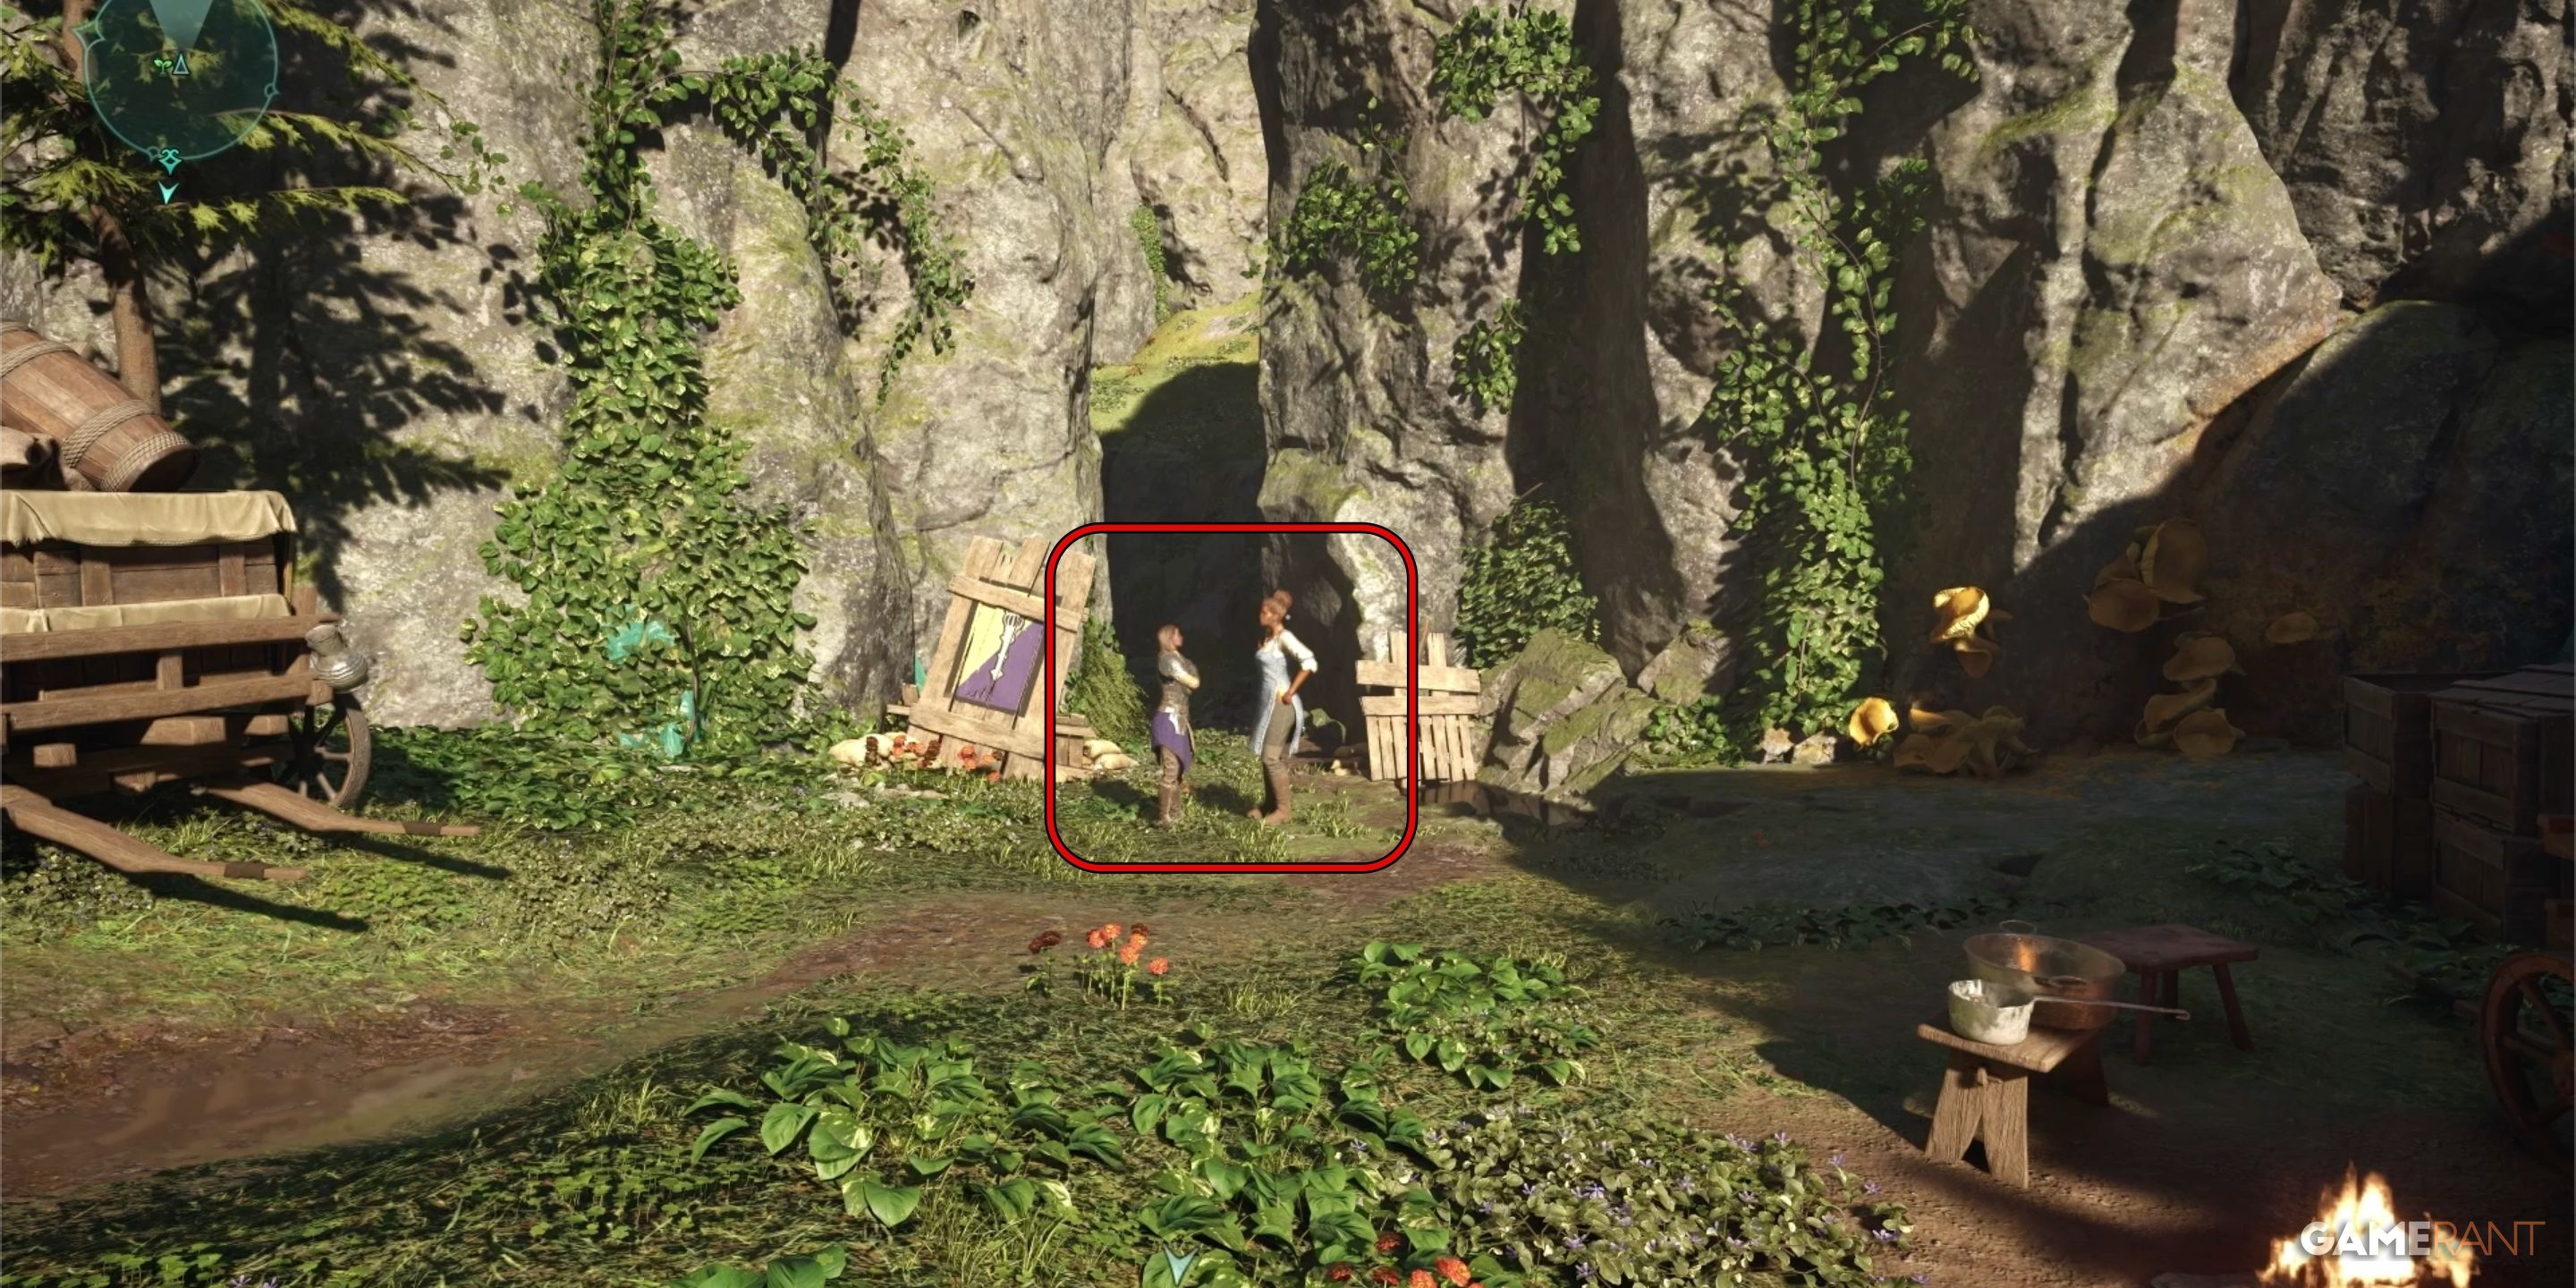
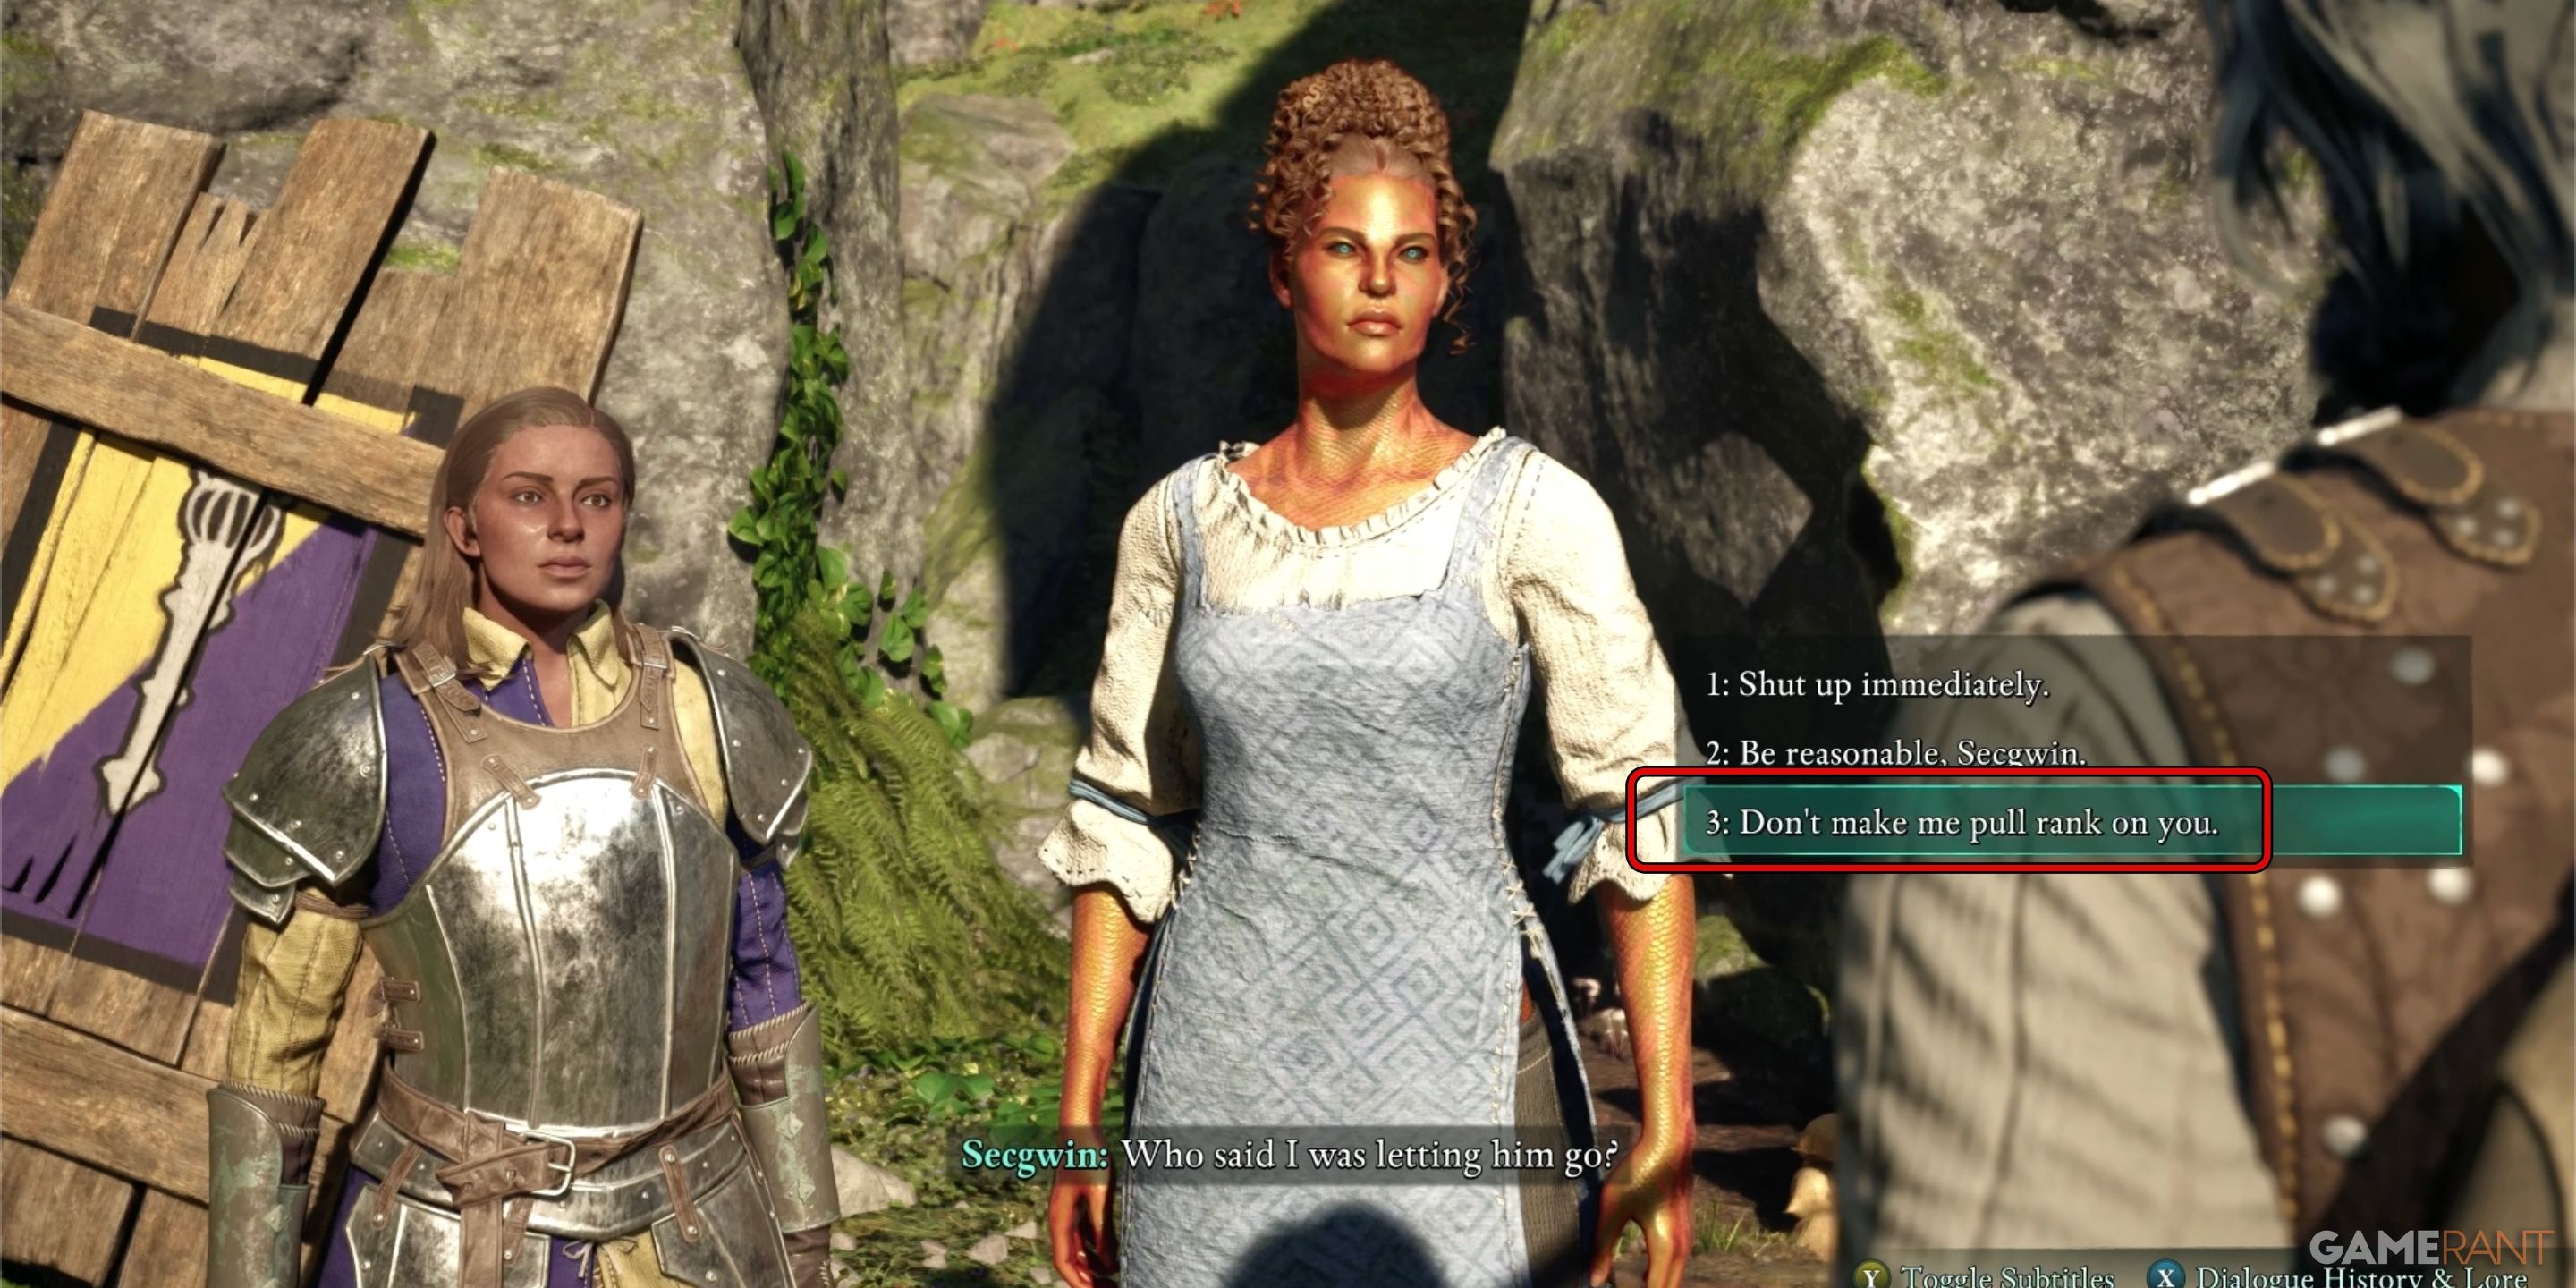
Ascend the hill until you’re close to the Pilgrim’s Path, where a group of Xaurips have barricaded a narrow stone passage. Overcome these adversaries, then proceed through the tunnel. Soon after, you’ll run into two non-player characters (NPCs) – Kauia and Seegwin – who are standing guard at the entrance. Engage them in conversation, and when the chance arises, choose the following dialog options:
- “I’d like to see this temple for myself.”
- “Don’t make me pull rank on you.”
Once you’ve made this selection, they’ll grant you access to the Eothasian Temple, kicking off the quest known as “Dawntreader”. Your mission during this quest will be to find the Aedyran Exploration Team.
How to Find the Oracle in Dawntreader – Avowed
Essence Generator Puzzle Solution:
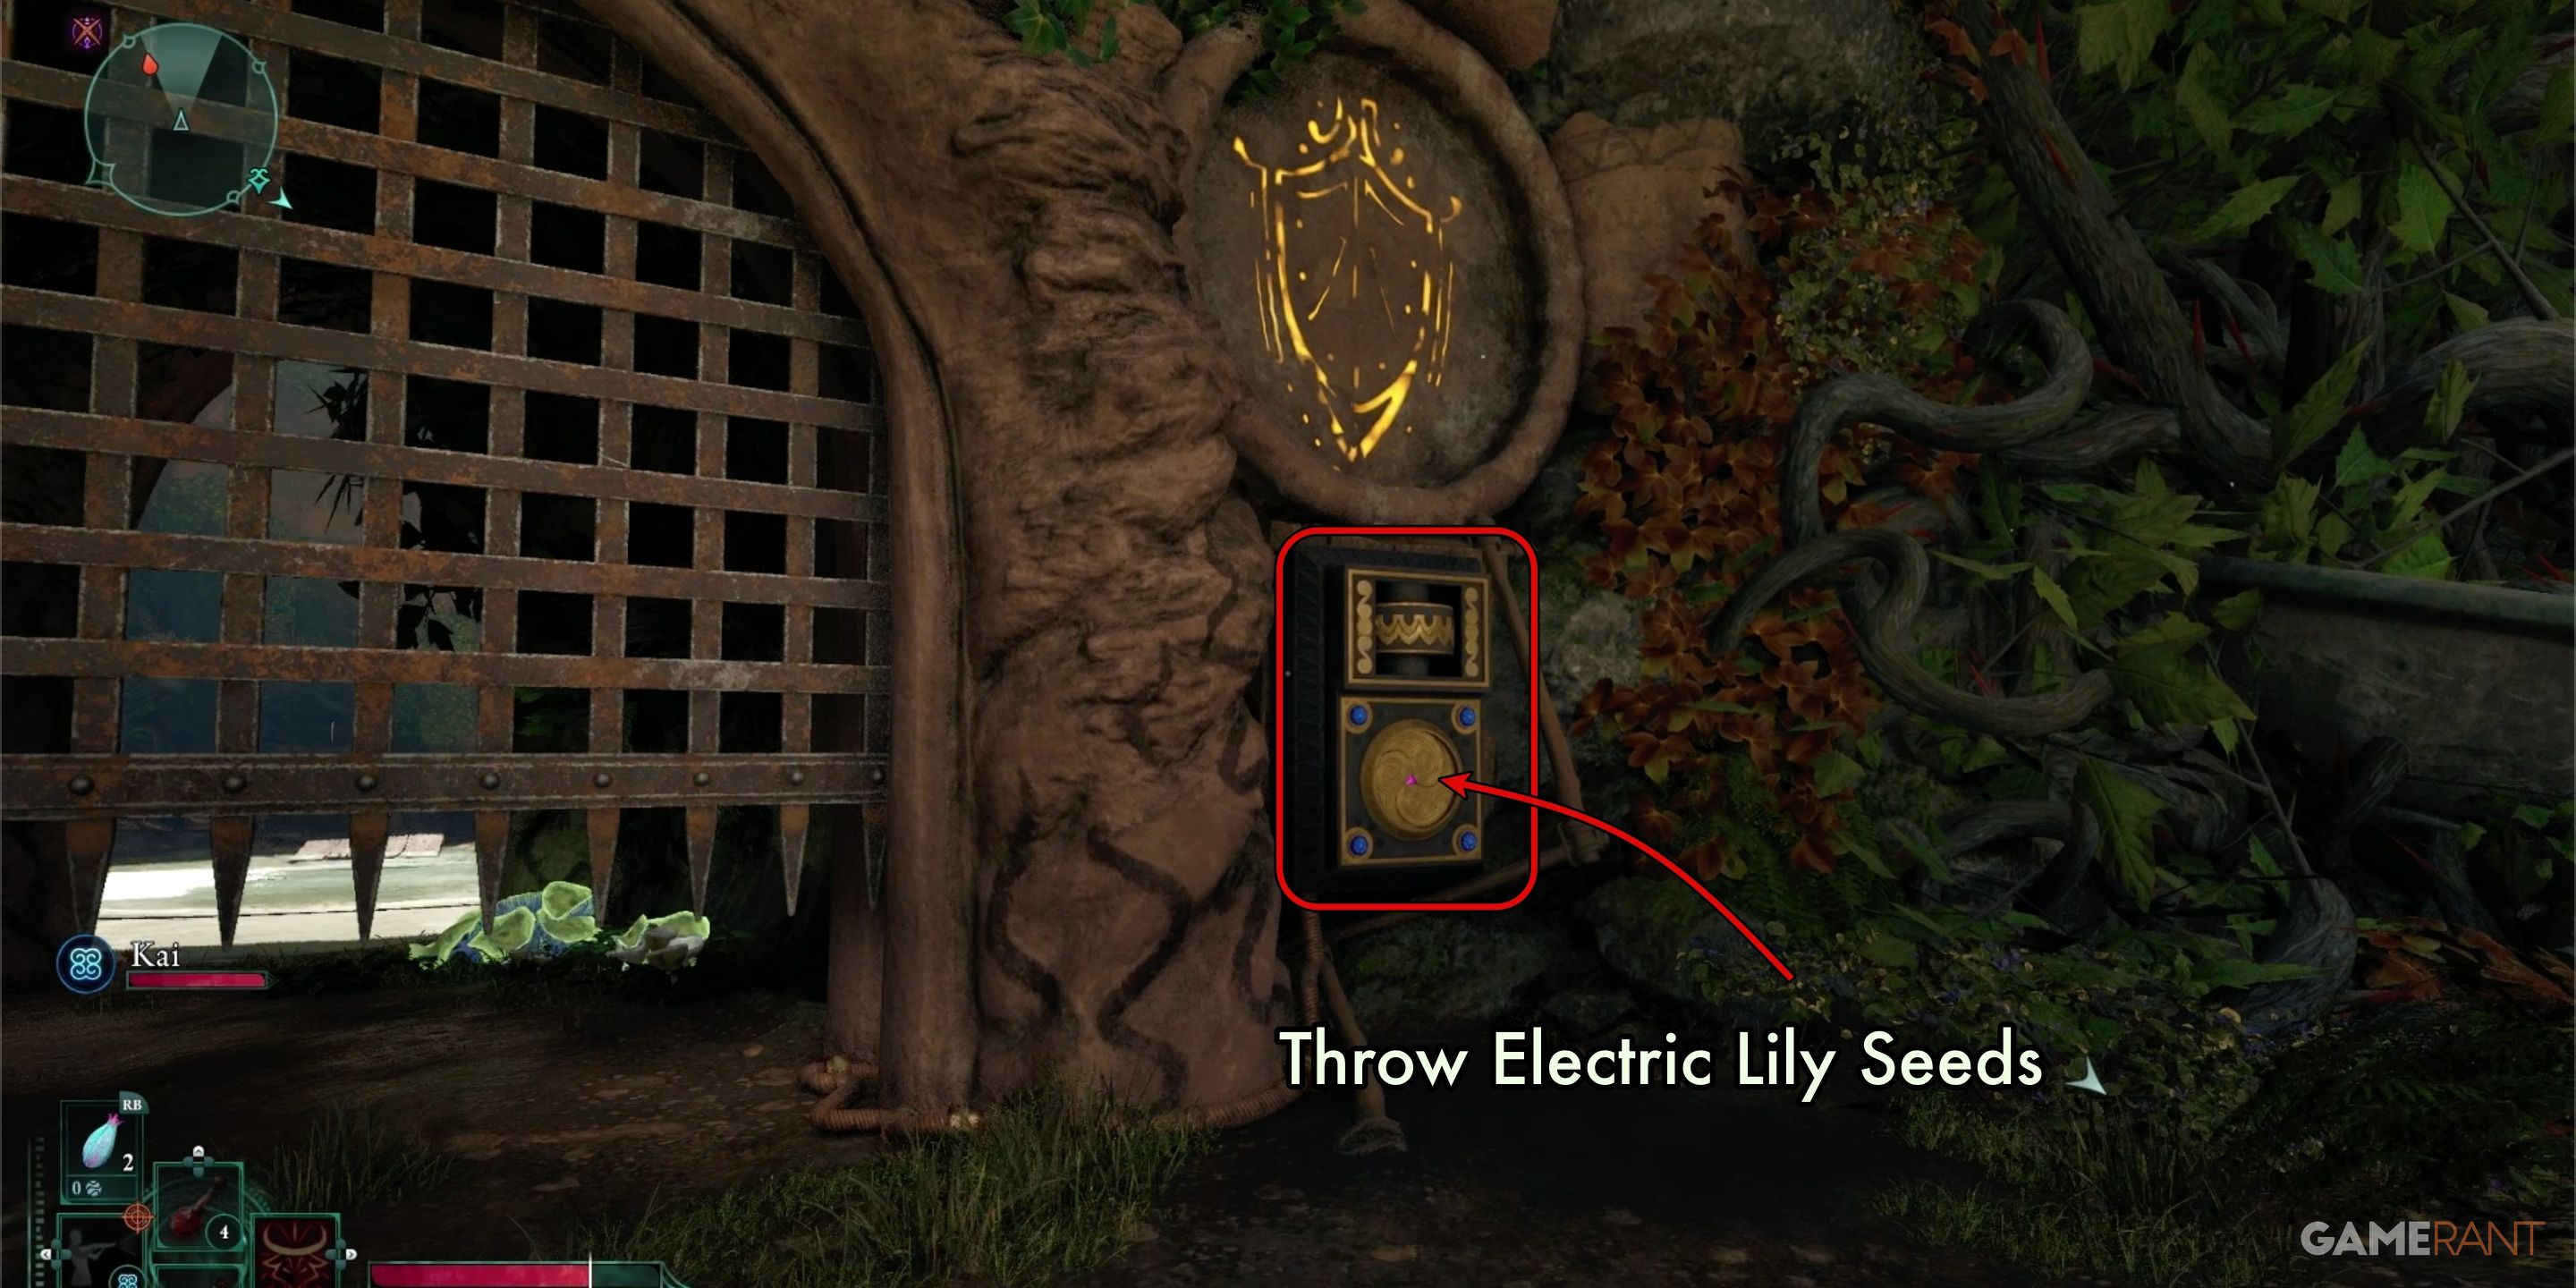
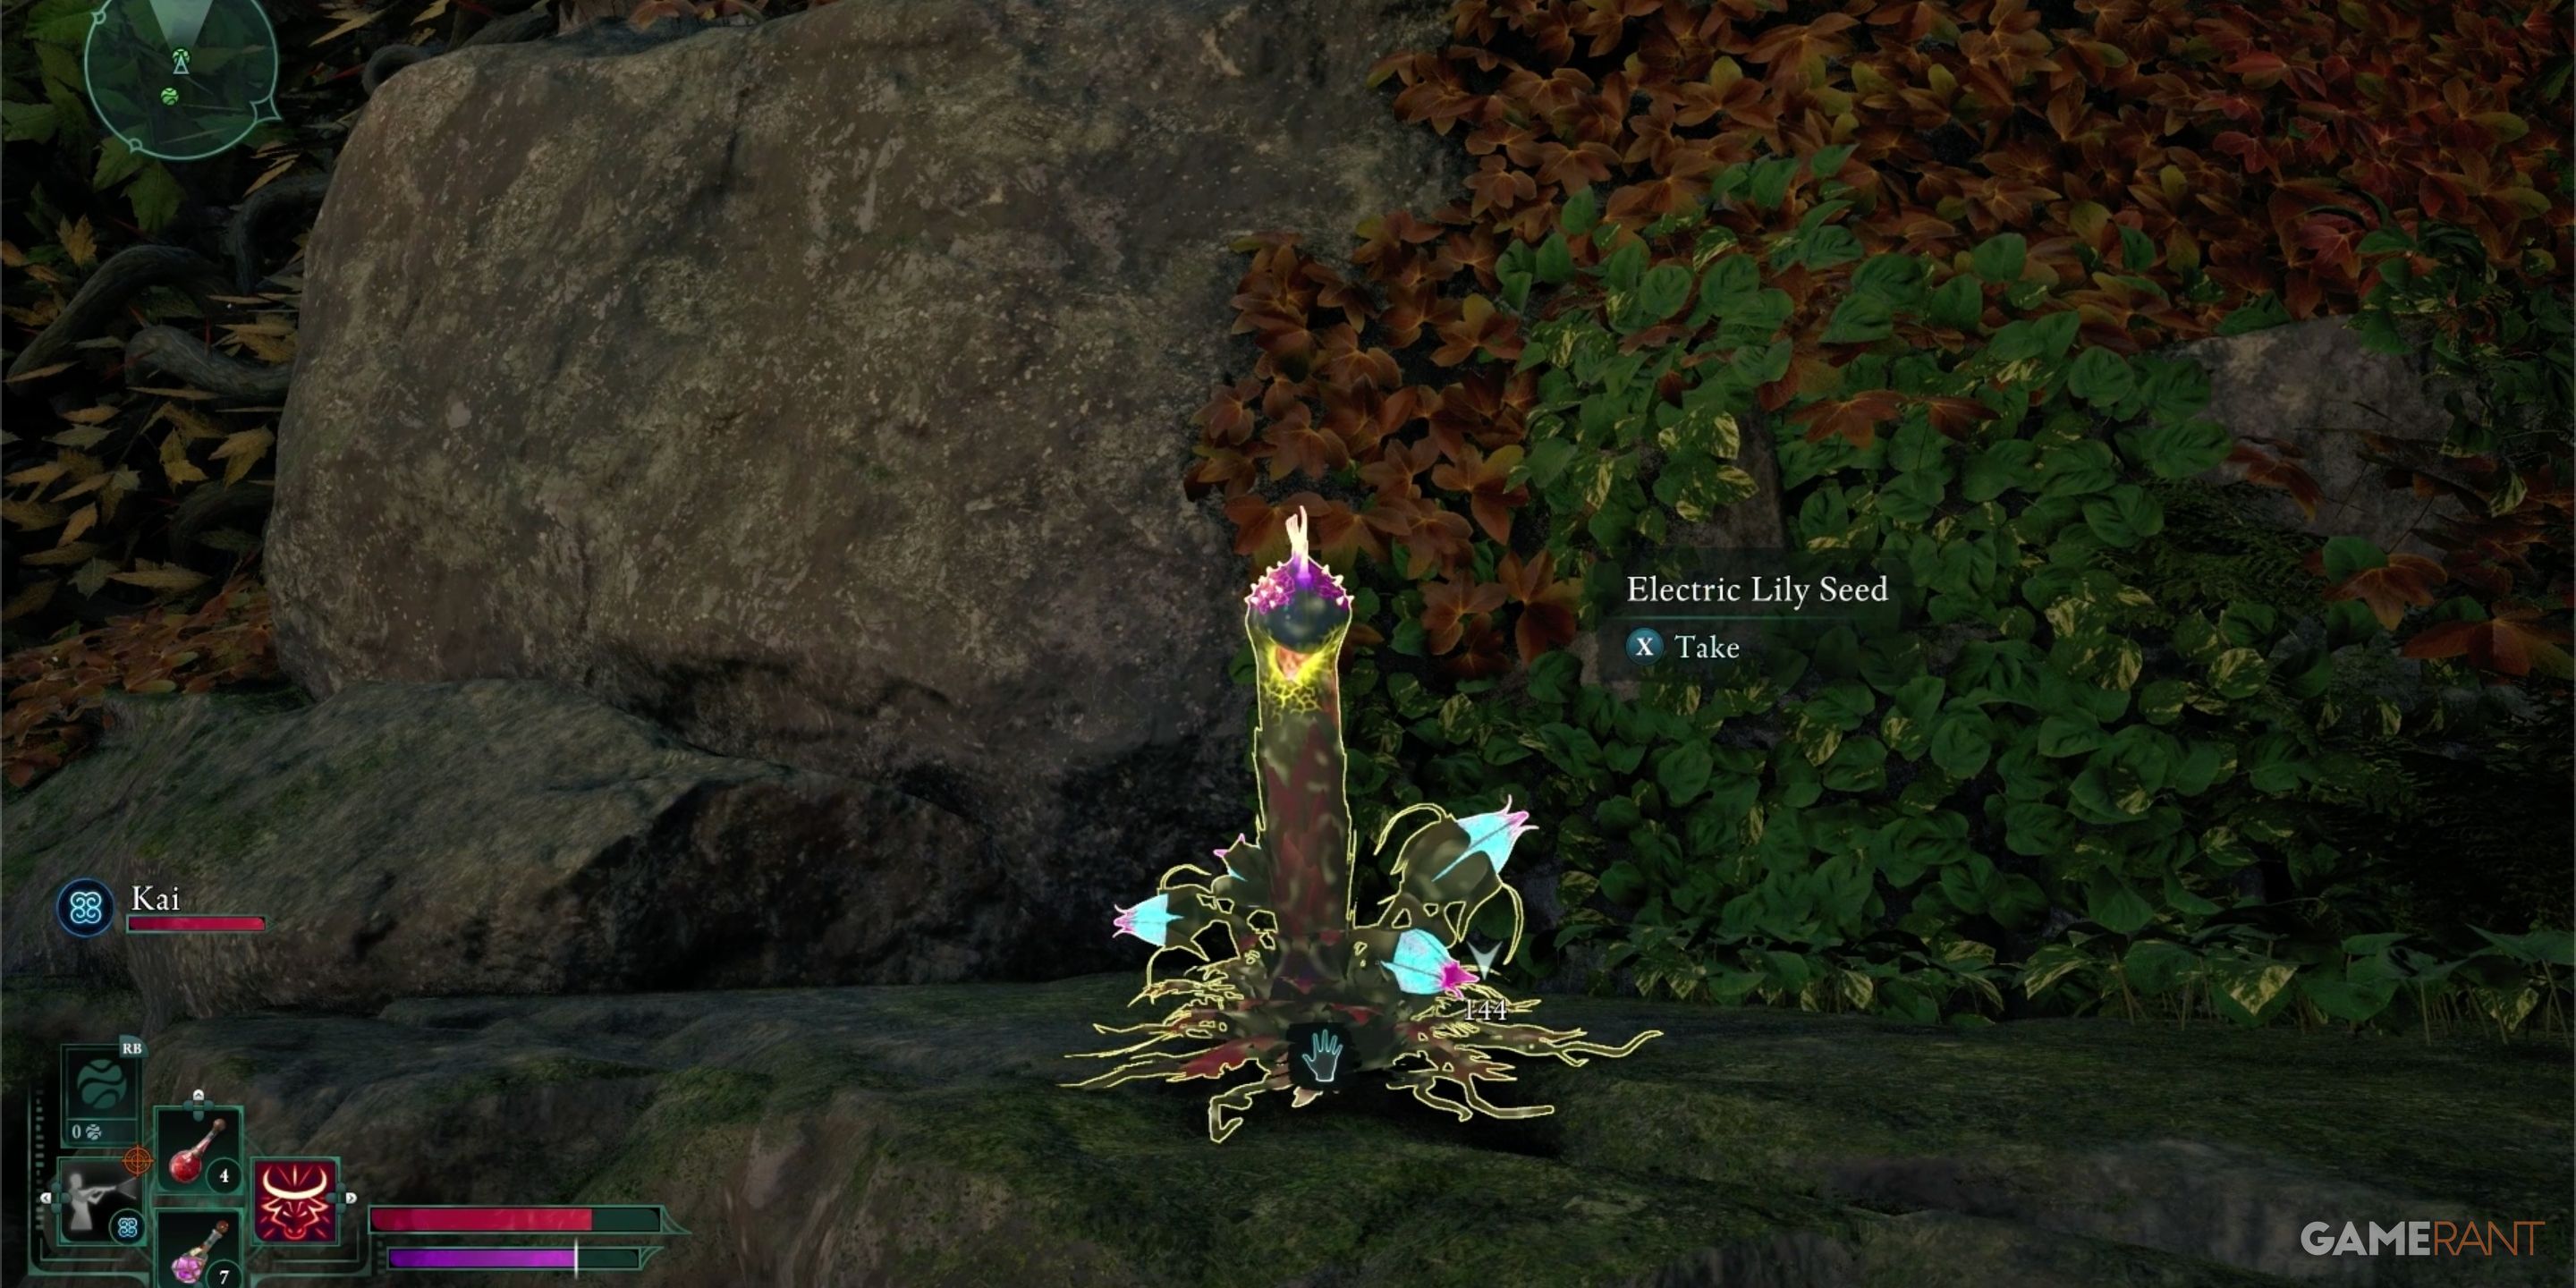
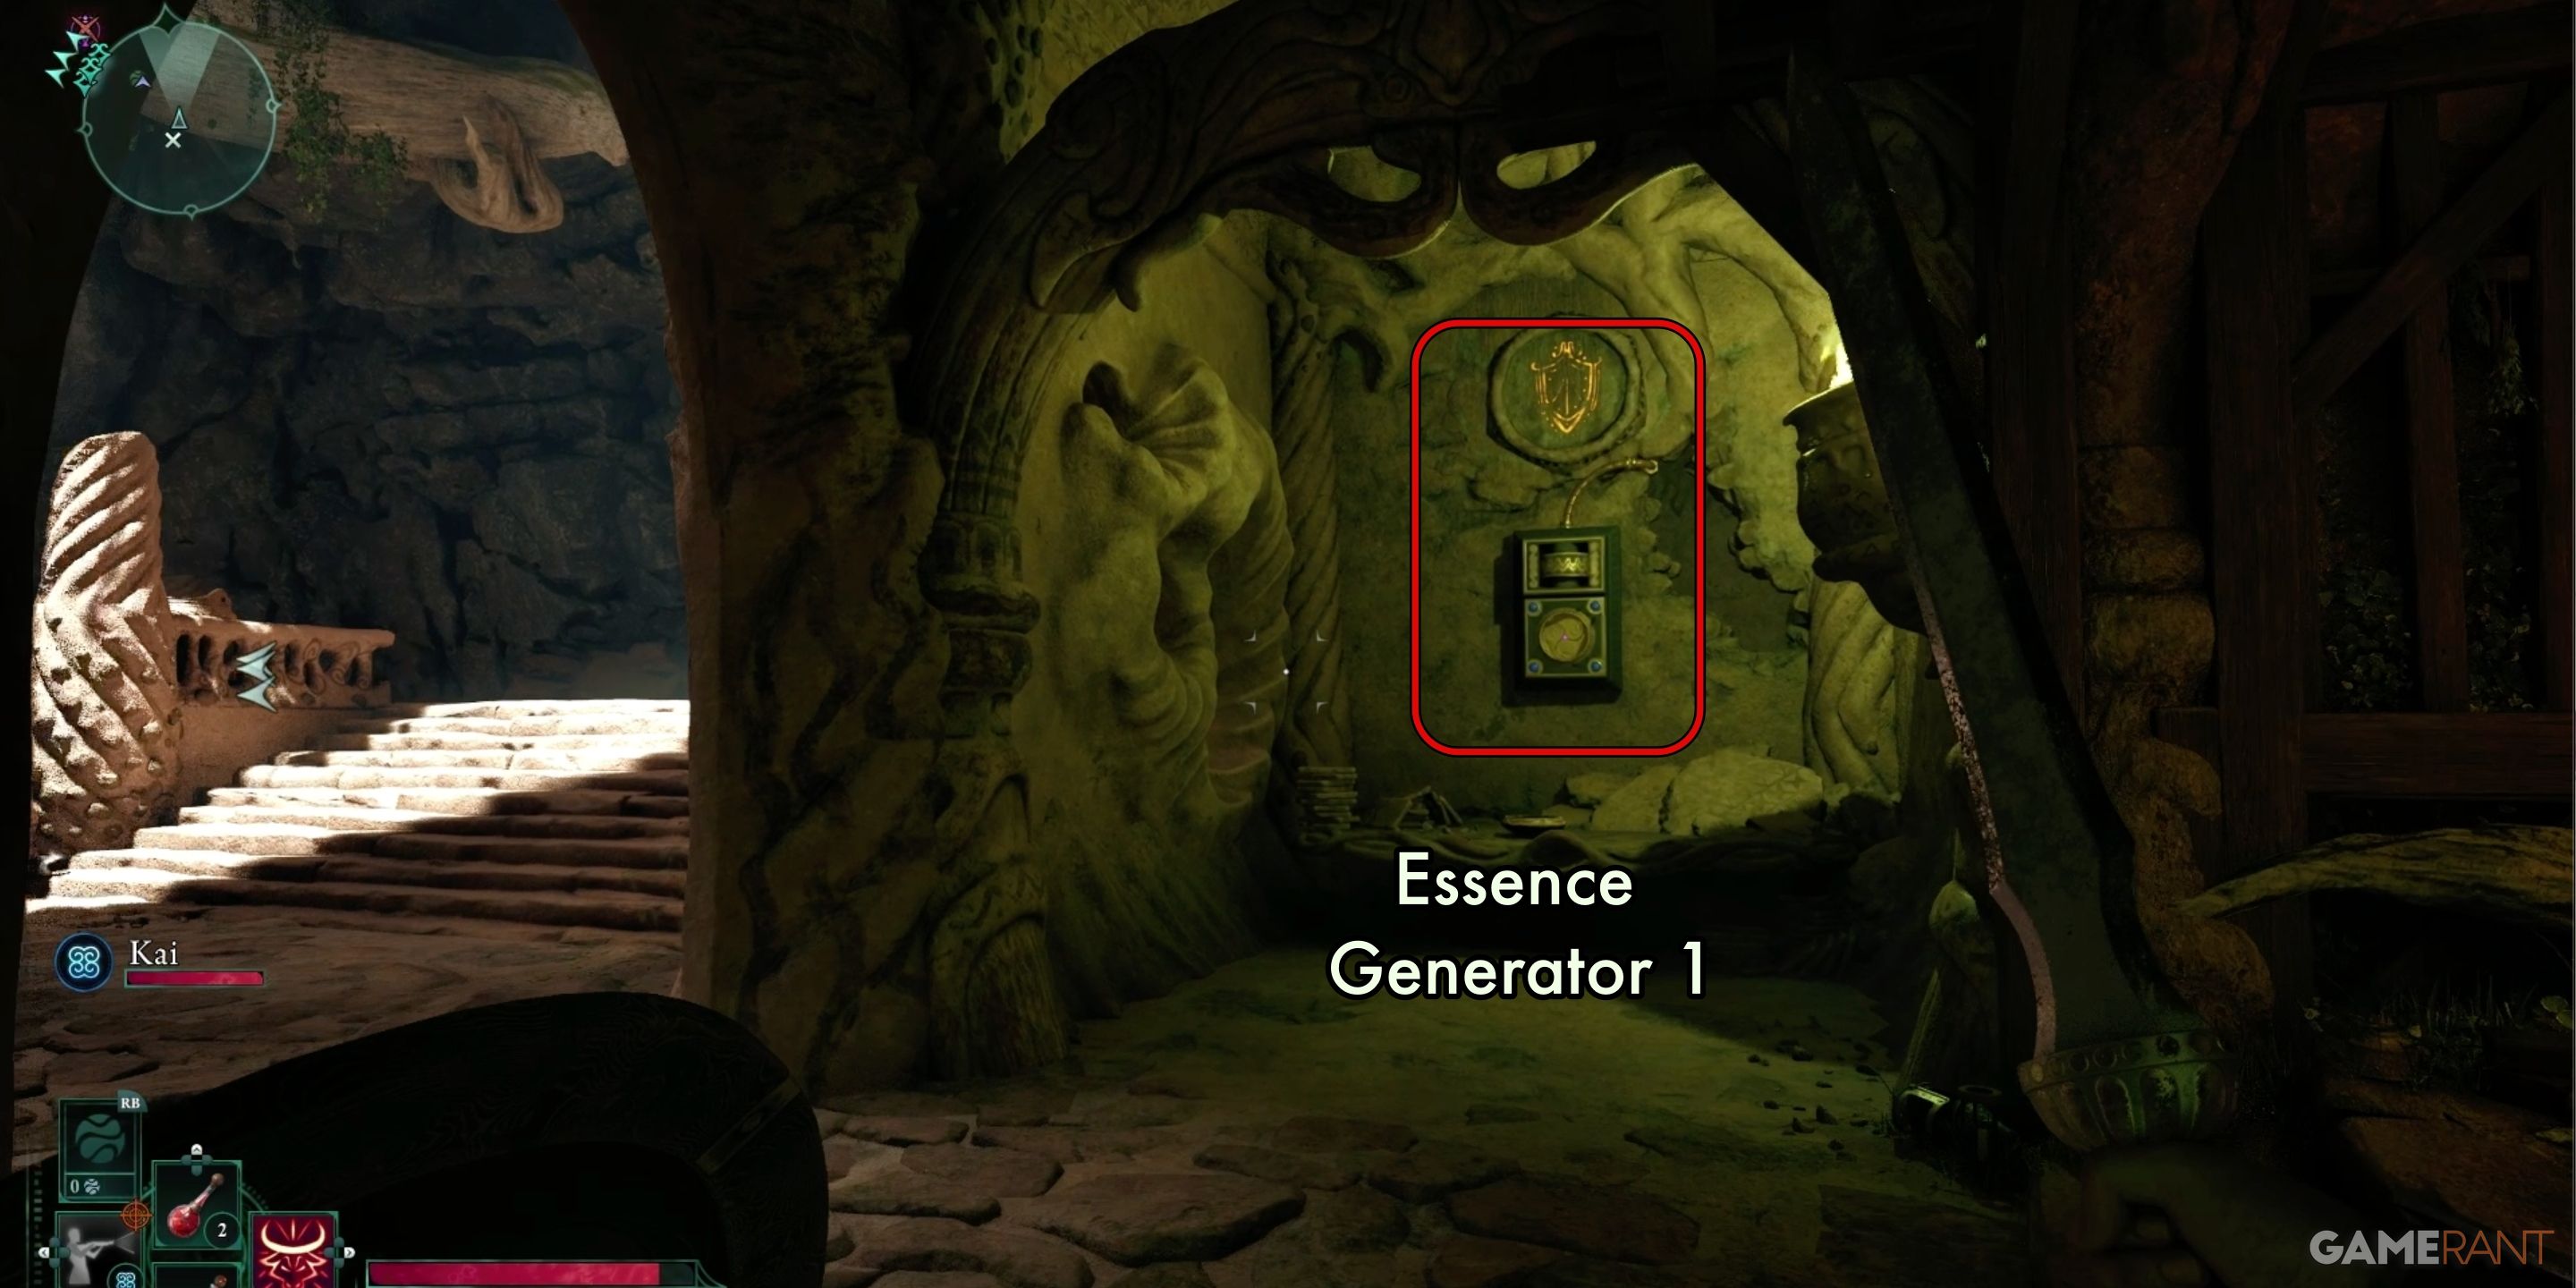
Previously mentioned, the beginning of “Dawntreader” is generally uncomplicated. Upon entering, you’ll encounter the Essence Generator puzzle right away. If you’ve thoroughly explored Dawnshore beforehand, then chances are you’re familiar with solving the conduit-like puzzles represented by the boxes. Regardless, the resolution is straightforward: collect the Electric Lily Seeds scattered throughout the temple and use them to activate the boxes by tossing them in that direction.
If you possess an item capable of building up electrical charge, also known as Shock Accumulation, you can employ it to activate your Essence Generators.
As a gamer, I stumbled upon two Electric Lily Seed plants in the initial room, perfect for powering up the Essence Generator on the wall. Keep an eye out for those distinctive orange shield symbols hidden in odd spots or above doors – they’re your clue that Essence Generators are nearby, indicating secret rooms and sweet loot! First, unlock the secret chamber within the temple, then carry on along the main pathway.
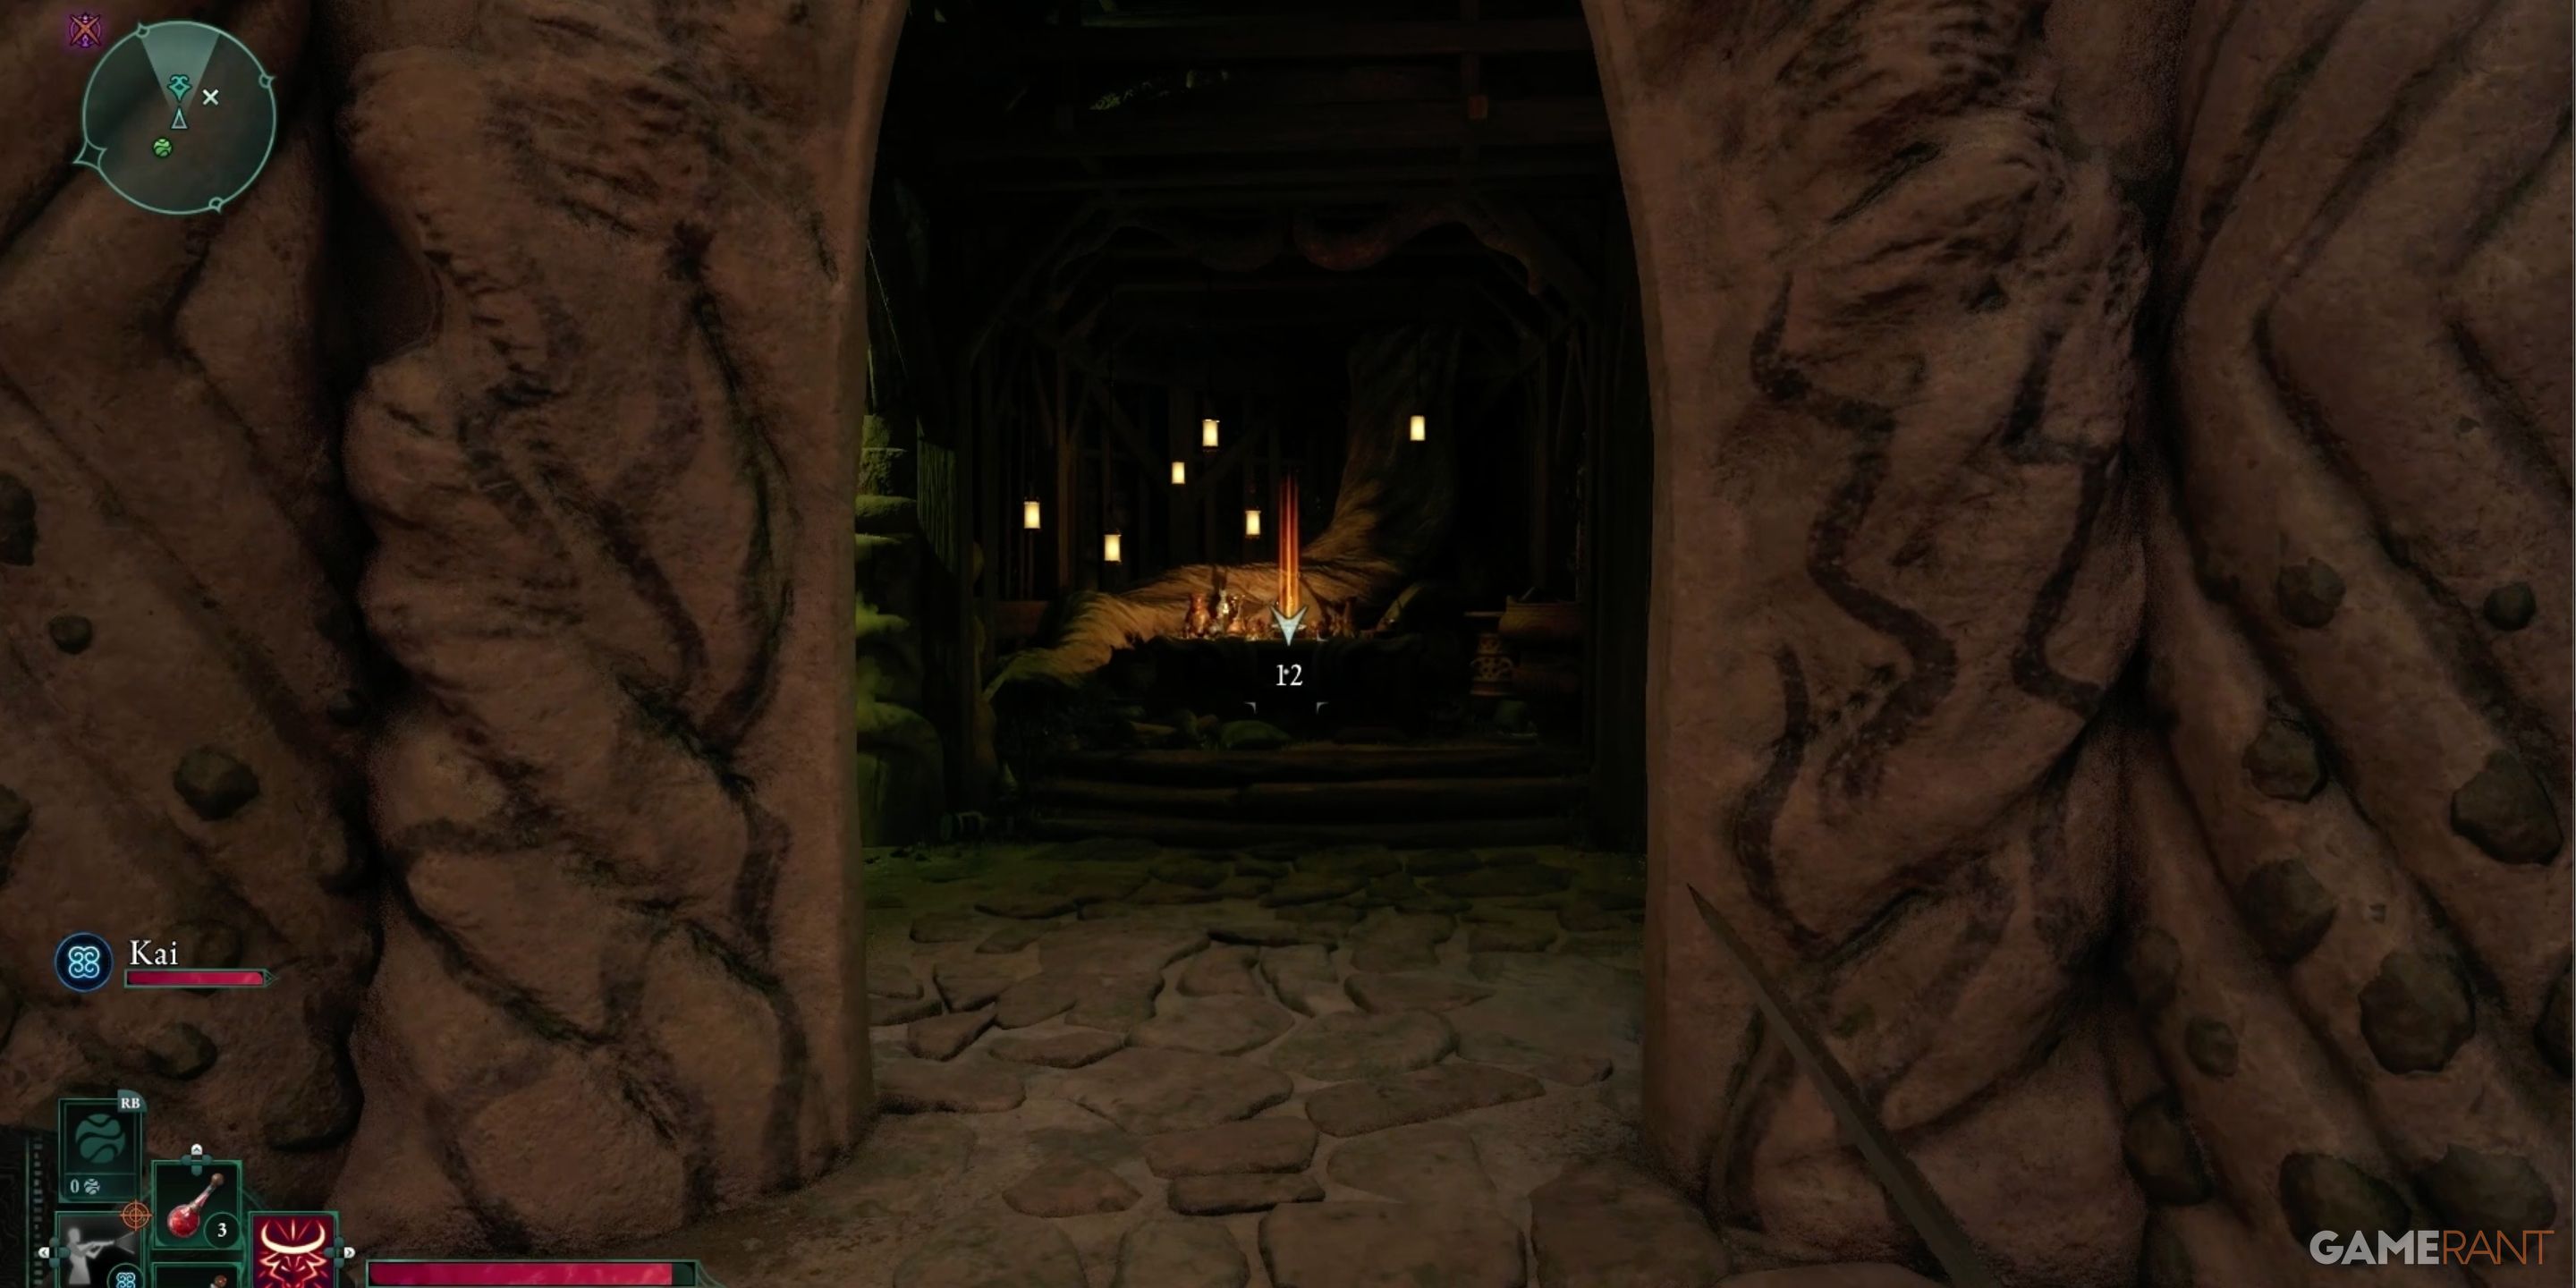
Over the coming chambers, you’ll find yourself mainly navigating through platform jumps, interspersed with a couple of small groups of Xaurips. Scattered along your route are some small loot containers, so keep an ear out for the sound clue that signals their presence.
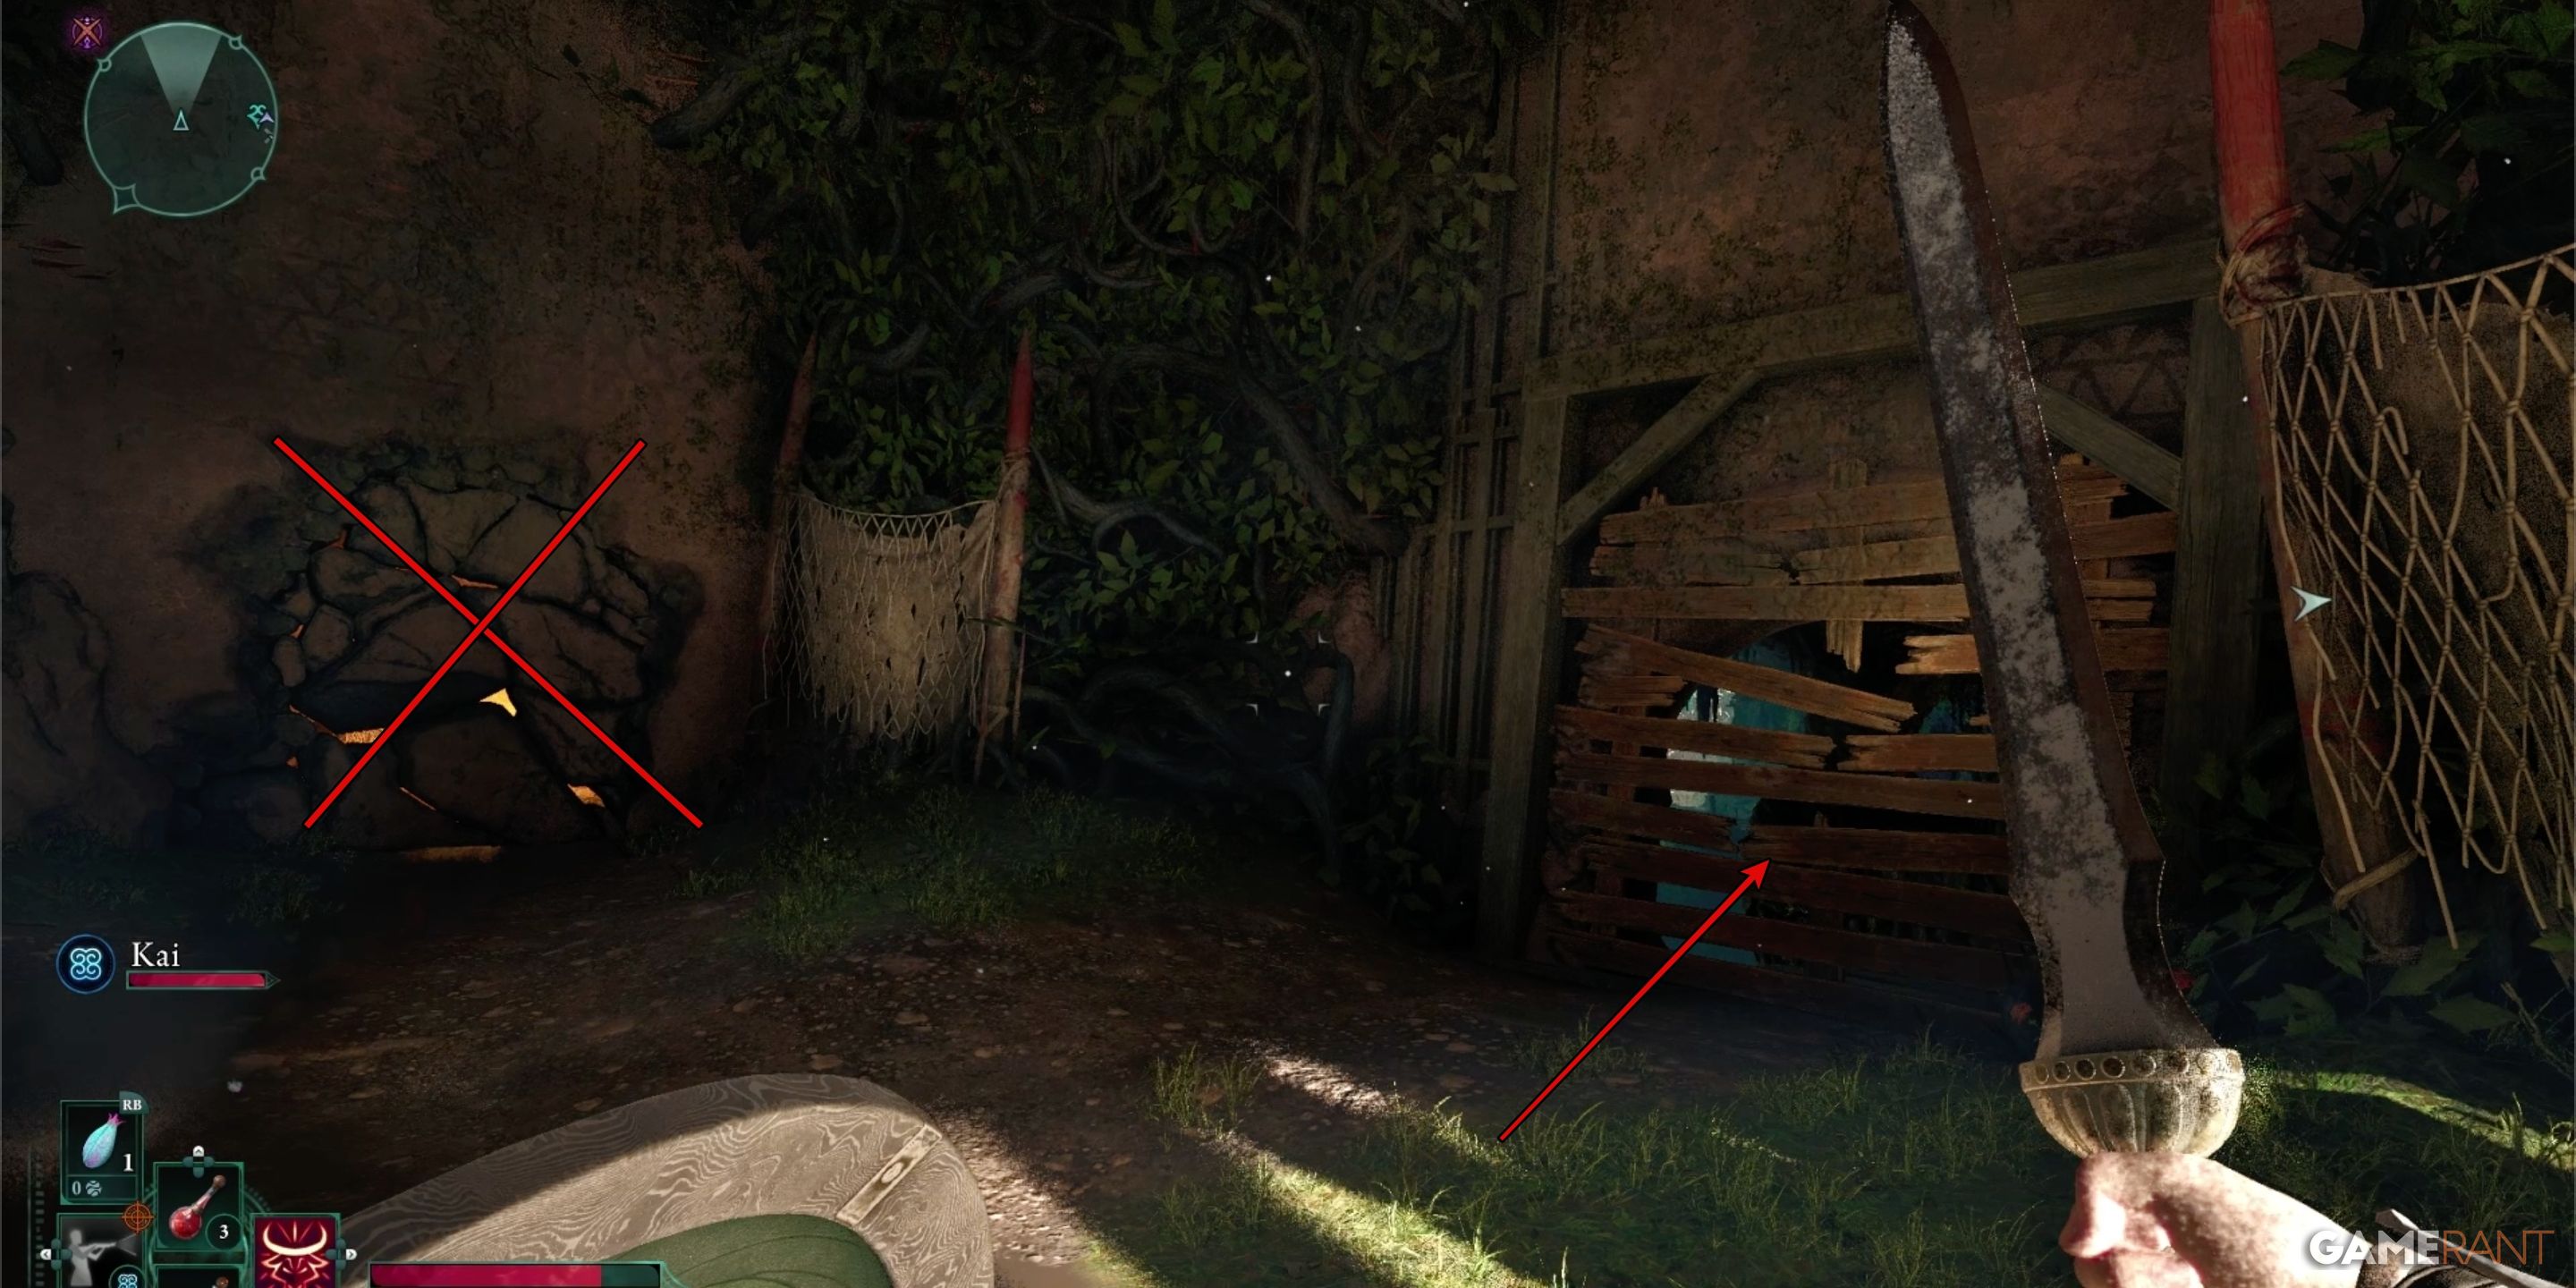
If you come across a room where one wall and a nearby pallet are breakable, but you can’t destroy the wall, don’t fret. Instead, smash the pallet and proceed along the path. There’s nothing valuable hidden behind that wall (although if you’re curious, take a left turn after the pallet, and you’ll discover an alternative entrance to the room).
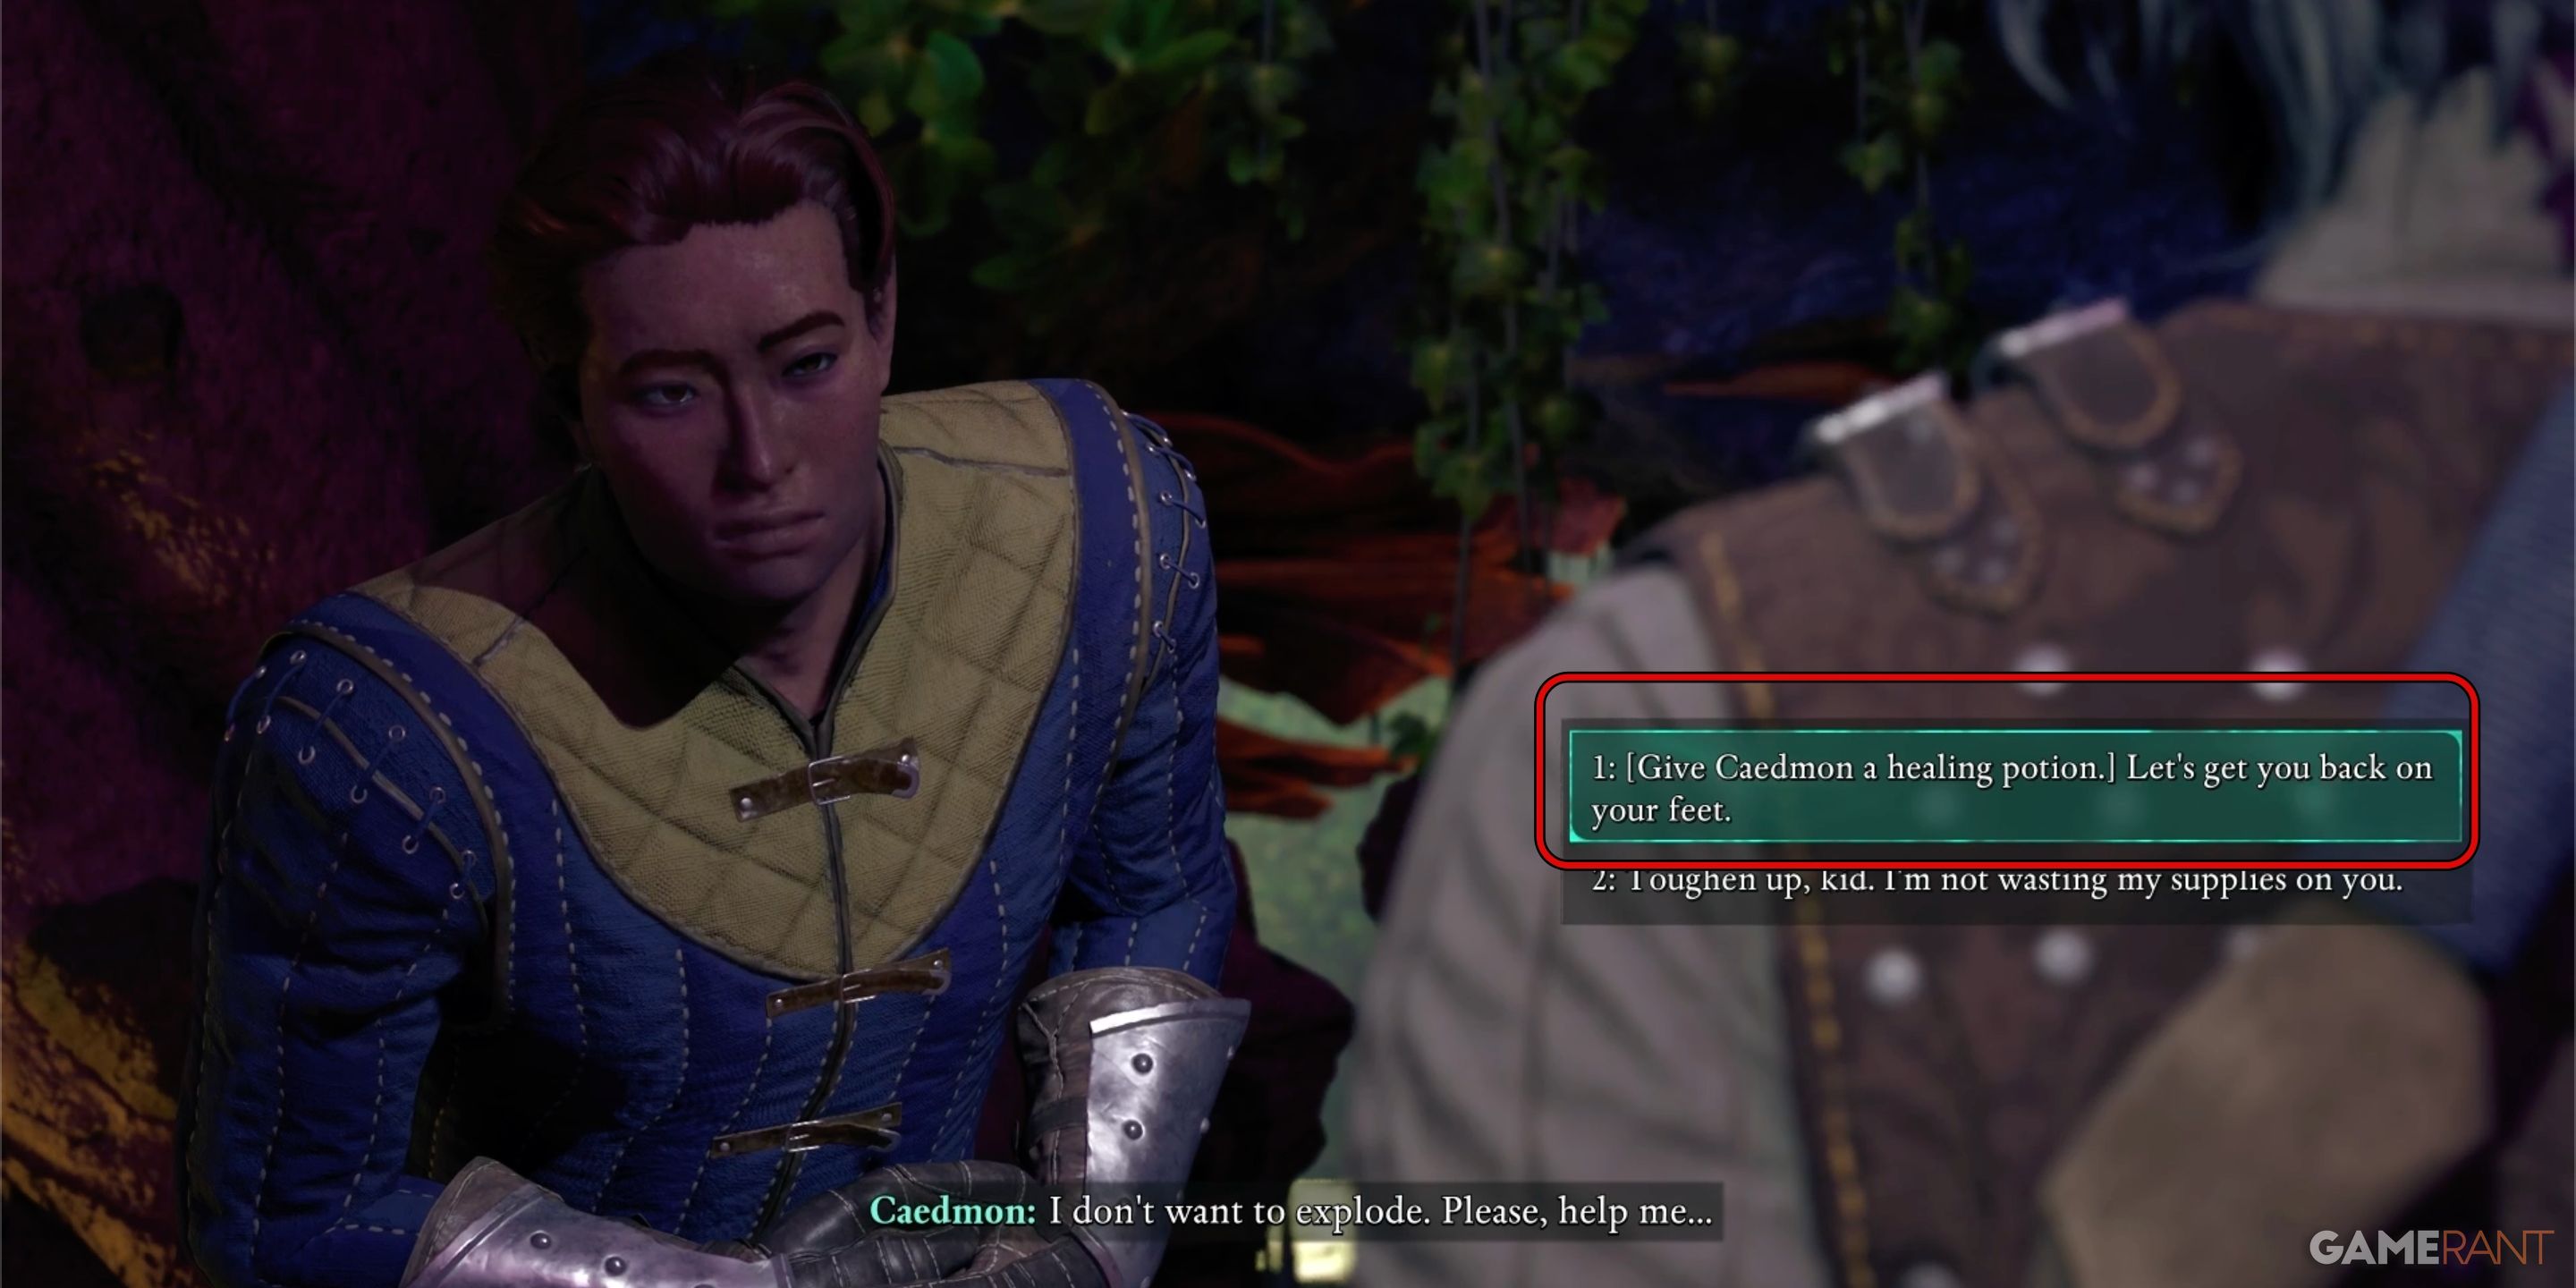
Following the room where the damaged Essence Generator sparks the water pool, you will come across Caedmon, one of the lost Expedition Team members. He is severely hurt and requires aid. If you decide to help him with a potion, you’ll have an opportunity to meet him again later outside the Aedyran Embassy and receive a reward.
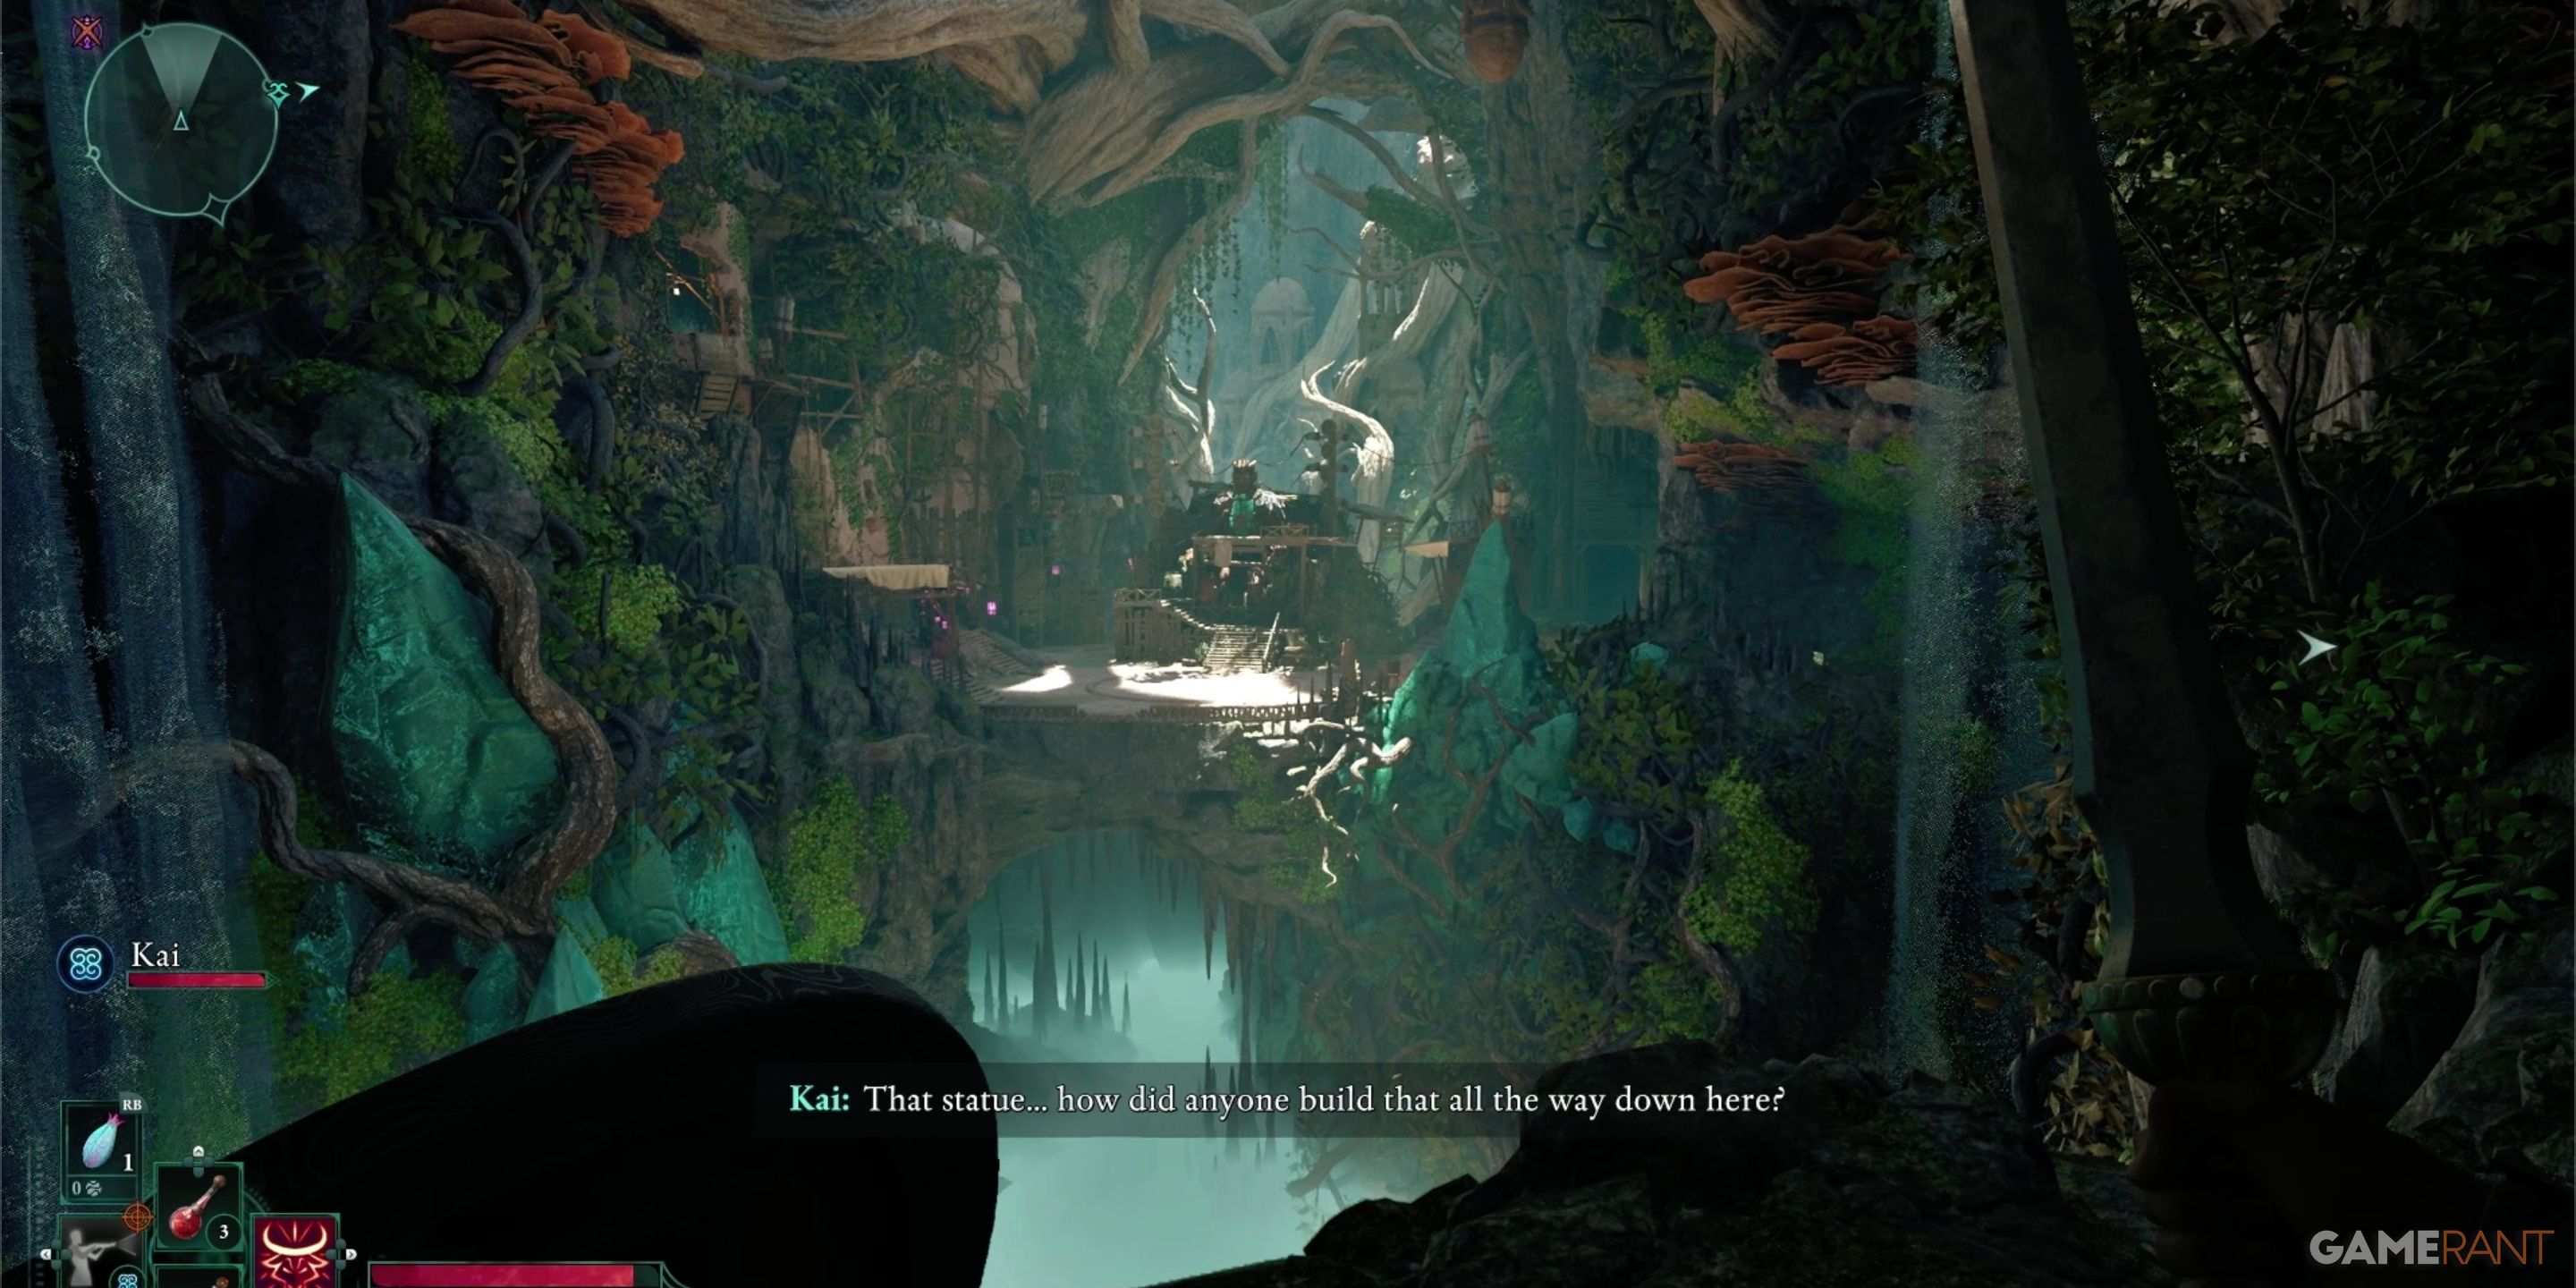
Upon encountering Caedmon, continue along the primary trail until you come across a lengthy wooden bridge. Before reaching that bridge, you’ll have another run-in with Xaurip. This direct path will take you straight to the Oracle Sargamis.
Collect the Splinter of Eothas – Avowed
Speak to the Oracle Sargamis:
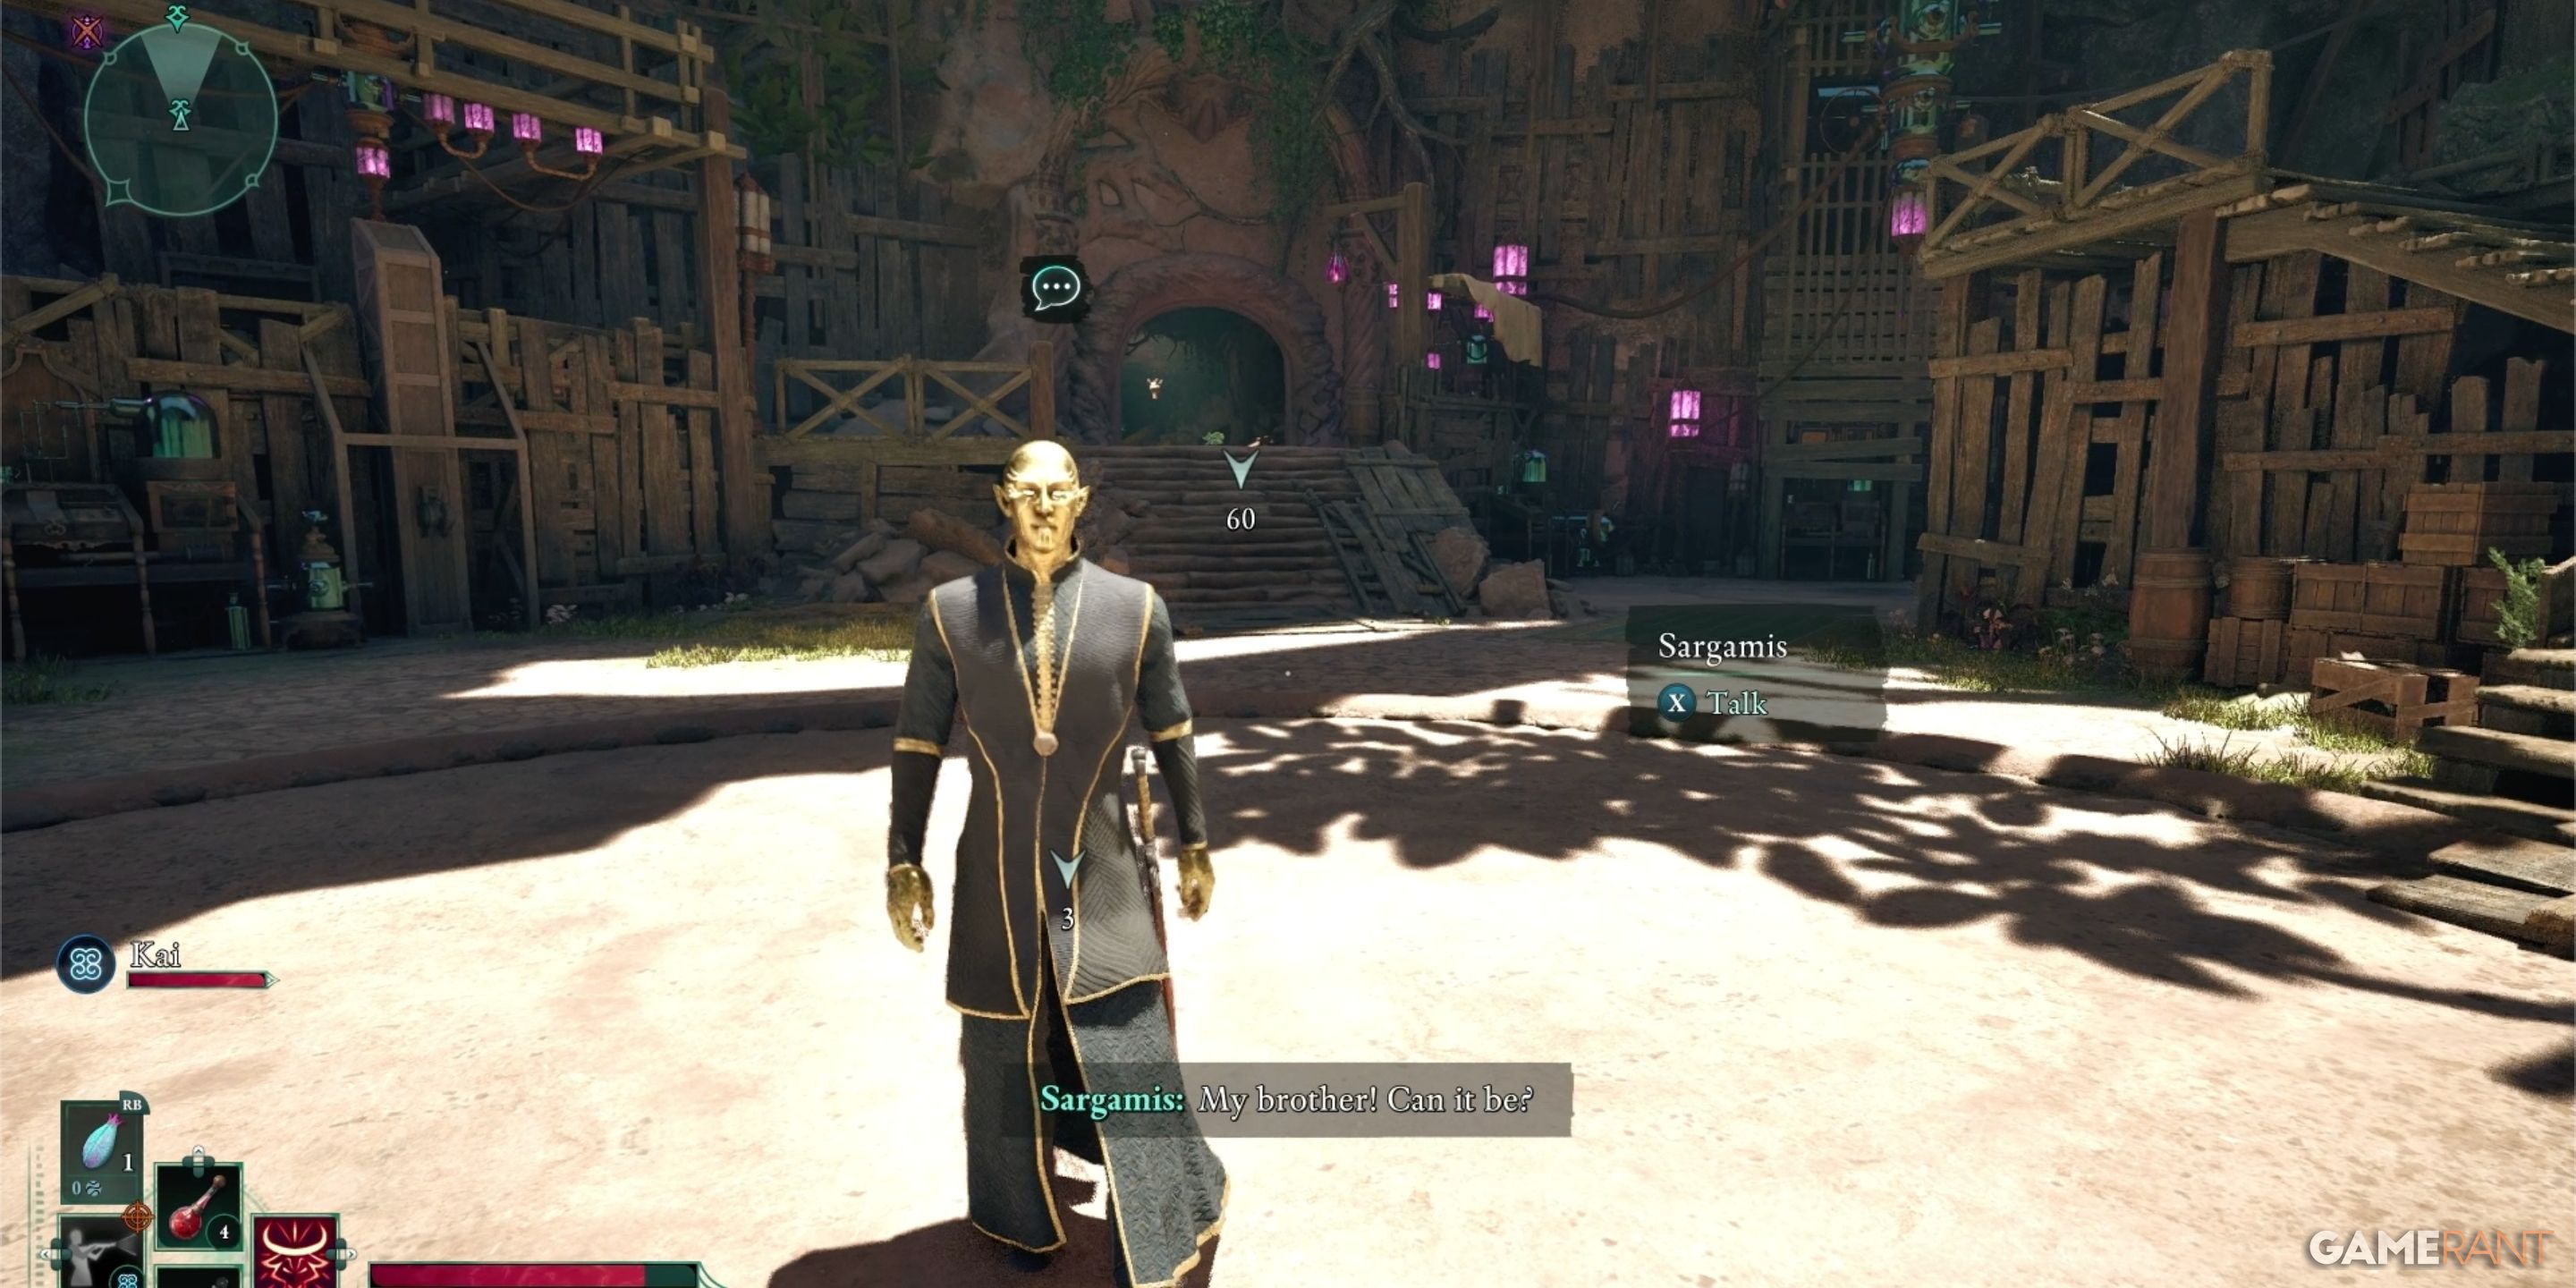
Upon your initial meeting with Sargamis, who goes by the name of the Oracle, he’ll feign ignorance about the Expedition Team. He’ll inquire what they were searching for, and when you bring up a relic, the Oracle will promptly disclose that it has to be the Fragment of Eothas that the Aedyrans were seeking.
In this scenario, Sargamis, a divine figure hailing from Eothas, expresses his need for a certain relic. The catch is that he can’t retrieve it himself. Now, things start to feel peculiar. Sargamis then requests that you collect the relic, and in doing so, shares an intriguing revelation: the towering statue within the chamber with you isn’t actually a statue; instead, it serves as some sort of vessel or host. However, he leaves the specific purpose of this statue frustratingly unclear.
No matter if you plan to aid Sargamis or not, gathering the relic makes perfect sense. Interestingly, this action could present numerous opportunities once the mission concludes.
Collect the Relic:
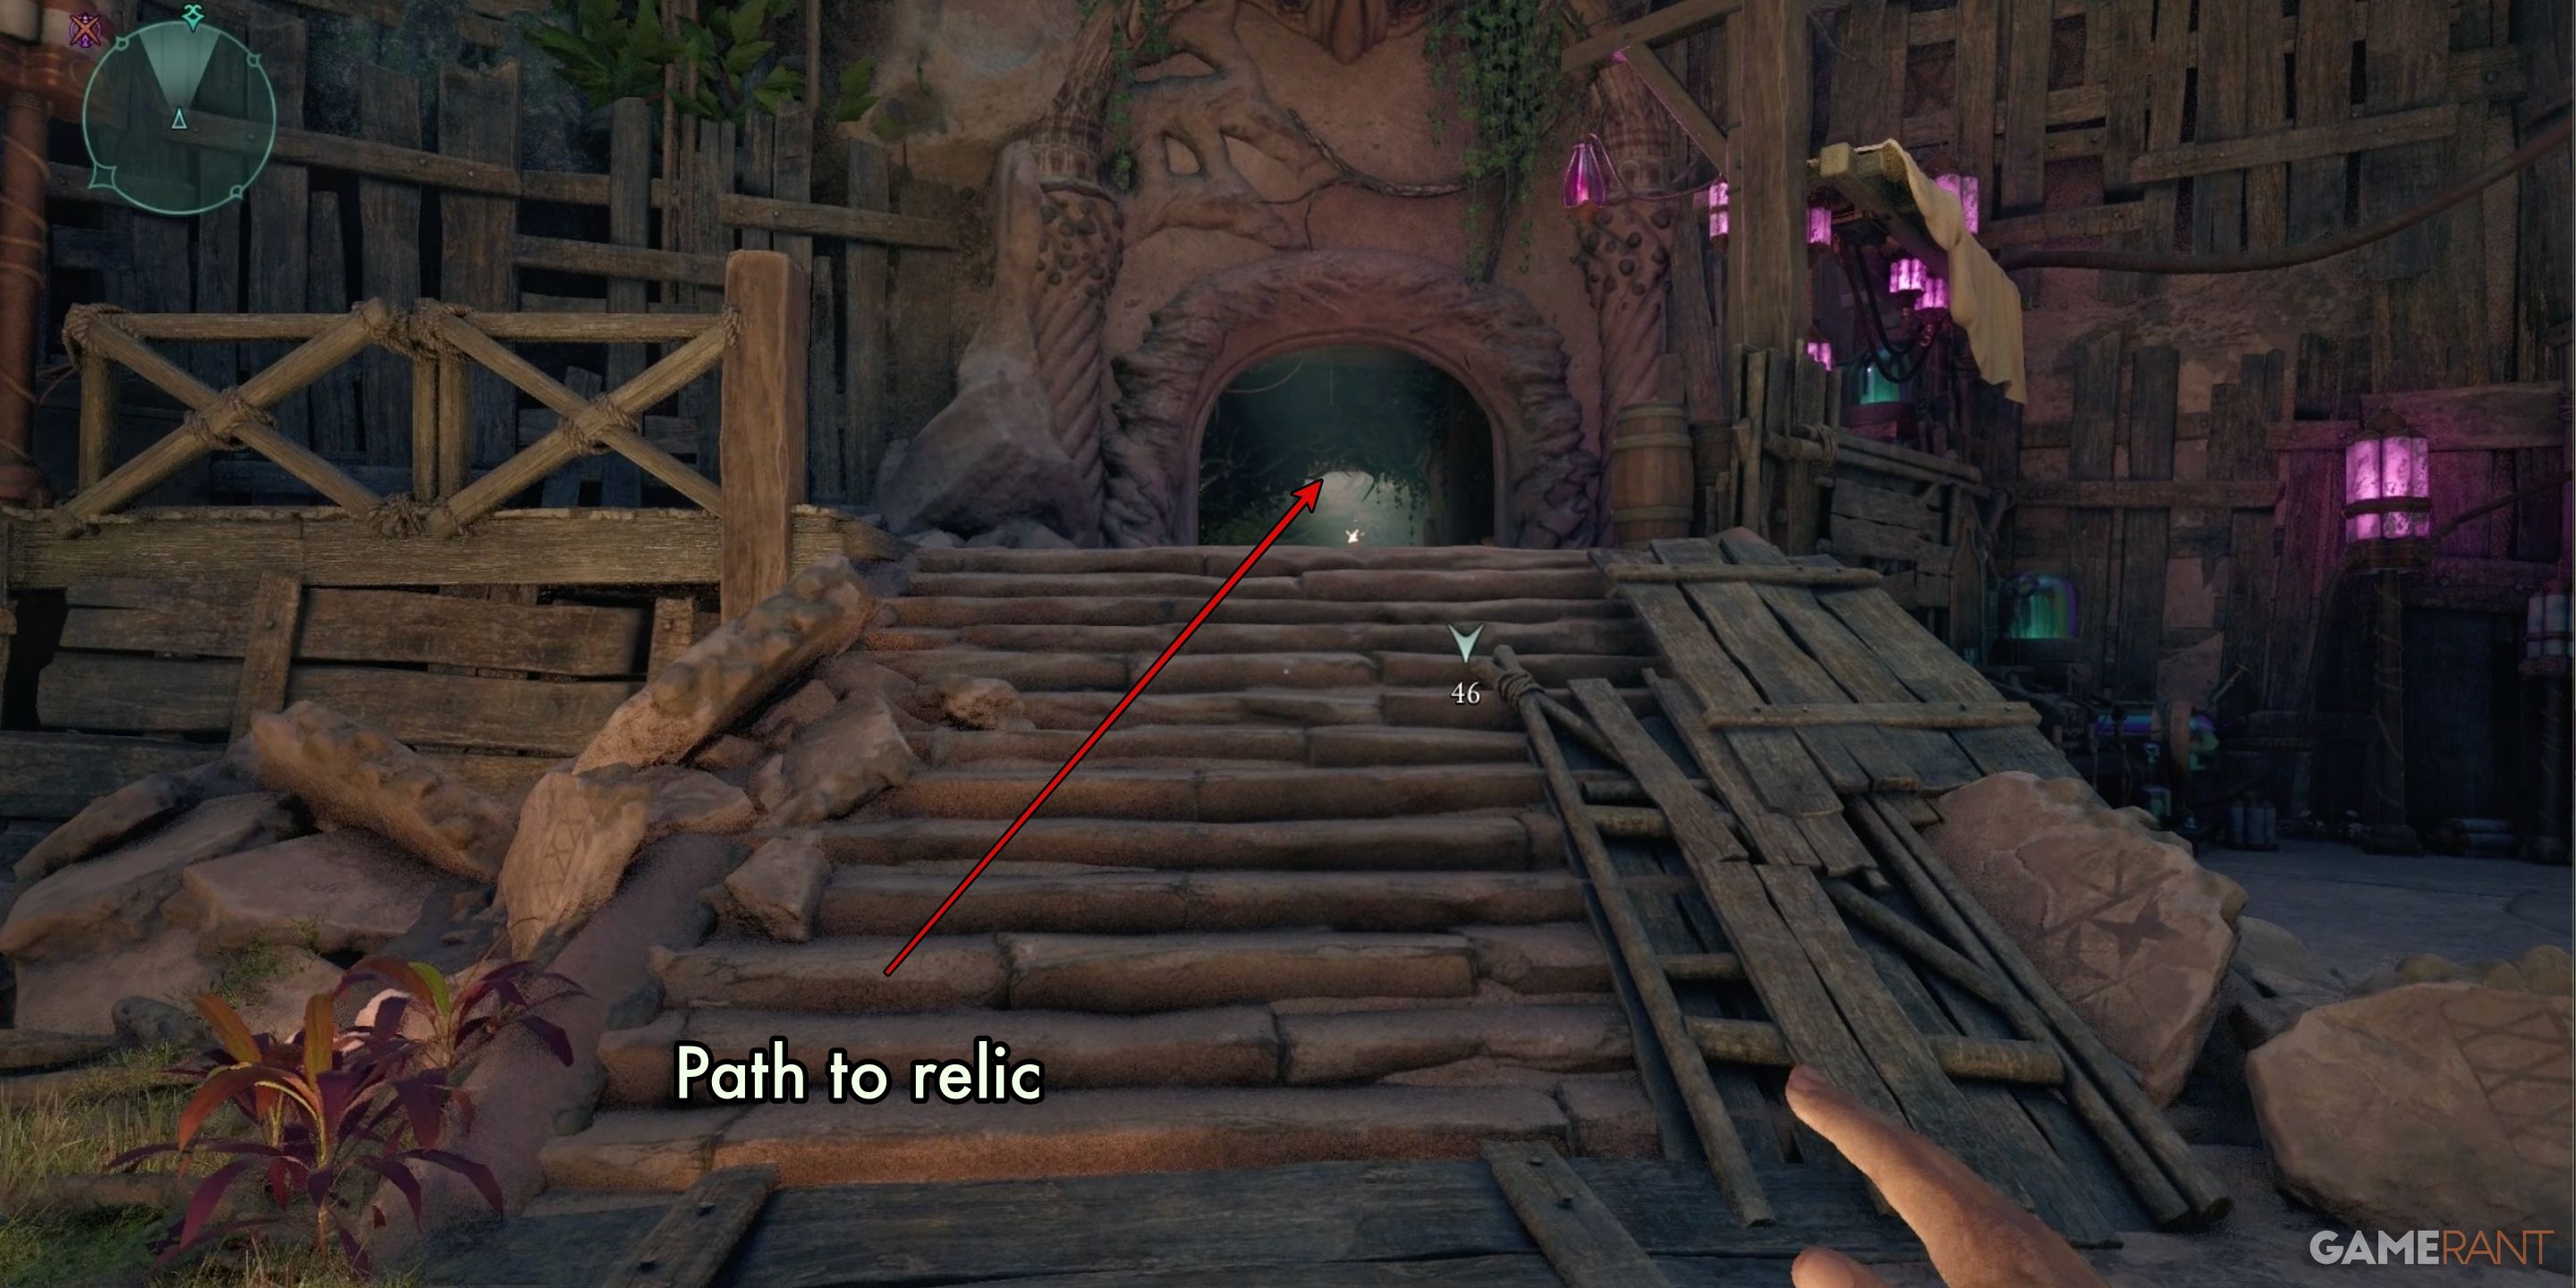
Leave the central workspace of Sargamis, heading towards the hallway beyond his workbenches. The route to the artifact remains straightforward. Along the journey, you’ll encounter and must battle two substantial groups of Xaurips and spiders.
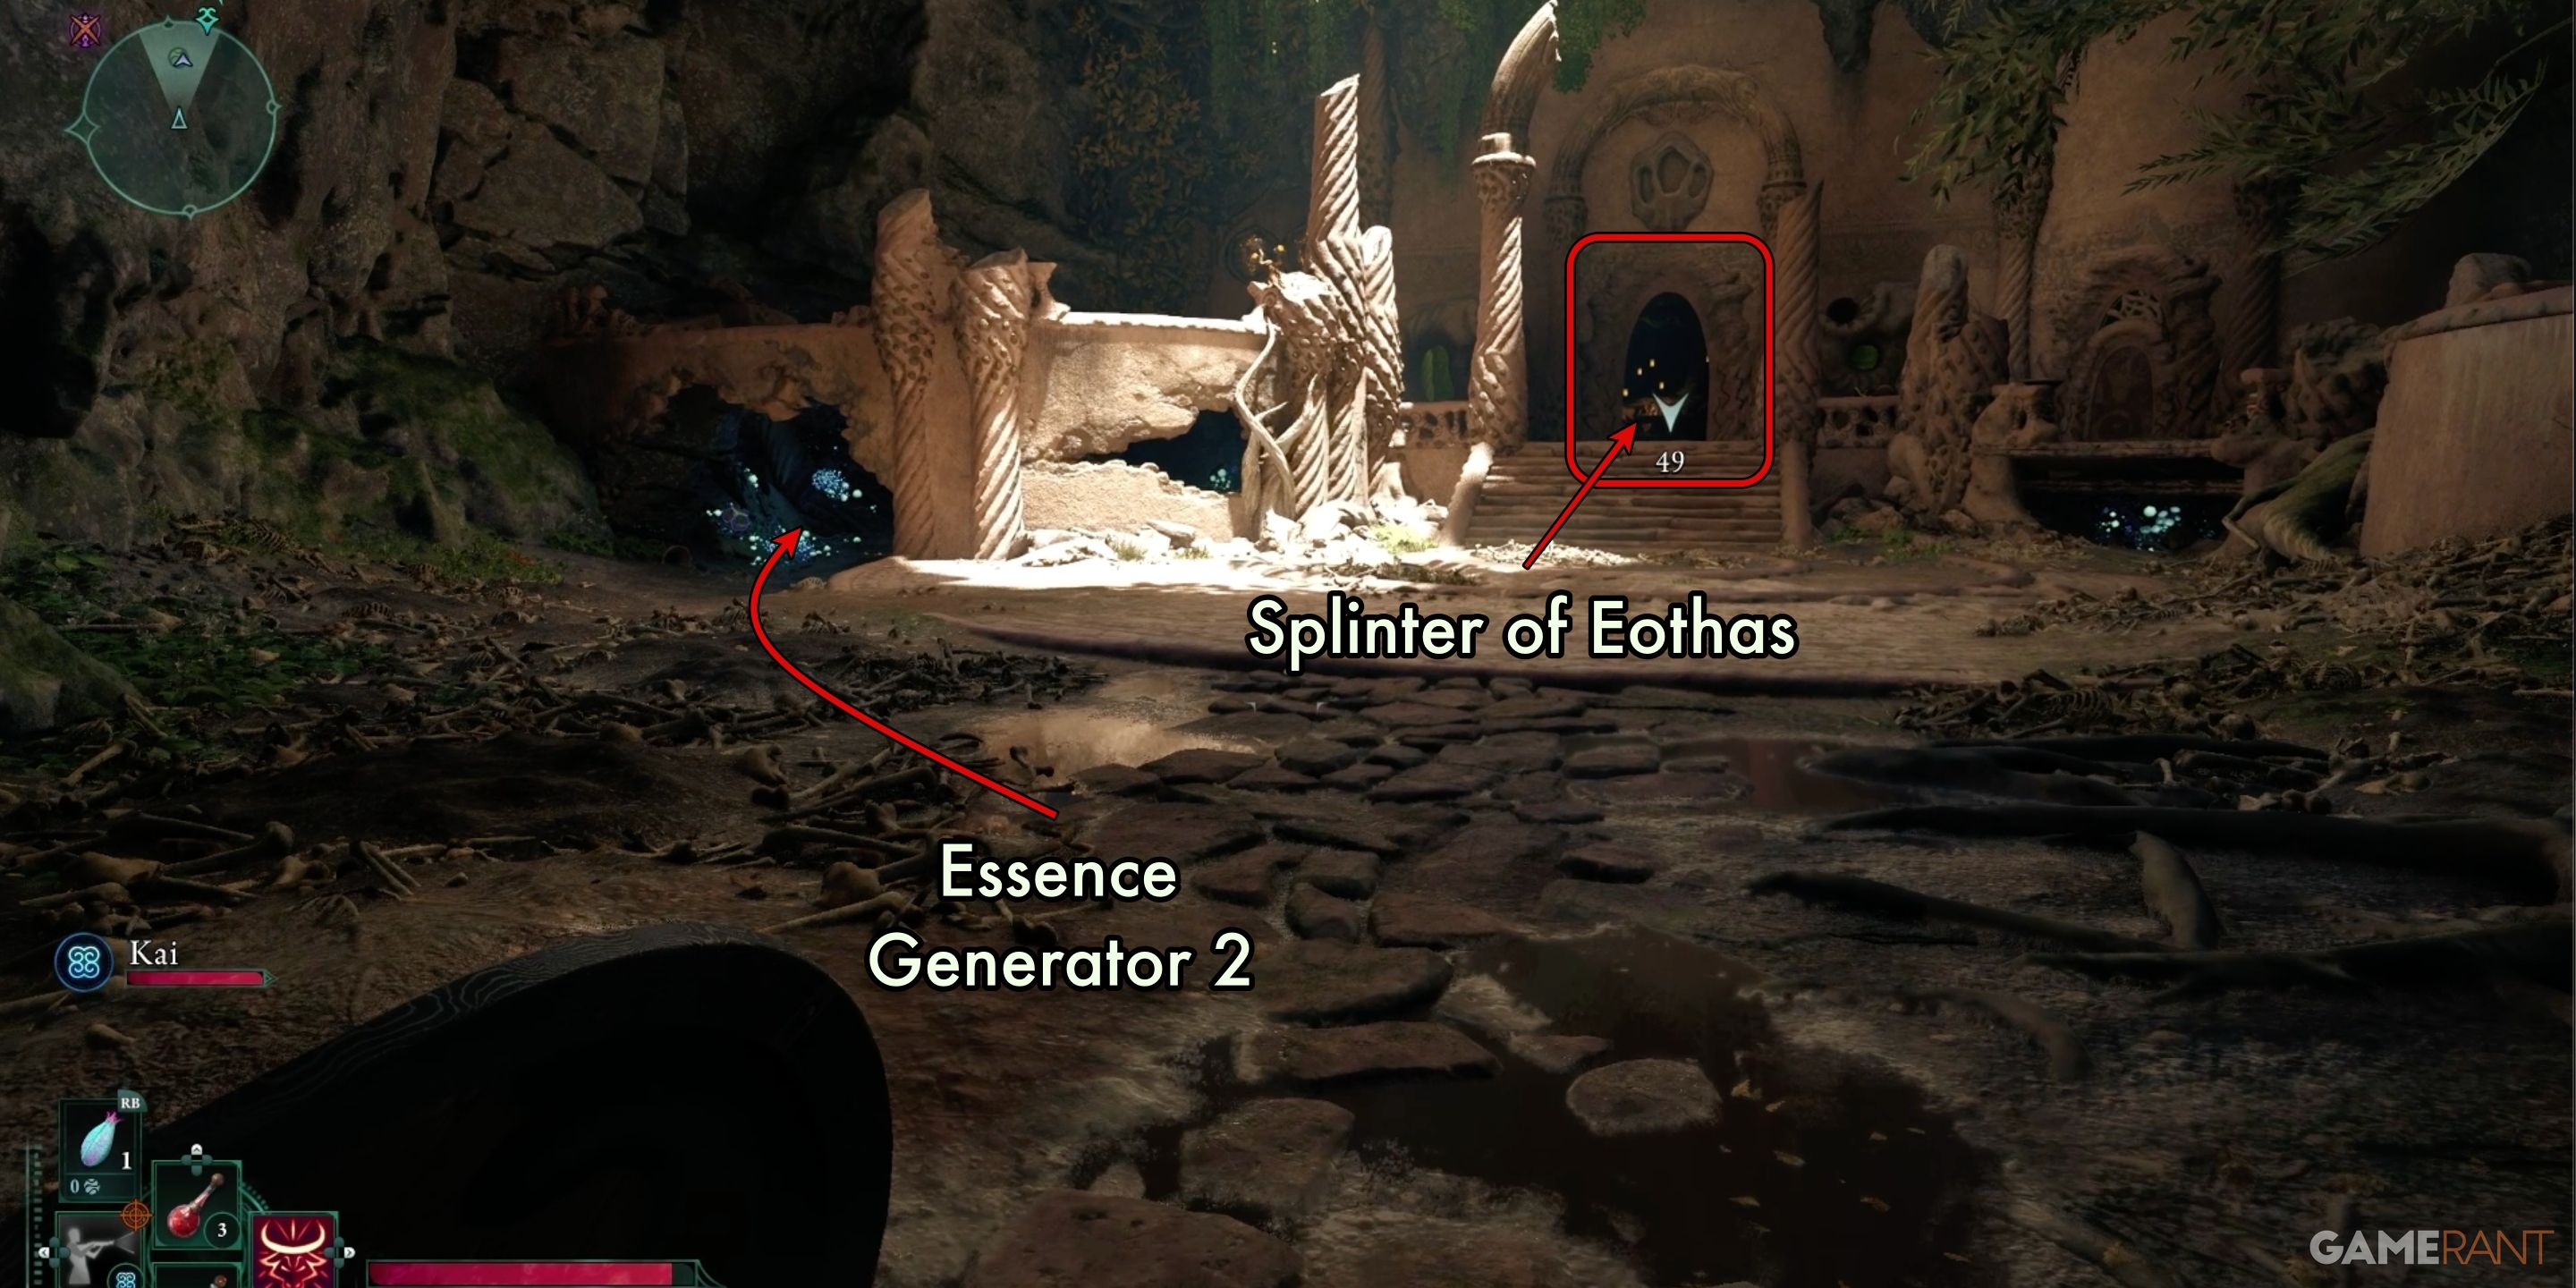
As I venture deeper into this labyrinth, I’ll eventually stumble upon a vast room. In the back of this room, nestled within another smaller chamber, lies the Splinter of Eothas. To the left of the relic chamber, there’s a treasure trove guarded by two Essence Generator locks. Keep your gaze fixed on the relic shrine if you’re facing it, and the first generator should be visible to the left.
To locate the second generator, you need to descend below the main platform, beyond the door leading to the treasure room. Search for a gap in the back wall; the second generator will be concealed within the walls at a considerable depth.
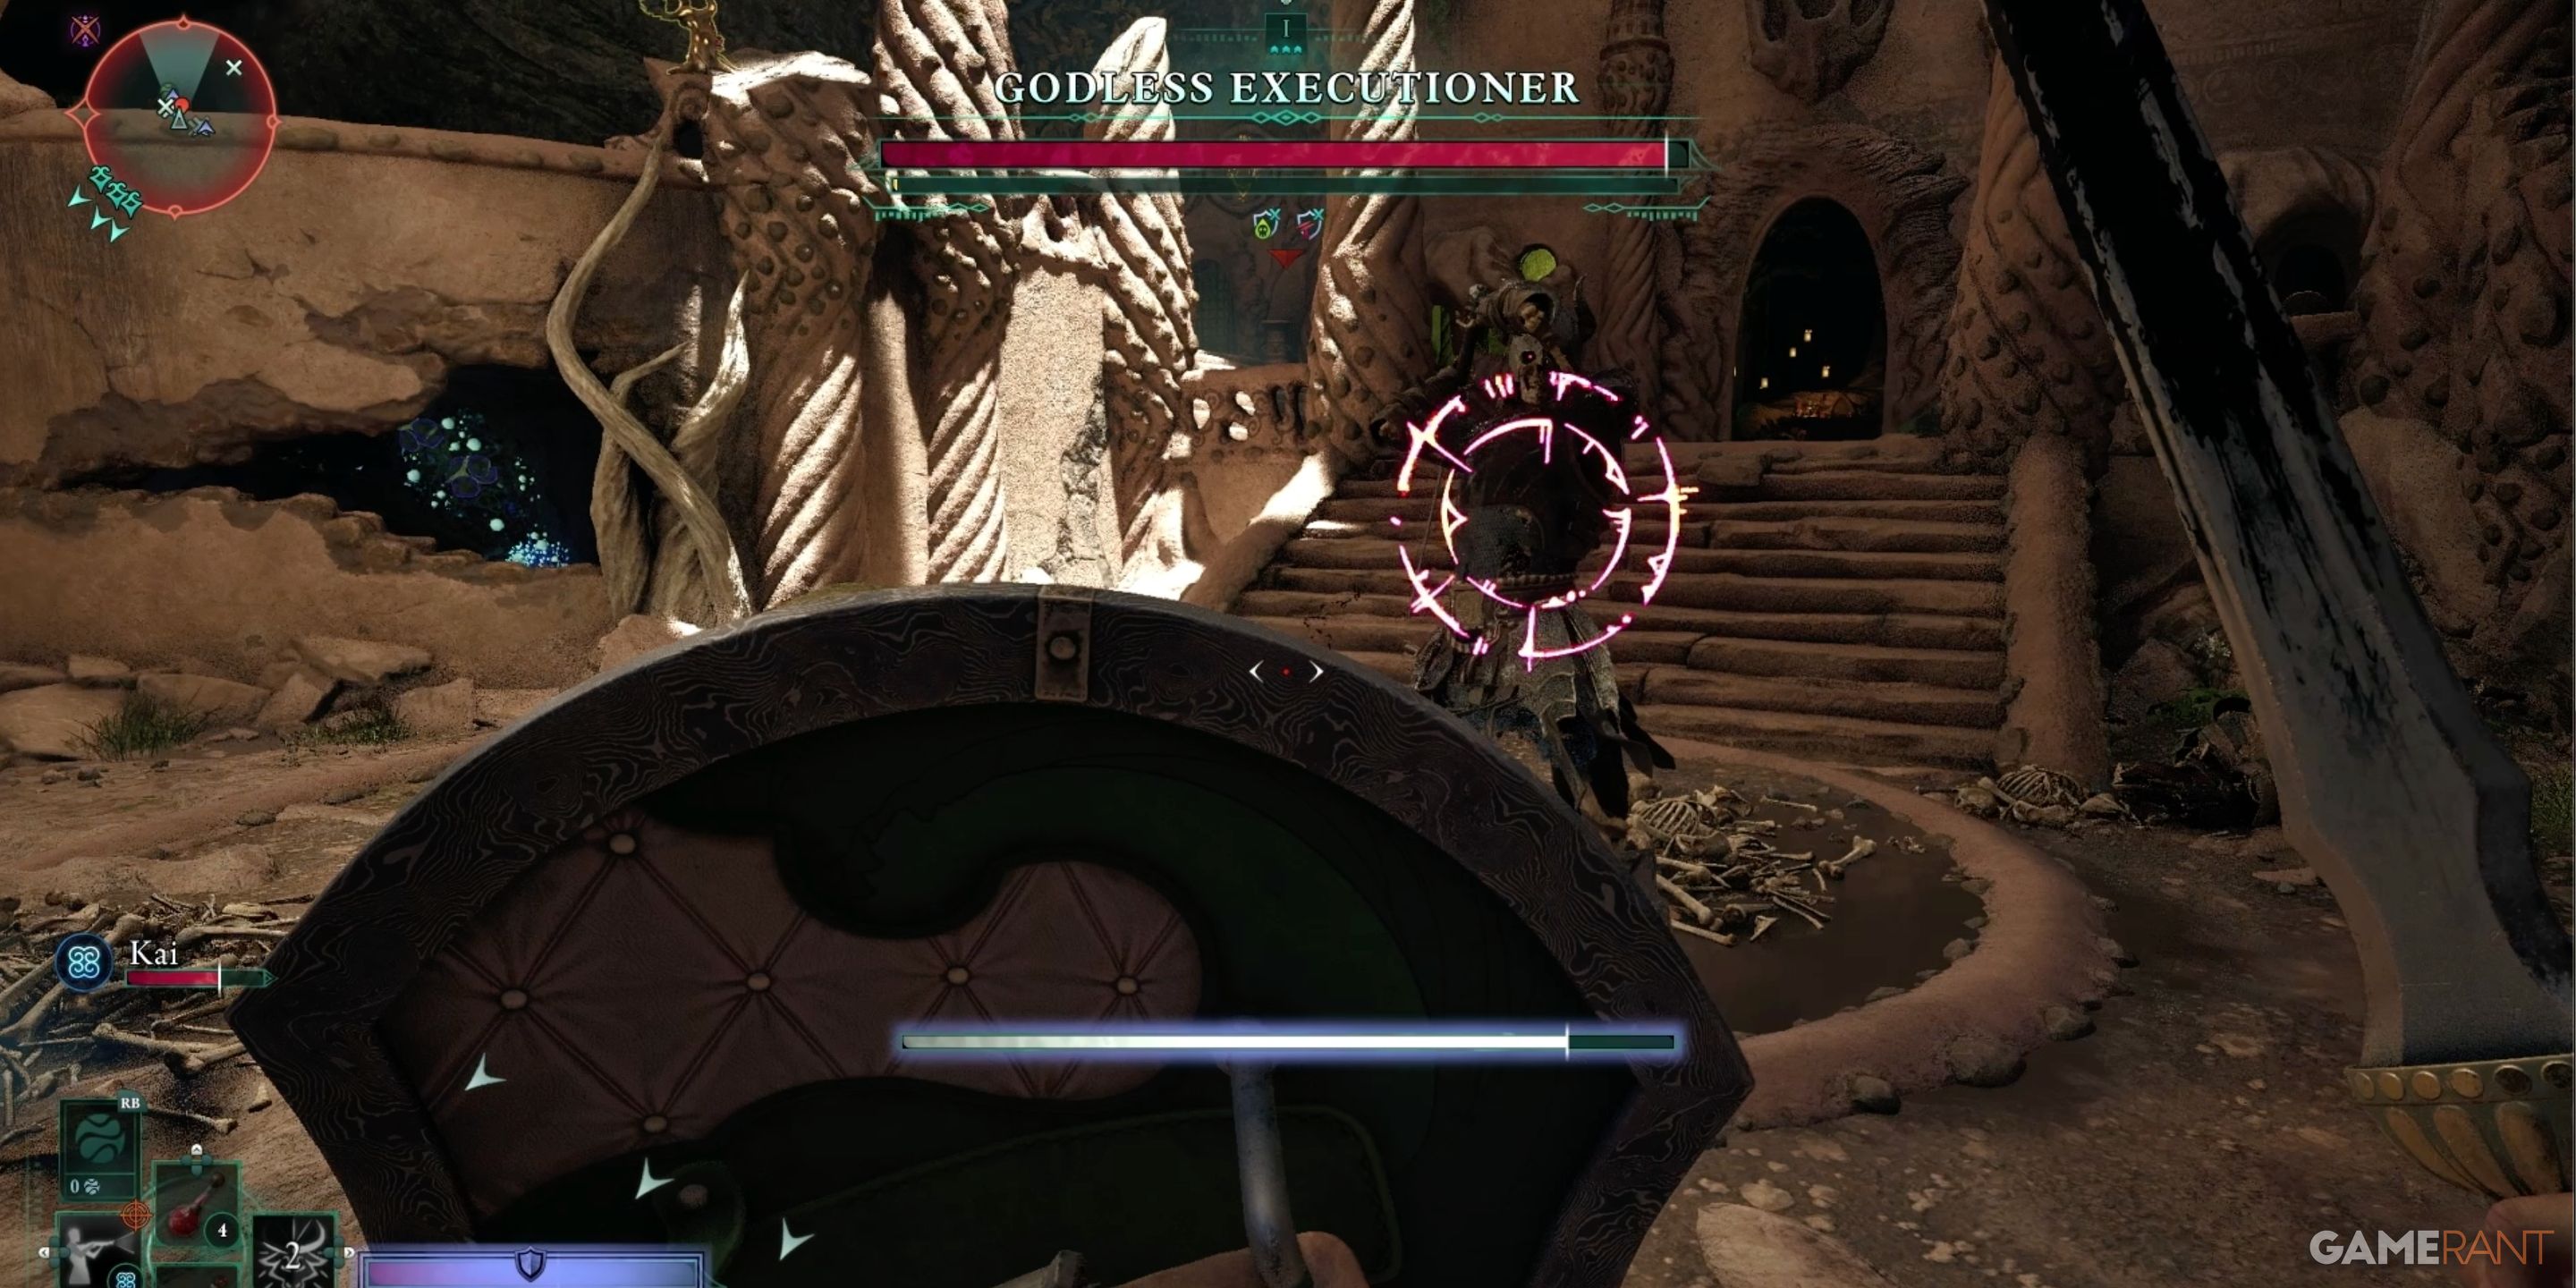
Upon retrieving the relic, brace yourself for a formidable horde of skeletal adversaries, including the relentless Godless Executioner. This boss shares some traits with the skeleton paladin foes, who are known for their mastery of greatswords. Be vigilant against powerful downward strikes. Prioritize defeating the skeleton priest first, as it has the ability to keep other enemies revitalized throughout the fight.
Locate the Expedition Team:
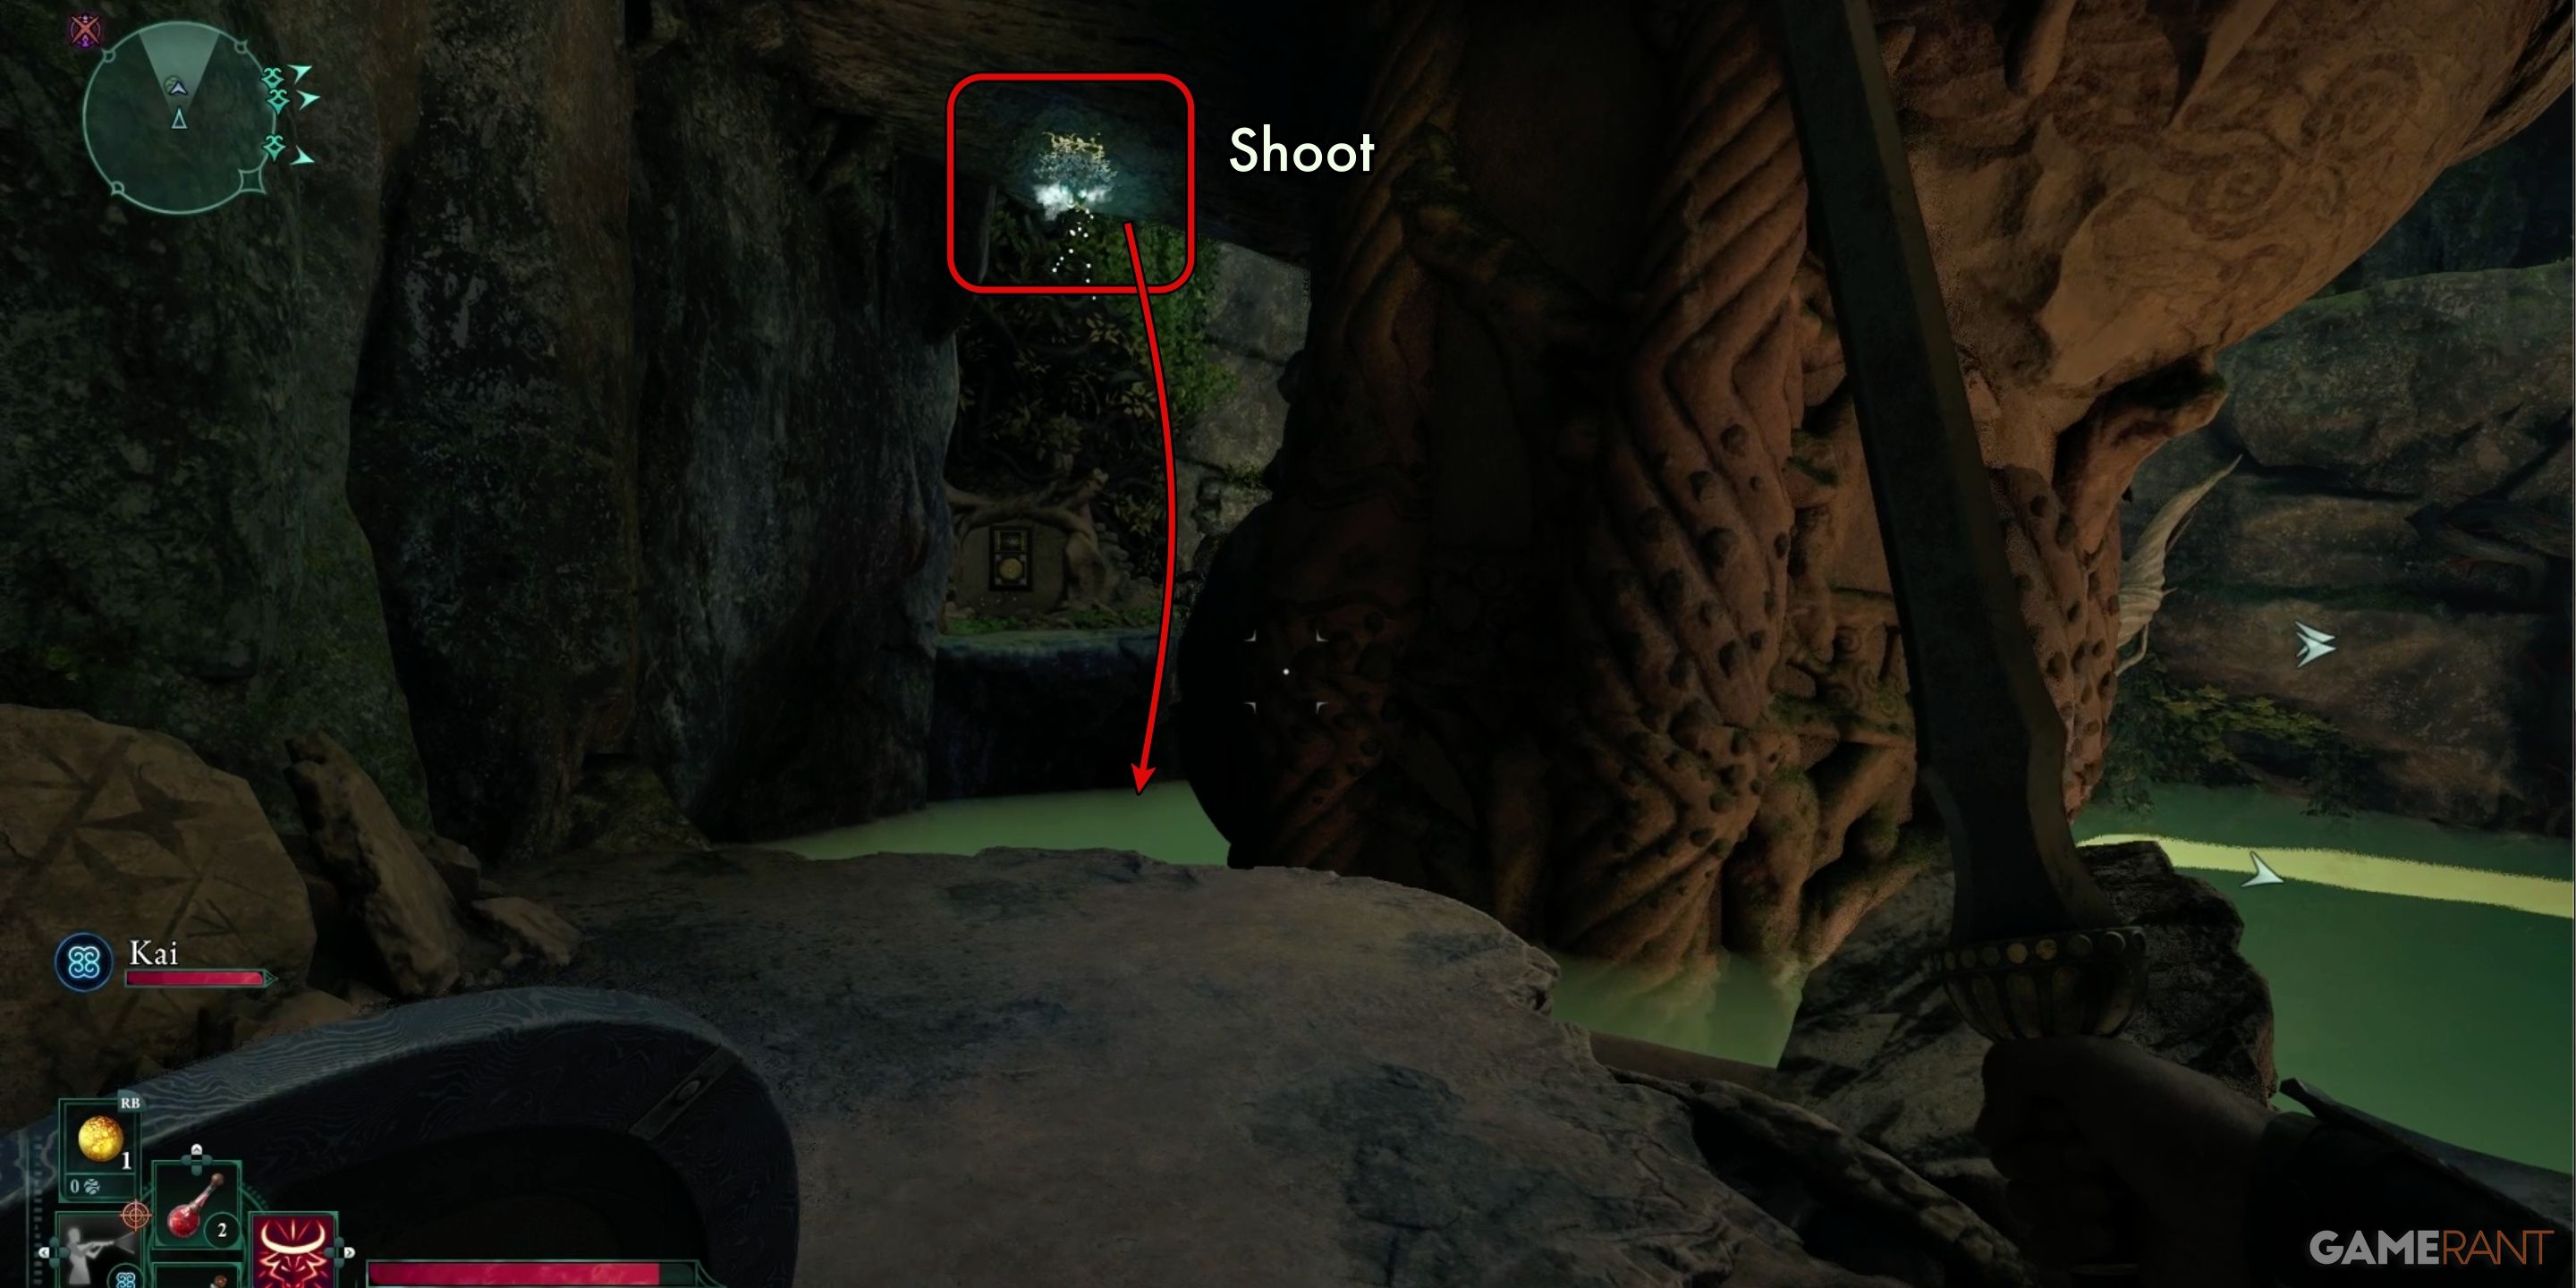
After defeating your adversaries, depart from the central relic vault and find that the remainder of the location is submerged. Upon exiting, glance to your left, and you’ll spot a vine-like plant dangling from an overhanging rock, which emits ice when fired upon. Fire at the plant to generate an ice platform, allowing you to leap onto it. This will guide you towards a hidden Essence Generator treasure room that was previously out of reach.
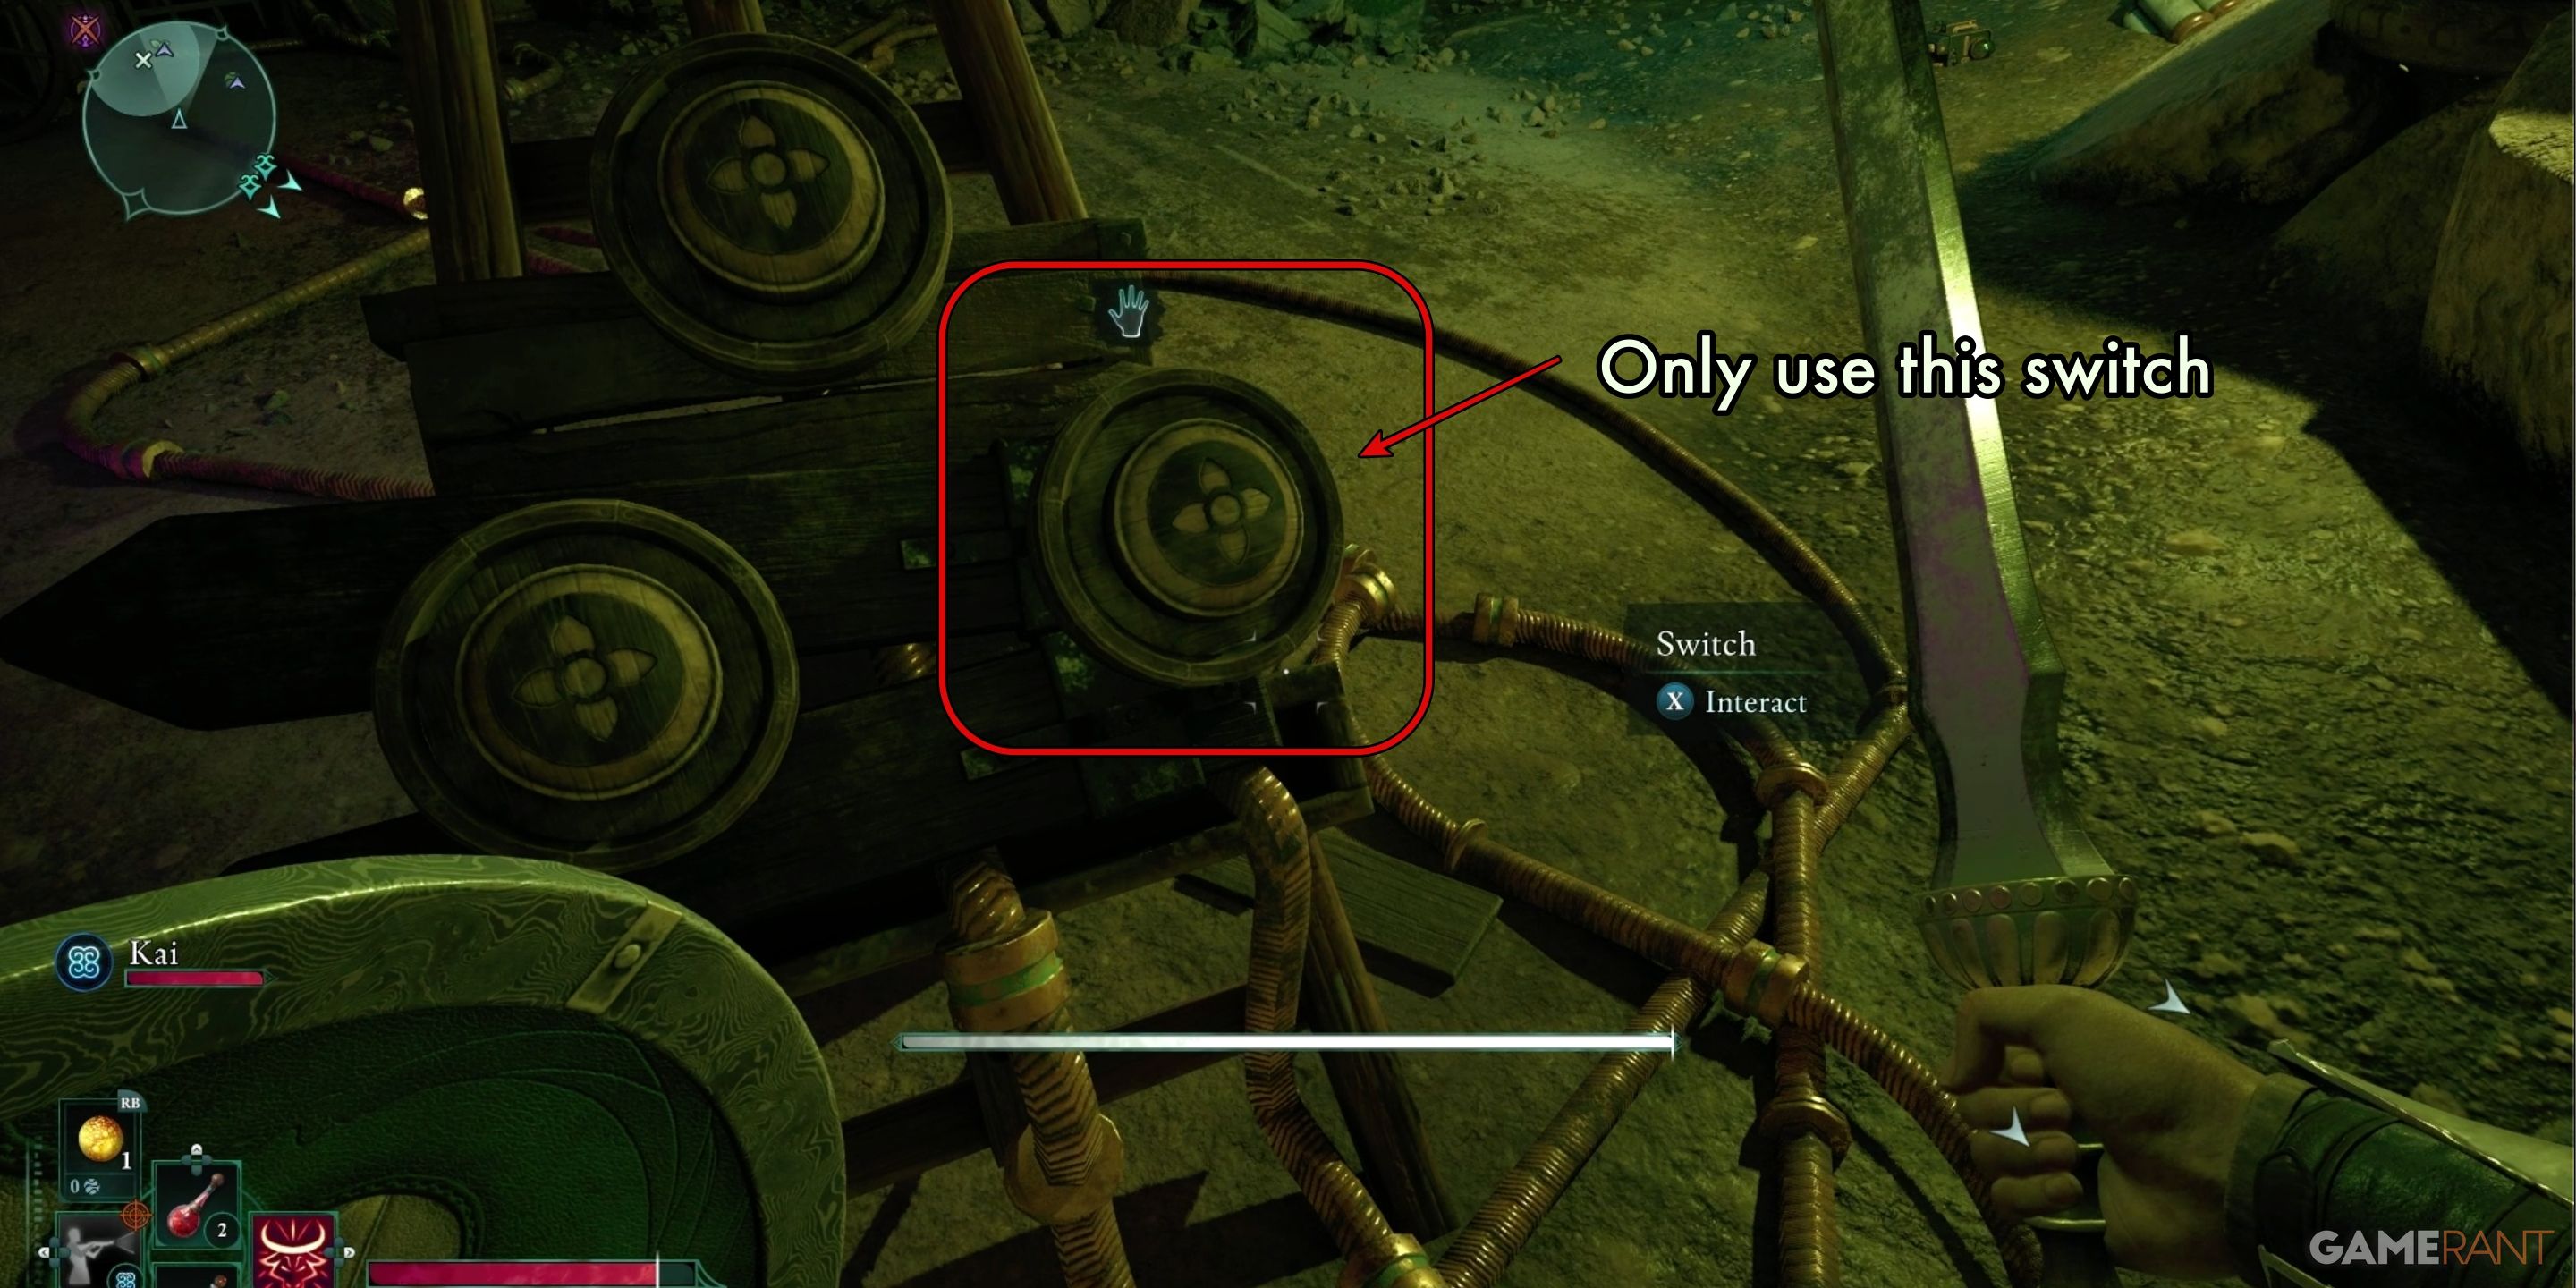
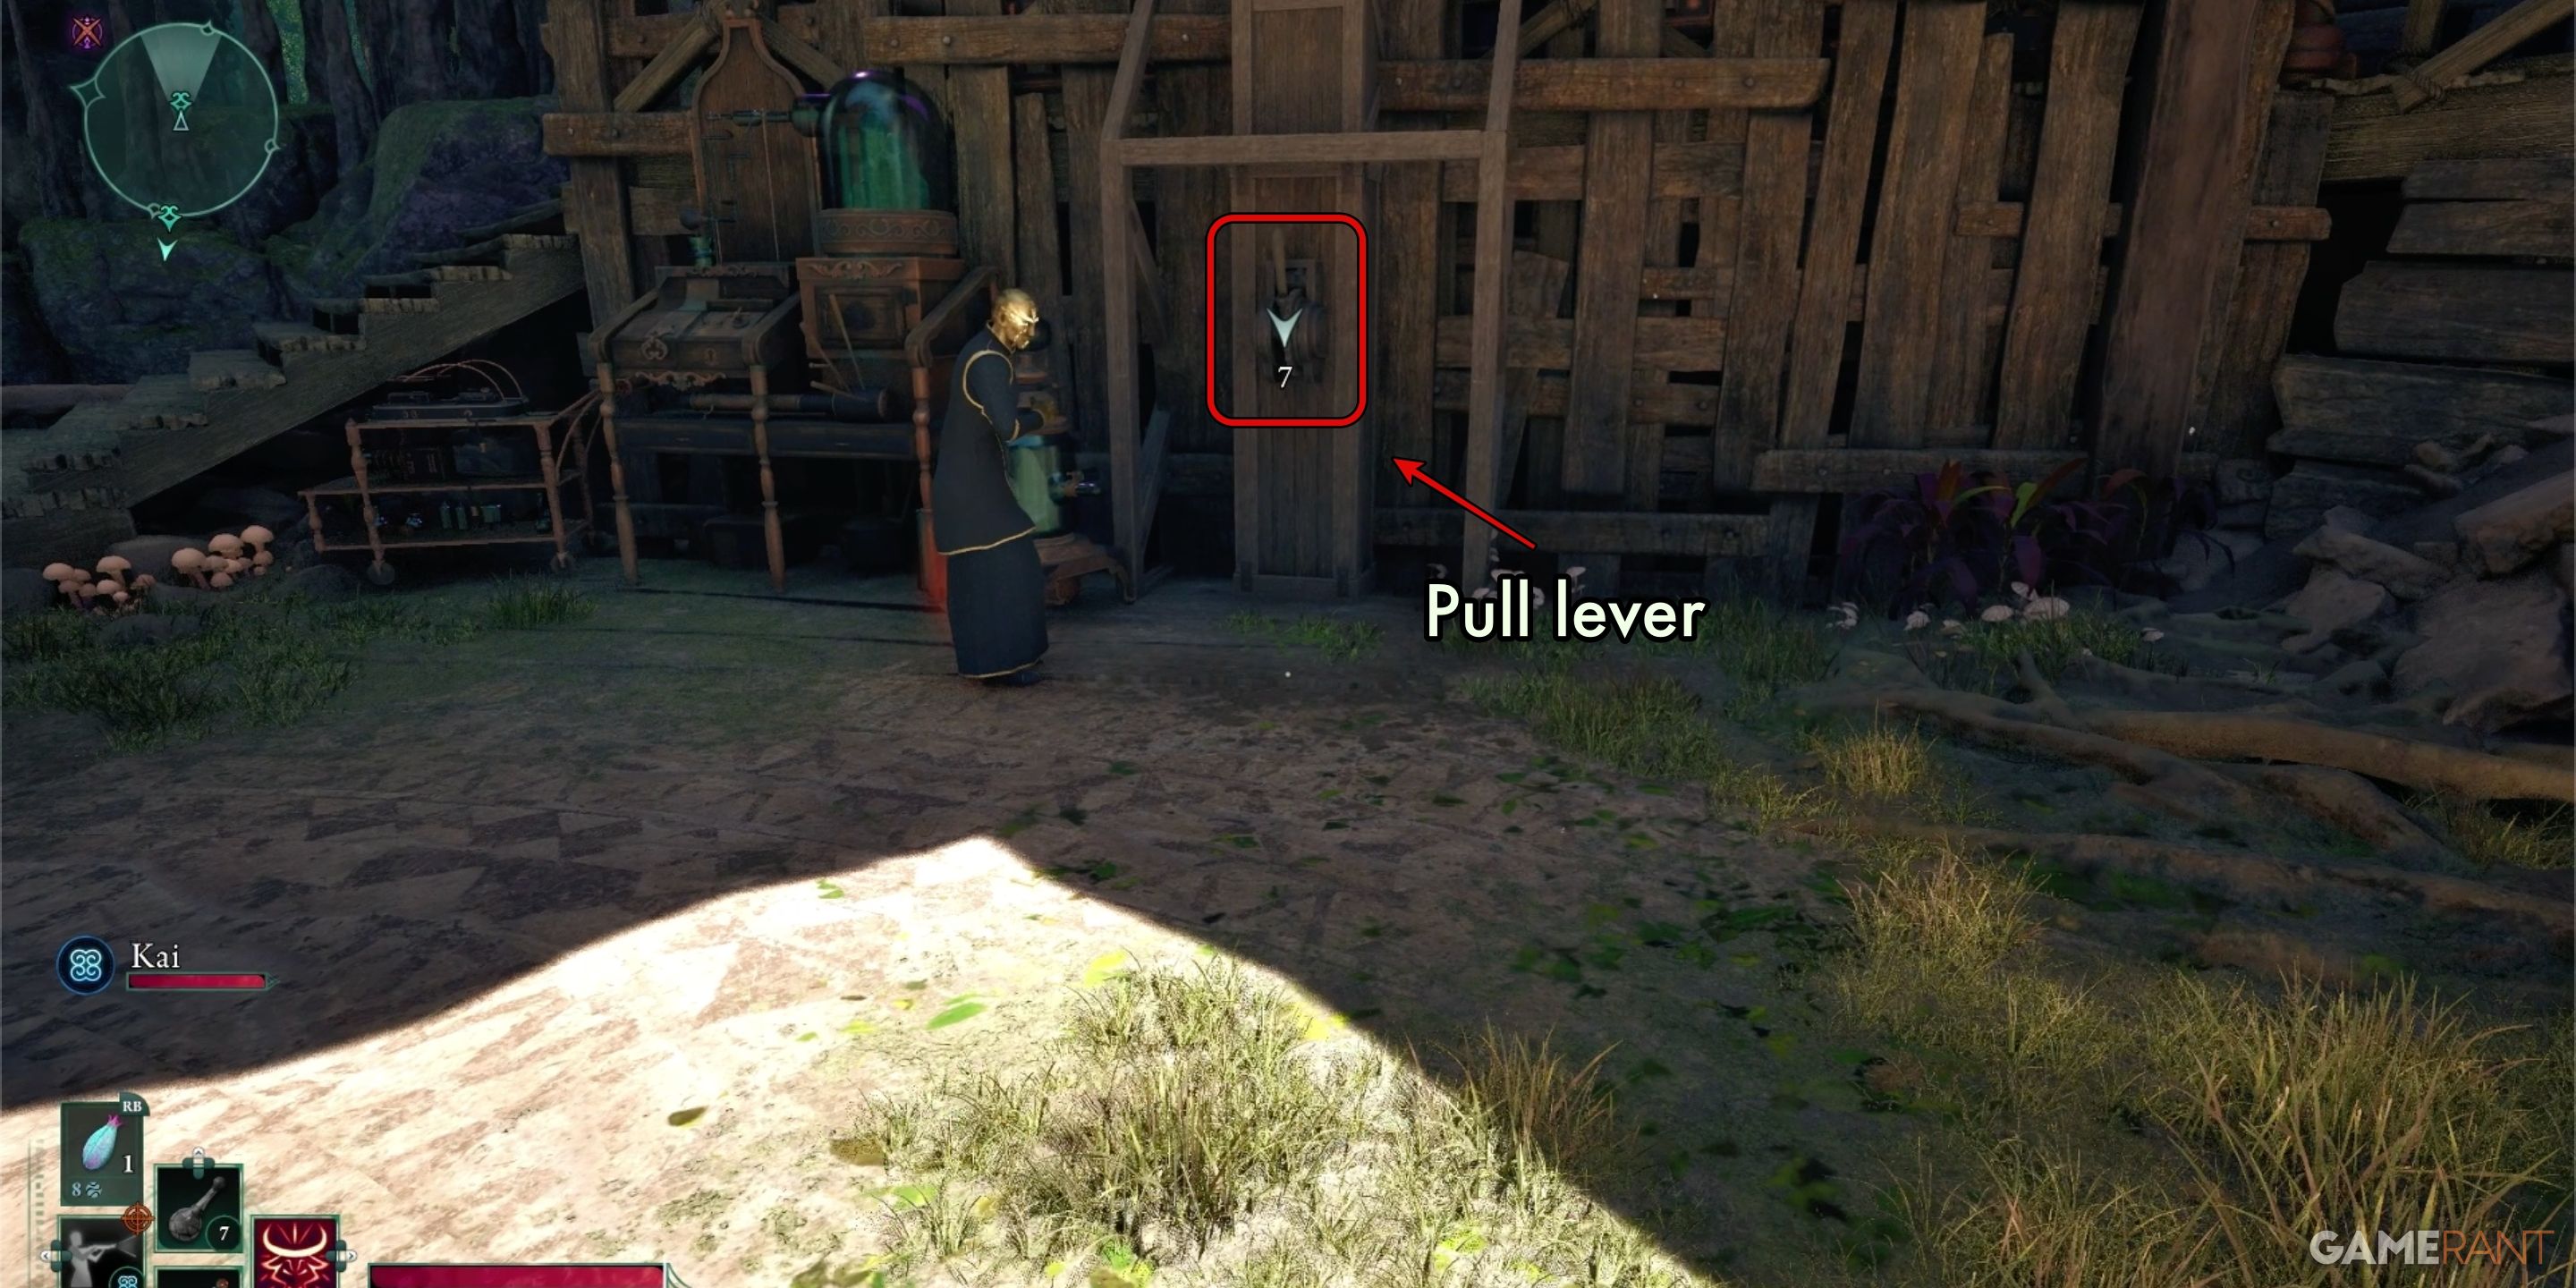
As a curious explorer, I followed the primary path until I stumbled upon a cozy little room adorned with multiple cables connected to three switches, resembling an artist’s easel. To avoid the perilous traps hidden in the left and center switches, I carefully chose the one located at the bottom right. This action revealed Sargamis’ workshop, a chilling sight where the remnants of the Aedyran Expedition Team lay lifeless. It was evident that the Oracle had taken their vital energy to fuel Eothas’ colossal form.
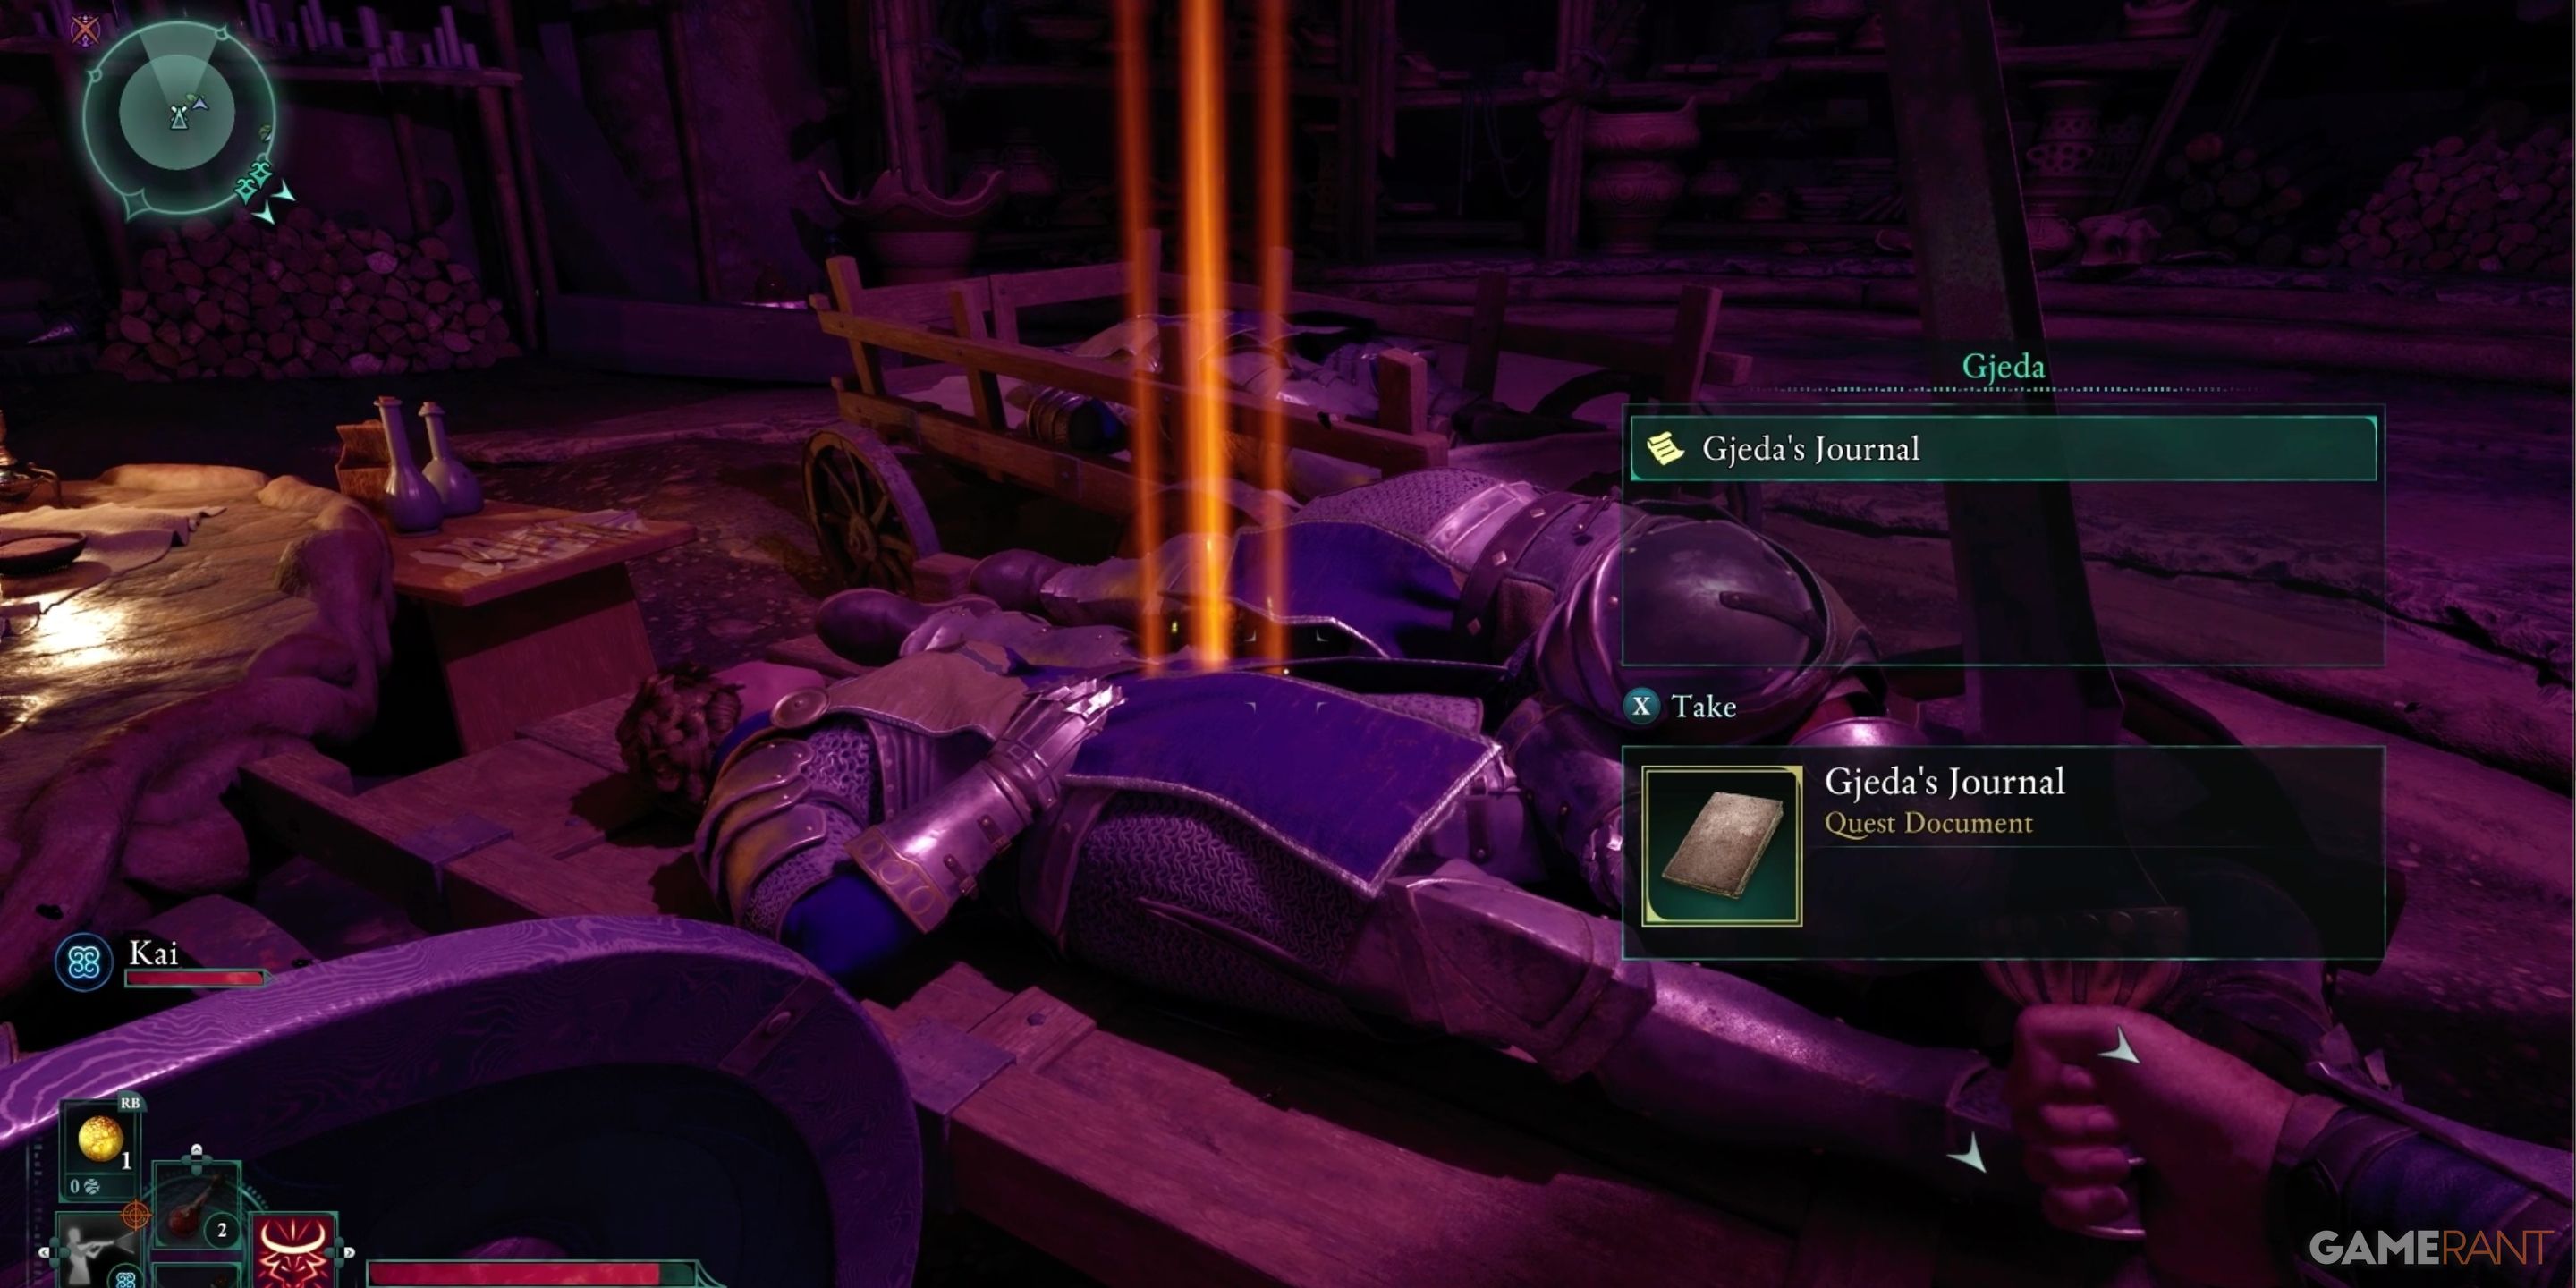
Collect Gjeda’s journal off the dead body in the center, then make your way back to the Oracle.
Should You Help or Kill The Oracle Sargamis? – Avowed
After gathering the Splinter of Eothas and Gjeda’s Journal, the next step is to face Oracle Saragamis. Upon your return, the Oracle will argue that the team’s death was essential for resurrecting god Eothas. The Oracle proposes a peculiar strategy to “redeem” Eothas, once it’s clear that the god had caused the deaths of many people during an incident before Avowed.
In the end, you’ll have to decide: either assist Sargamis in achieving his goal, or confront him to acquire one of the top-tier weapons within the game, Avowed.
The final decision lies between aiding Sargamis with his scheme, or battling him for the acquisition of an exceptional weapon found in the world of Avowed.
Helping the Oracle Sargamis:
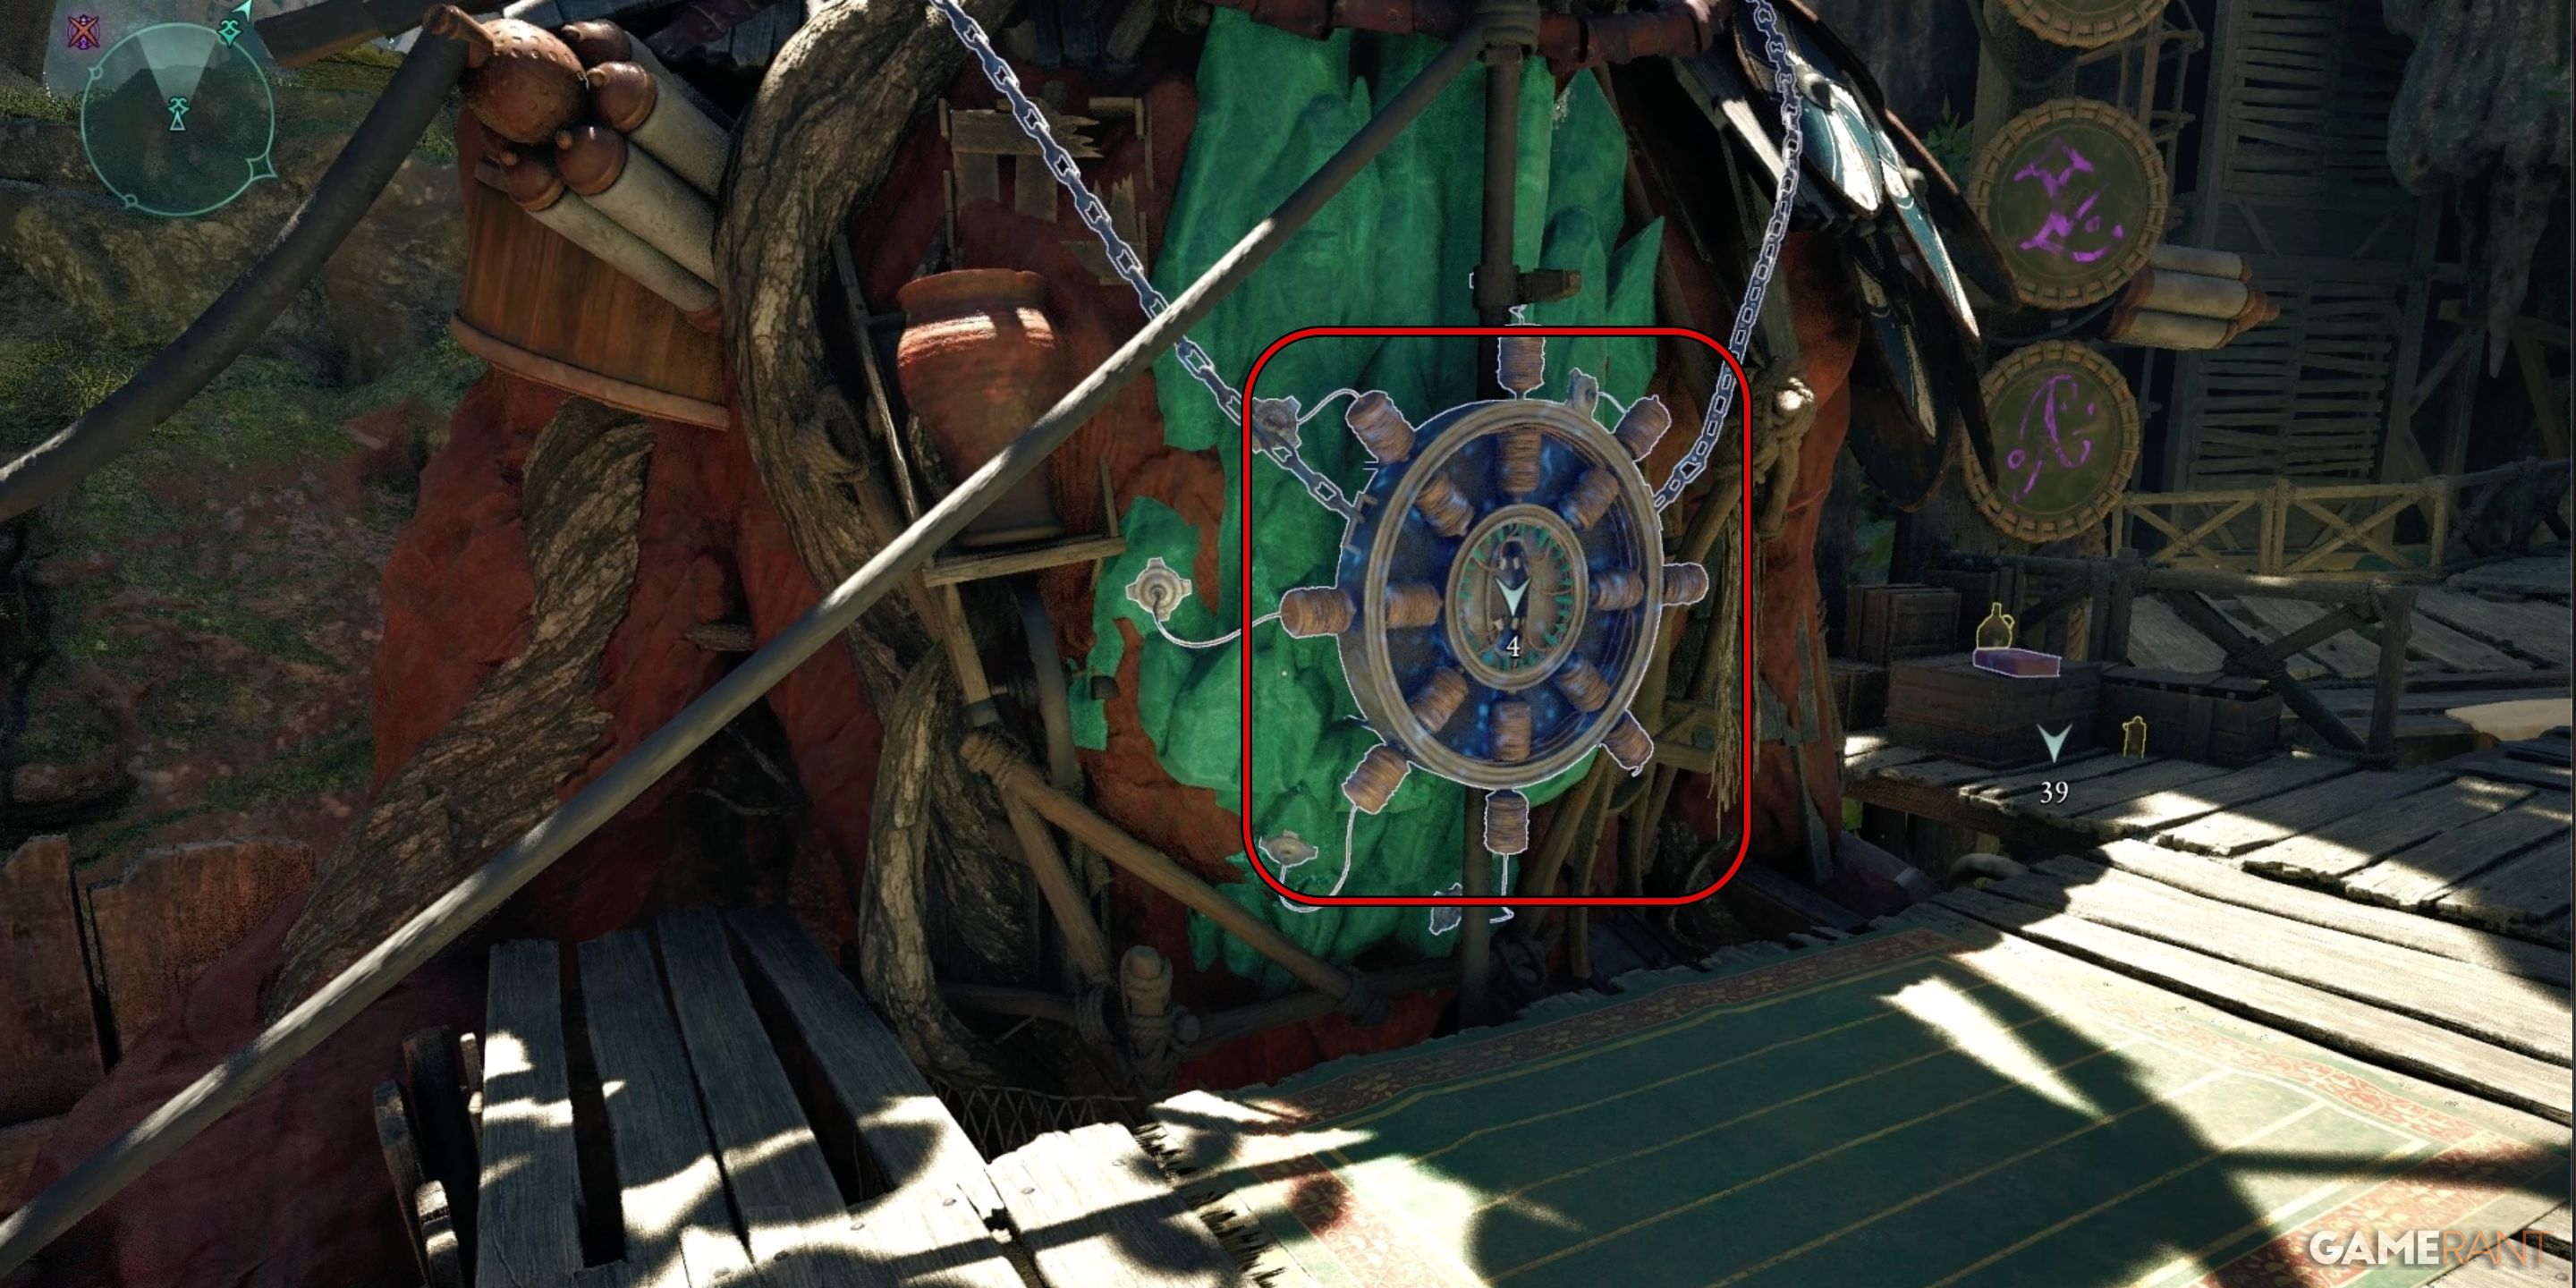
If you choose to aid Sargamis, you’ll first need to endure a lengthy explanation, then navigate the structures nearby and deposit the Splinter of Eothas into the central wheel after that.
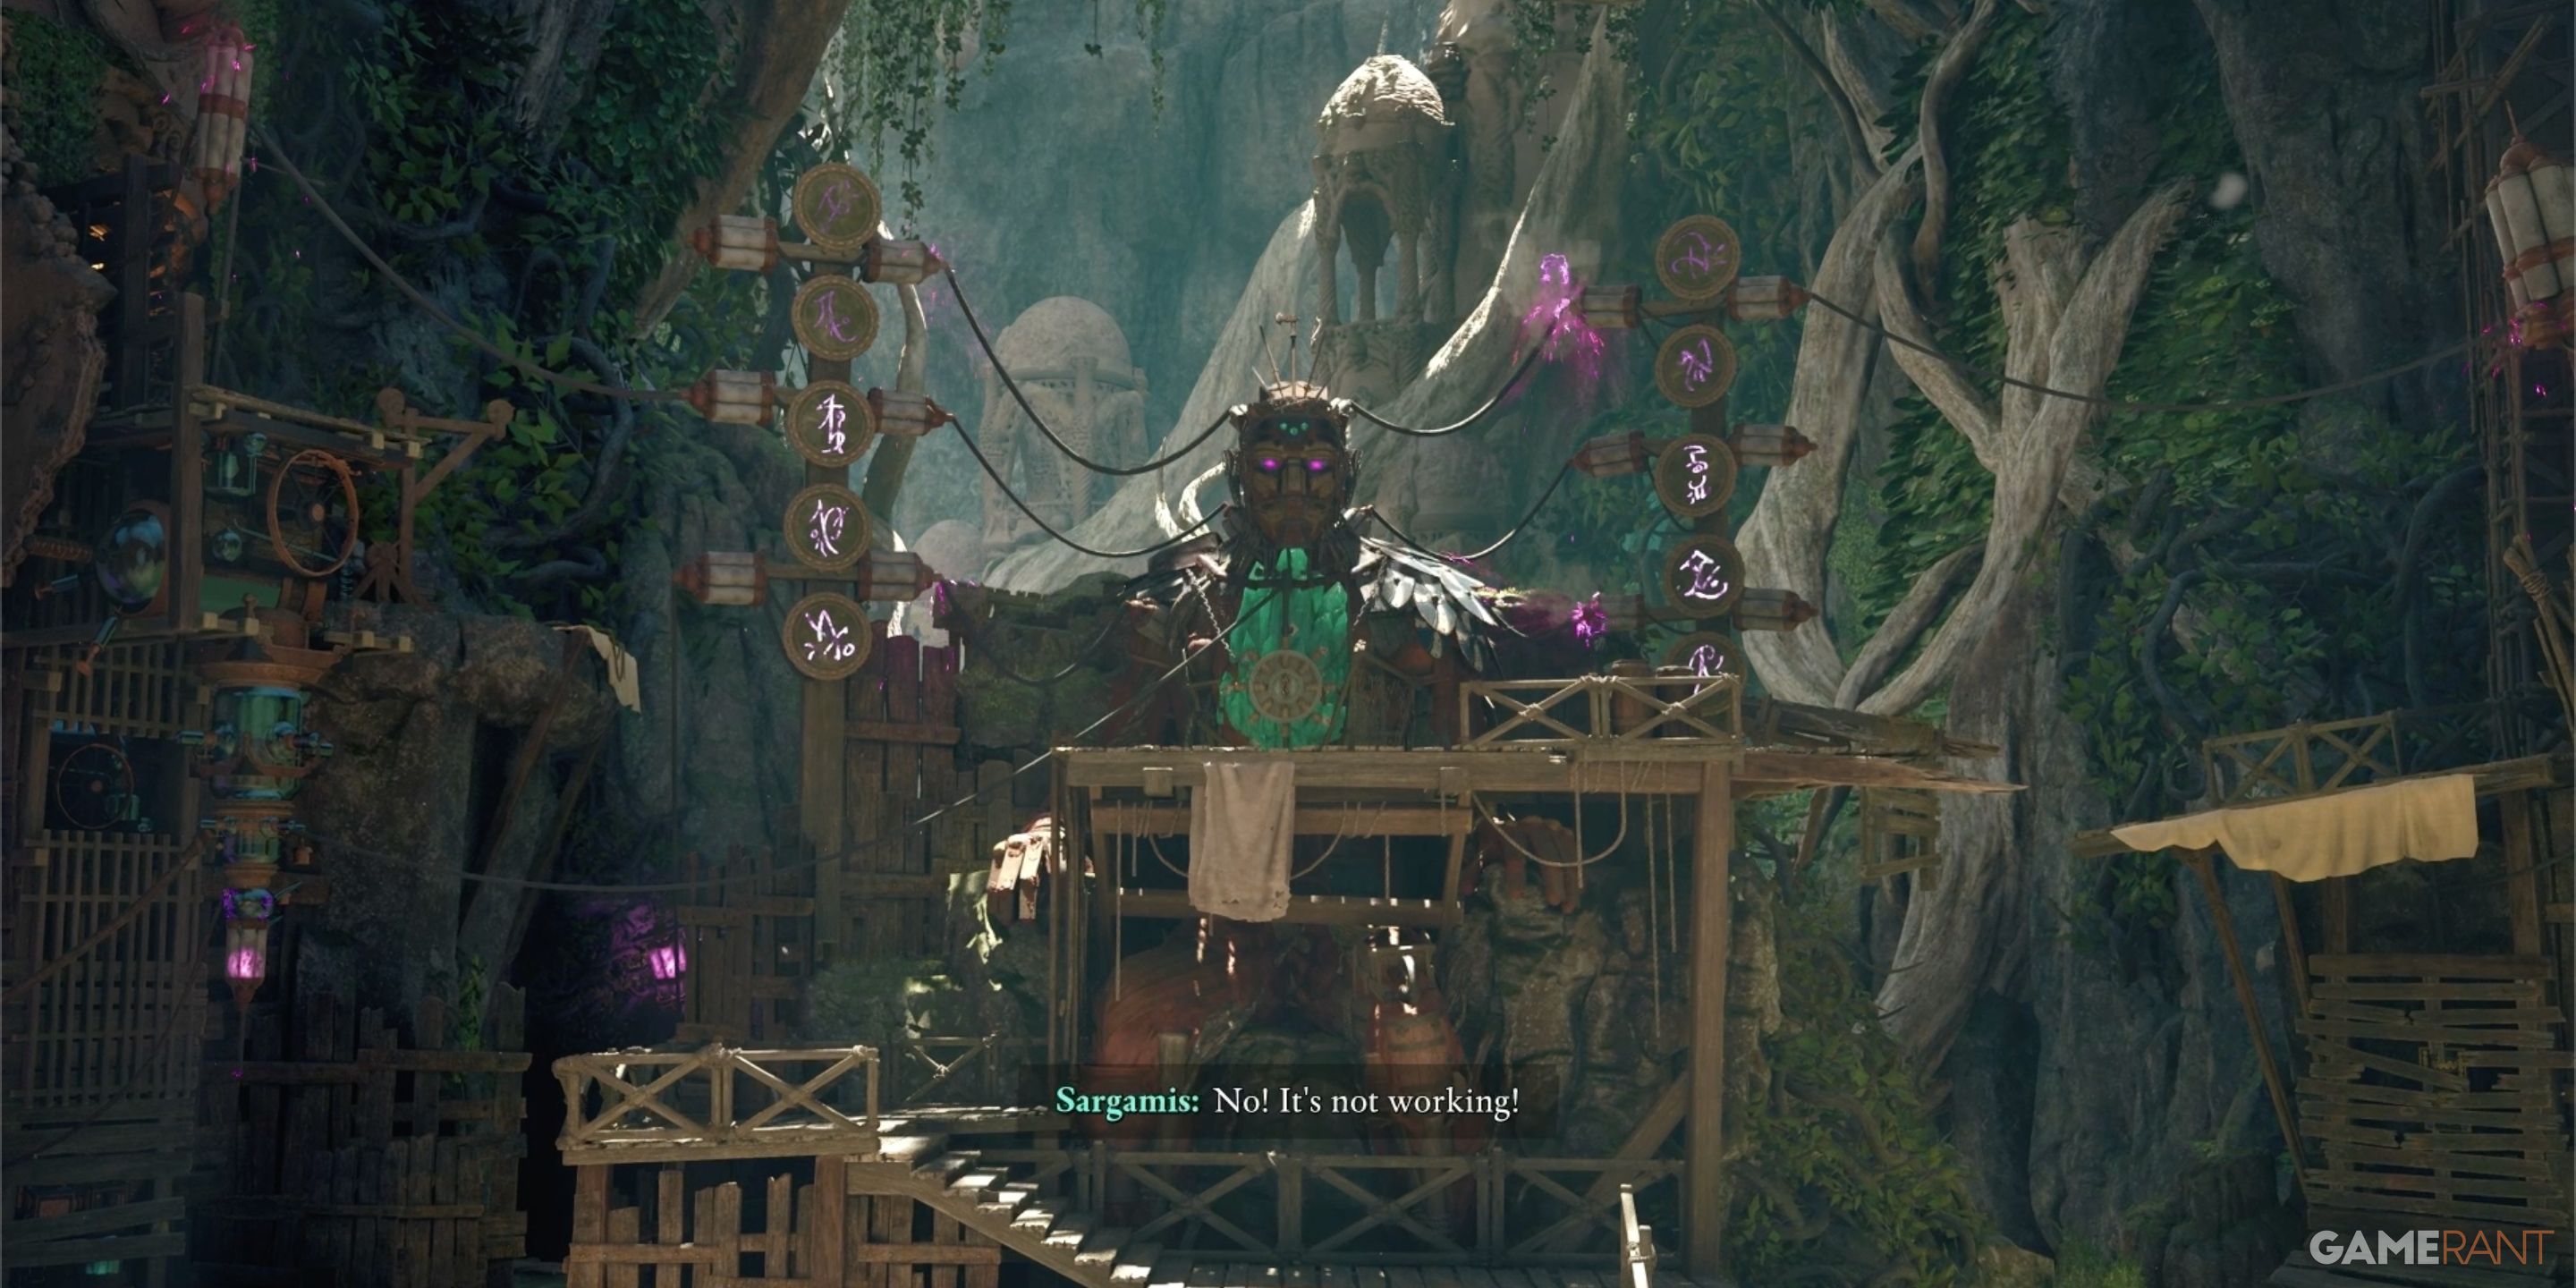
Moving forward, make your way to Sargamis and press the button on the wall to discharge the substance into the structure. Following a short interlude, it becomes clear that the entire undertaking has yielded no results. Unfortunately, Sargamis’s project has faltered. Yet, he proposes another plan. He inquires if you would be willing to invest your spirit in the form. The Oracle strongly suggests this is the crucial element lacking.
I’m sorry to inform you that if you proceed with this action, it will unfortunately lead to your demise. Sargamis will instruct you to position yourself under a massive animancy device. A mission prompt will appear asking you to ponder your impending doom. Once the machine is activated, you’ll encounter the ‘Into the Beyond’ death screen. Leaving the machine before it activates will make Sargamis aggressive towards you.
An alternative approach is to persuade Sargamis that it might not be beneficial to carry on with the experiment. In the dialogue provided by the Court Auger character, there will be an option for this scenario. However, at the moment, it appears that there’s no advantage in taking this path. The Oracle suffers no repercussions for the countless lives he has ended.
Killing the Oracle Sargamis:
While certain characters might think it’s wiser to give Sargamis a chance at redemption, we believe that, from both narrative and gameplay perspectives, it would be more fitting for the Oracle to face the consequences of his actions instead.
Instead of launching hostilities immediately upon your return with the relic, there’s a more eloquent approach for dealing with the Oracle. Follow the initial stages as if you’re assisting him. Insert the Splinter of Eothas into the construct, then press the lever on the wall. But when he requests you to make a sacrifice, it’s crucial to reverse roles, and persuade Sargamis that it is he who should be sacrificed in order to resurrect Eothas.
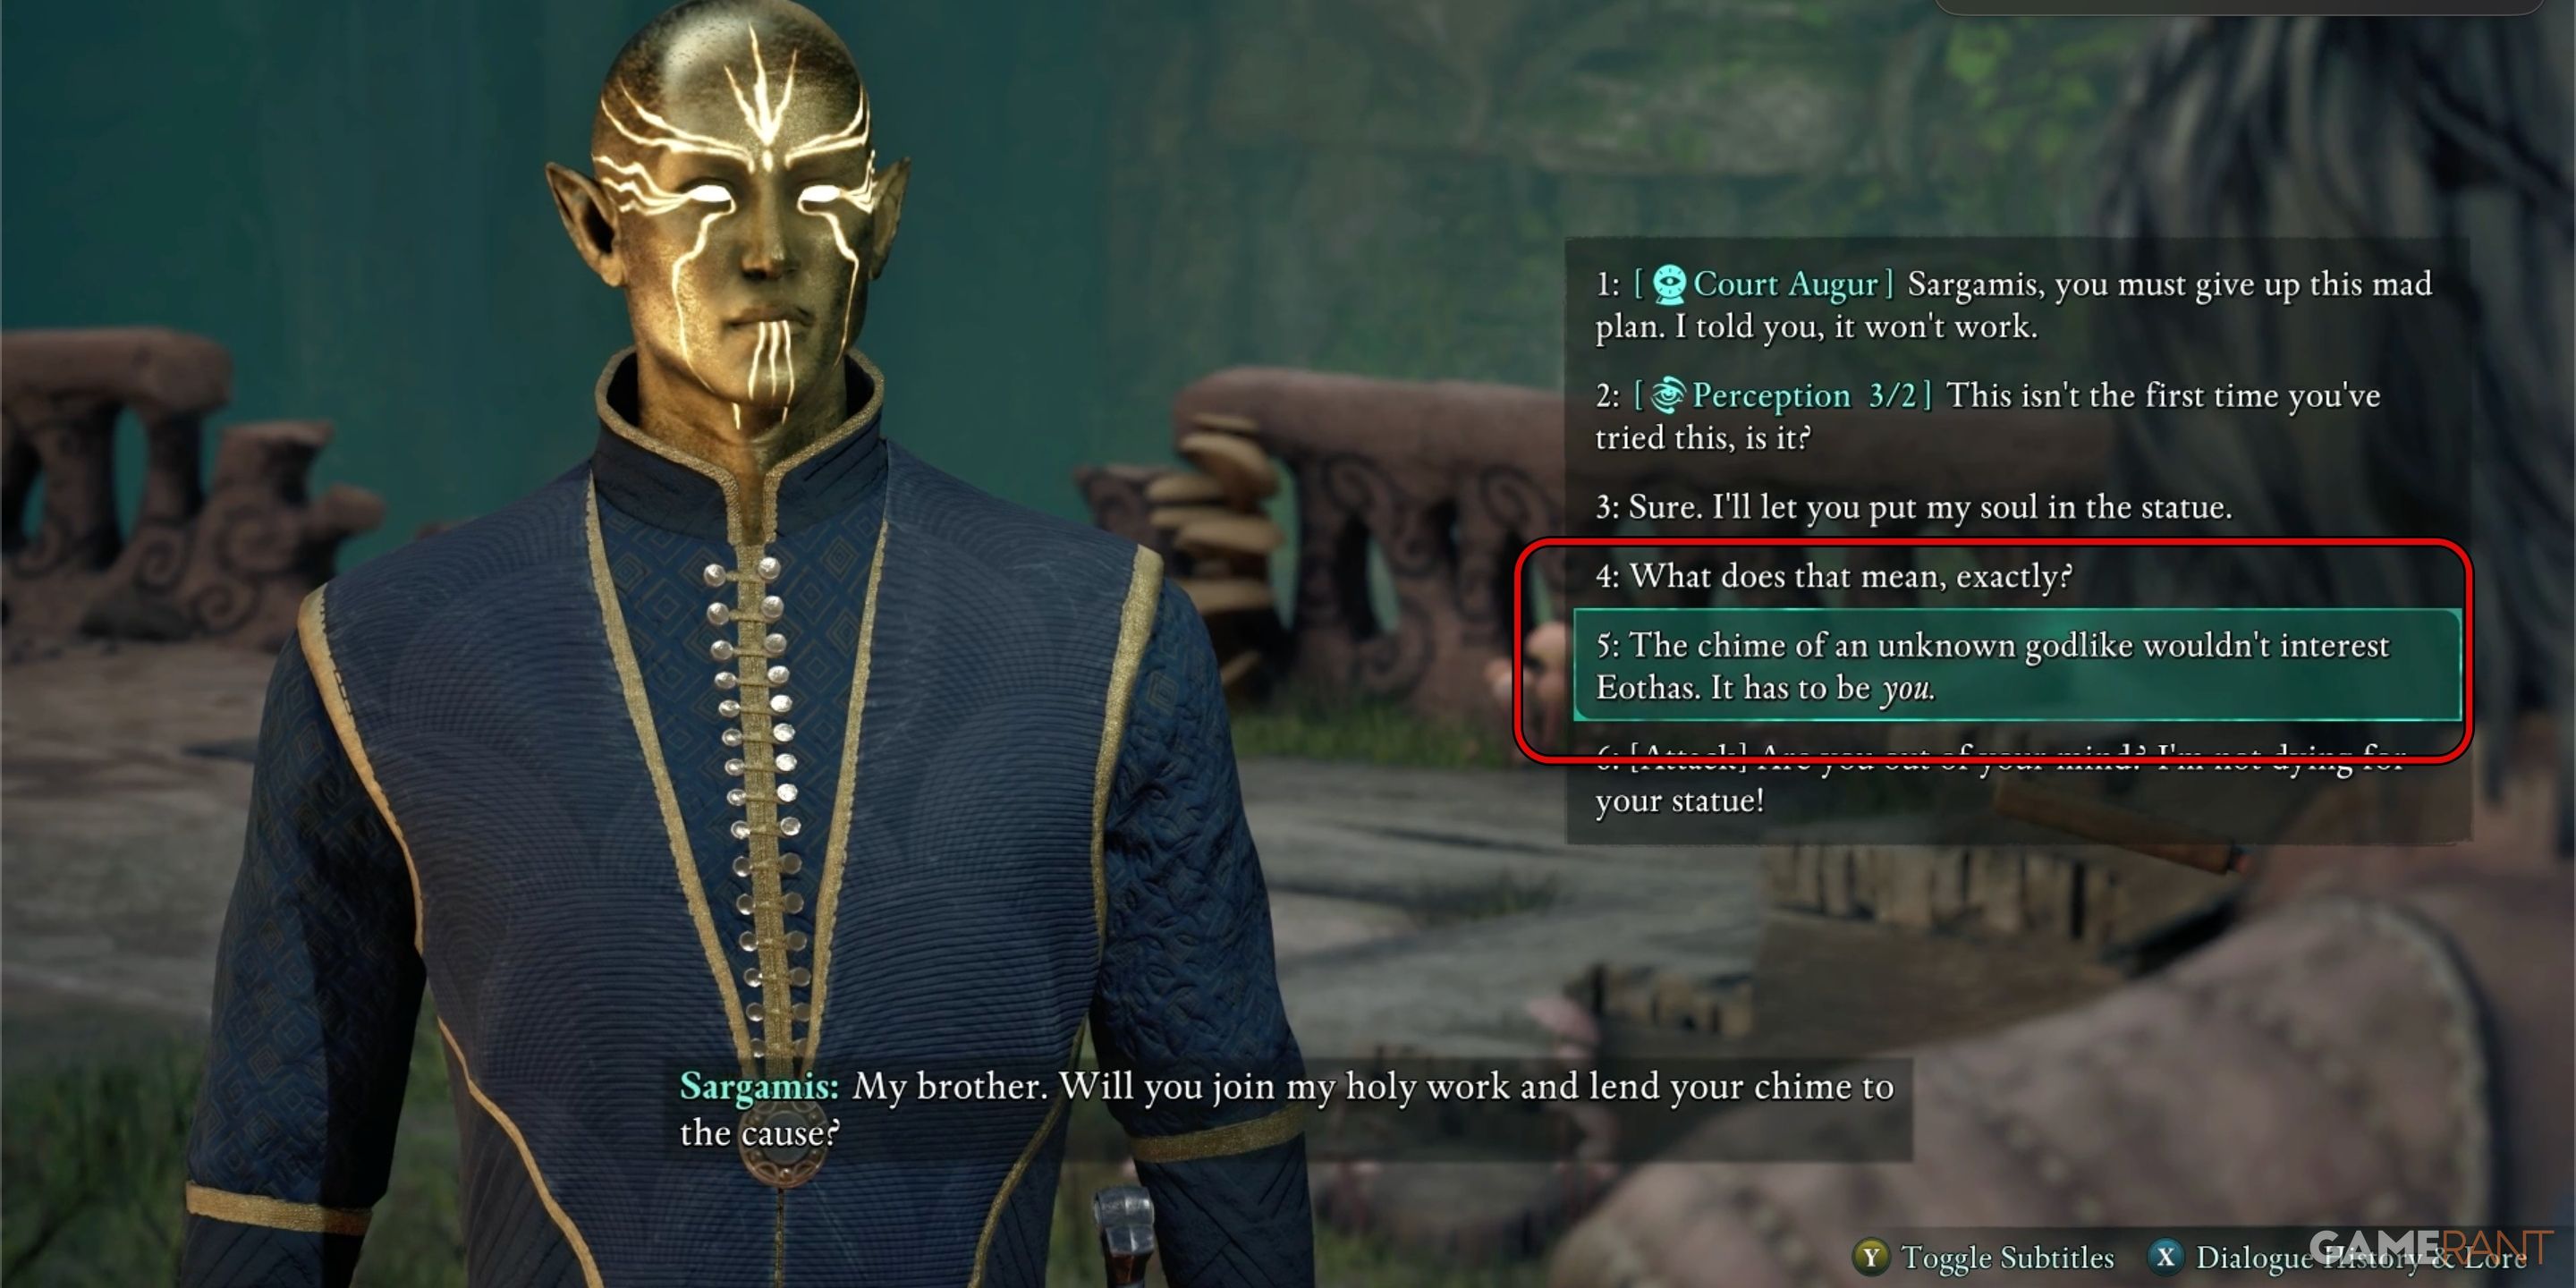
Choose the following dialogue options:
- “The chime of an unknown godlike wouldn’t interest Eothas. It has to be you.”
- “Eothas didn’t keep me alive for 600 years. It has to be you.”
To get Sargamis to transfer his spirit into the new body, he needs to position himself under the animancy machine. Once there, all you need to do is press the button on the upper level. You can find it by following the quest marker.
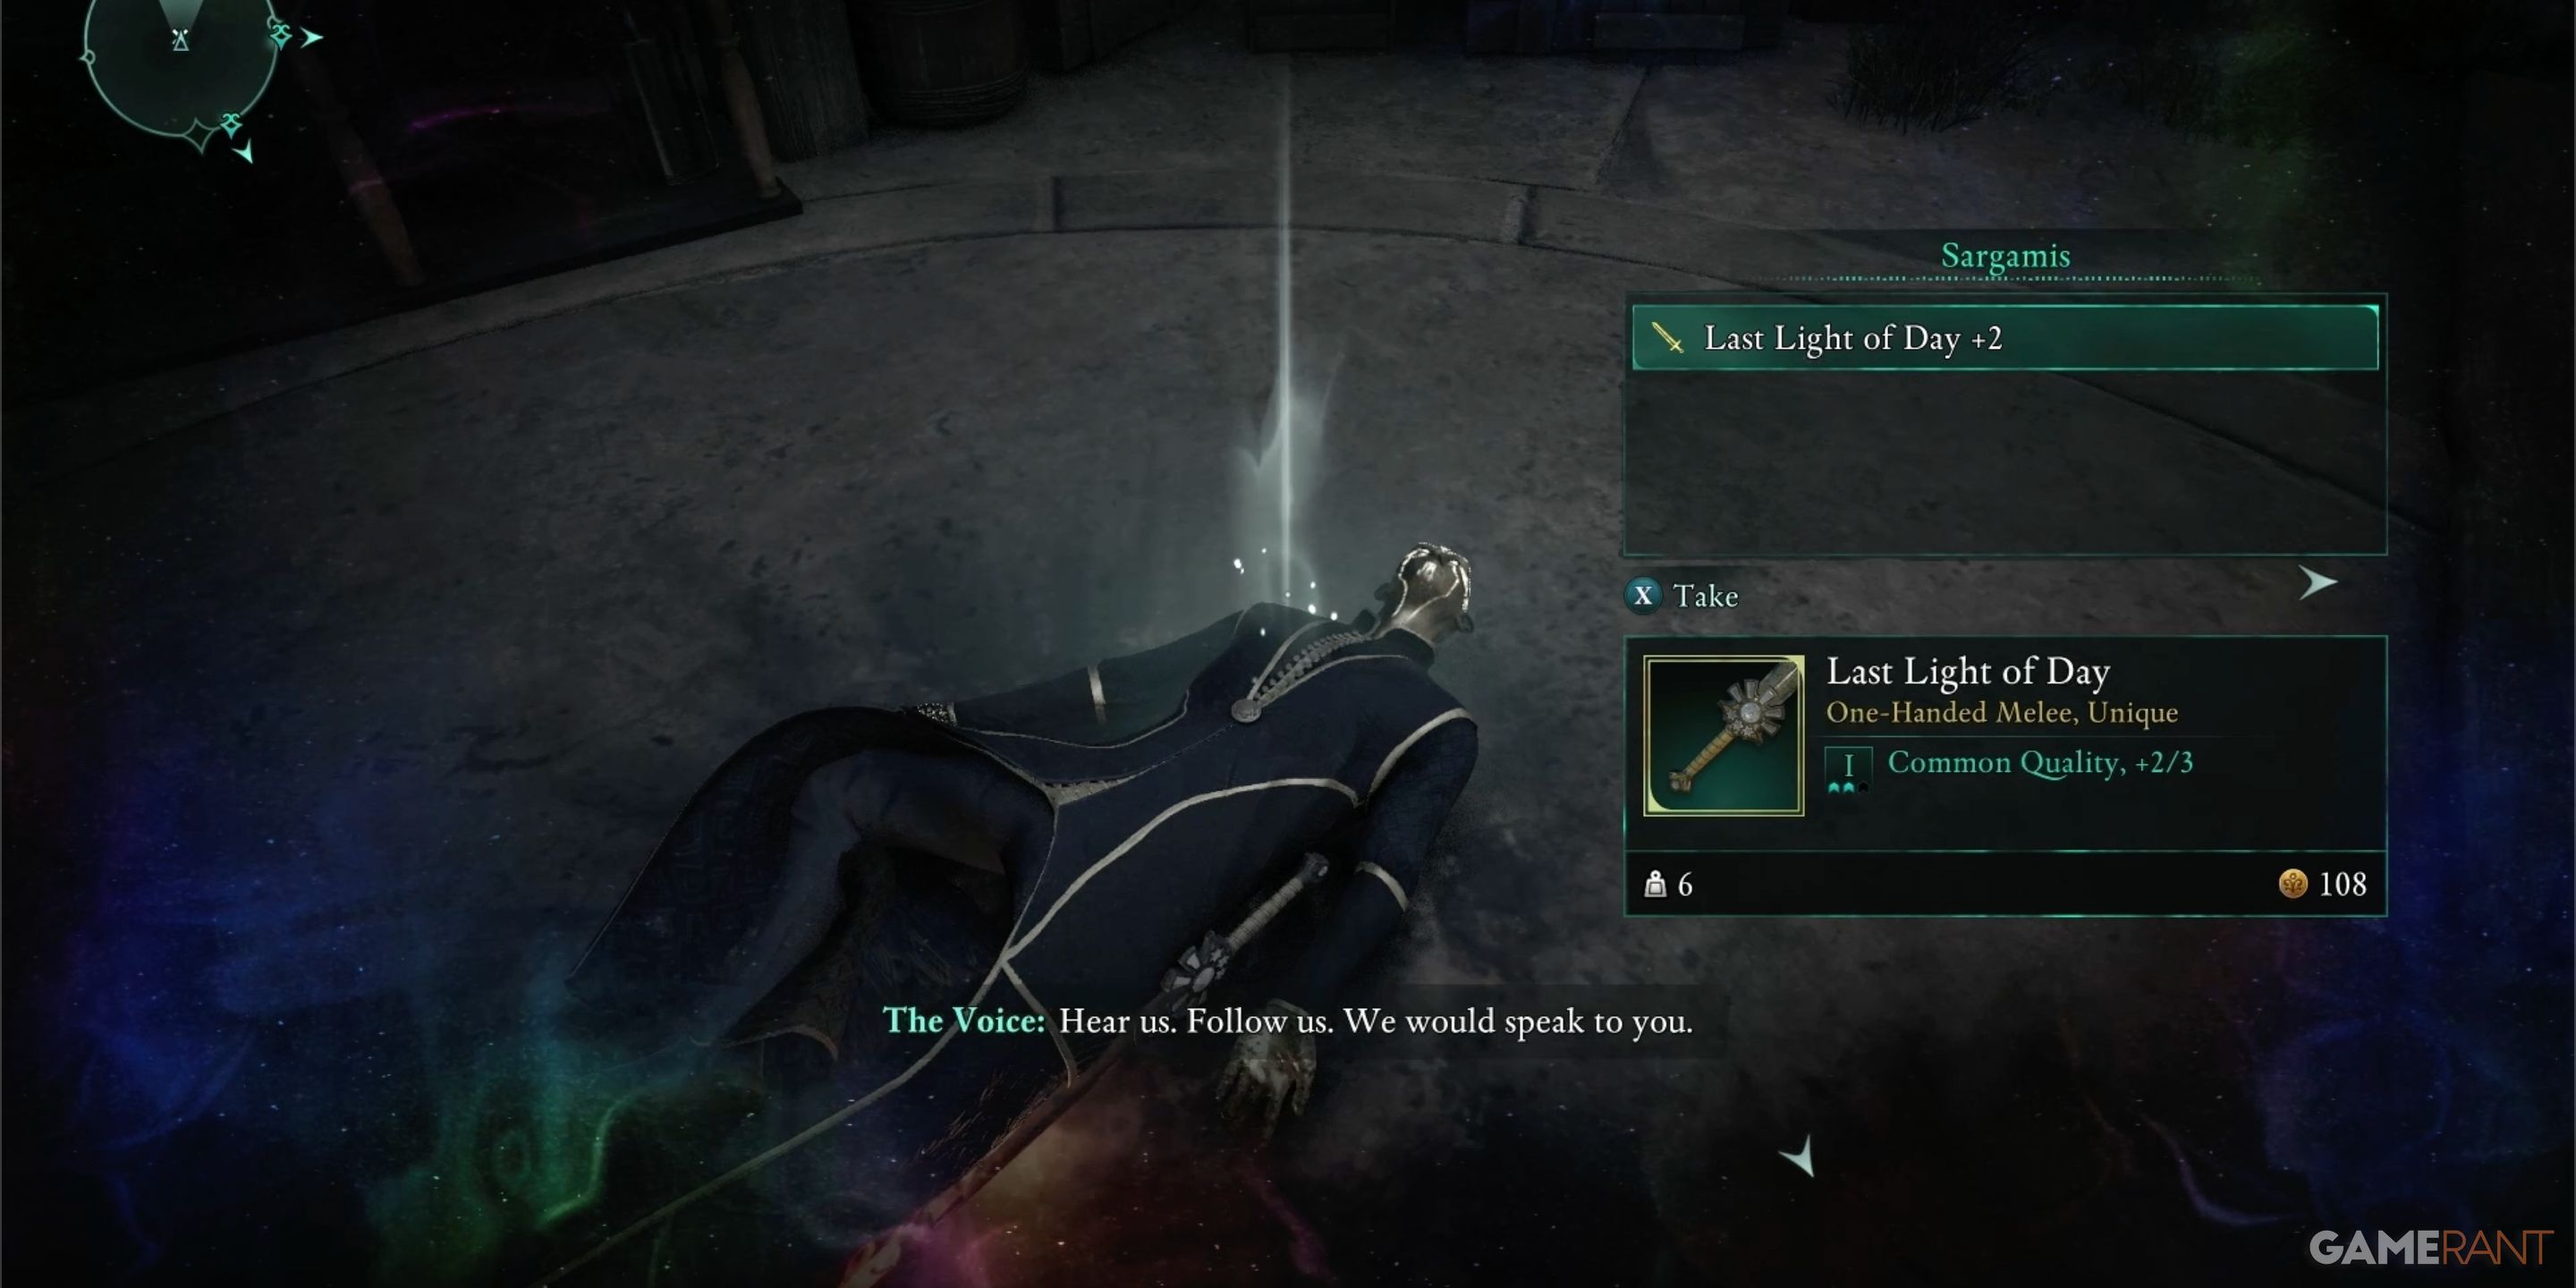
After I’ve taken down Sargamis, don’t forget to snatch up the “Last Light of Day +2” from his corpse. This bad boy is hands-down the best early-game weapon, and it might just be the finest weapon in this game! You’ll have a chance to grab it if you manage to defeat him fair and square in regular combat.
Should You Give the Body to the Voice?
After wrapping up with Oracle, the inner voice prompts you to ponder over granting them control of your physical form once they are released. Whether this is beneficial isn’t explicitly clear at this point. If you give your consent, it seems significant later on in the storyline. However, if you refuse and opt to destroy their body instead, the inner voice will show strong disapproval.
From a curious fan’s perspective, I’m continuously uncovering the lasting effects when speech is given physical form. Once I unearth definitive insights, I’ll be sure to revise my guide to reflect these findings.
Read More
- Clash Royale Best Boss Bandit Champion decks
- Mobile Legends January 2026 Leaks: Upcoming new skins, heroes, events and more
- Clash Royale Furnace Evolution best decks guide
- Vampire’s Fall 2 redeem codes and how to use them (June 2025)
- Best Hero Card Decks in Clash Royale
- Mobile Legends: Bang Bang (MLBB) Sora Guide: Best Build, Emblem and Gameplay Tips
- Best Arena 9 Decks in Clast Royale
- Clash Royale Witch Evolution best decks guide
- Brawl Stars Steampunk Brawl Pass brings Steampunk Stu and Steampunk Gale skins, along with chromas
- Brawl Stars December 2025 Brawl Talk: Two New Brawlers, Buffie, Vault, New Skins, Game Modes, and more
2025-02-13 23:29