Title Guide: Maximizing Your Advantage in ‘The First Berserker: Khazan’
In the game ‘The First Berserker: Khazan’, traditional RPG elements like character leveling and shop-bought gear are combined with exclusive collectibles – Soulstones and Jarlings. Soulstones boost your hero’s key stats such as stamina, damage output, and damage multiplier. On the other hand, Jarlings offer you uncommon items as you amass more of them. This guide will lead you to each Soulstone and Jarling location, helping you reach Khazan’s peak performance in the game.
NOTE: This guide is a work in progress and will be updated as we uncover more secrets
How to Get All Khazan Soulstones & Jarlings Guide (Locations)

There are 100 Soulstones and 44 Jarlings for you to find in The First Berserker Khazan.
Soulstones refer to the red crystals that can be obtained by smashing them using a melee weapon or, at times, with the javelin when they’re out of reach from Khazan. In contrast, Jarlings are small glowing containers that can be gathered by breaking secret/hidden pots. Once found, these are sent to the Danjin NPC in the Crevice.
In the game The First Berserker Khazan, accumulating all Soulstones earns you the Agent of the Netherworld achievement or trophy, whereas gathering all Jarlings bestows upon you the Jar Enthusiast achievement or trophy.
Keep in mind that you’ll only encounter Jarlings during specific missions following the completion of the bonus mission titled “Jar Enthusiasts.” Skipping this mission means that these jars won’t show up in your game while you play through the main story.
All Soulstones and Jars Location Guide in First Act of Revenge Mission – The First Berserker Khazan
All Soulstones Locations in the First Act of Revenge Mission
First Soulstone
As a dedicated adventurer, I’d guide you from Central Storehouse Blade Nexus. Take the trail to your left and keep going until it ends at a sealed door flanked by fearsome wolves and an elite adversary on opposite sides. Overcome this formidable foe, and you’ll discover the first soulstone nestled on a ramp, hidden to the left side of the area.
Second Soulstone

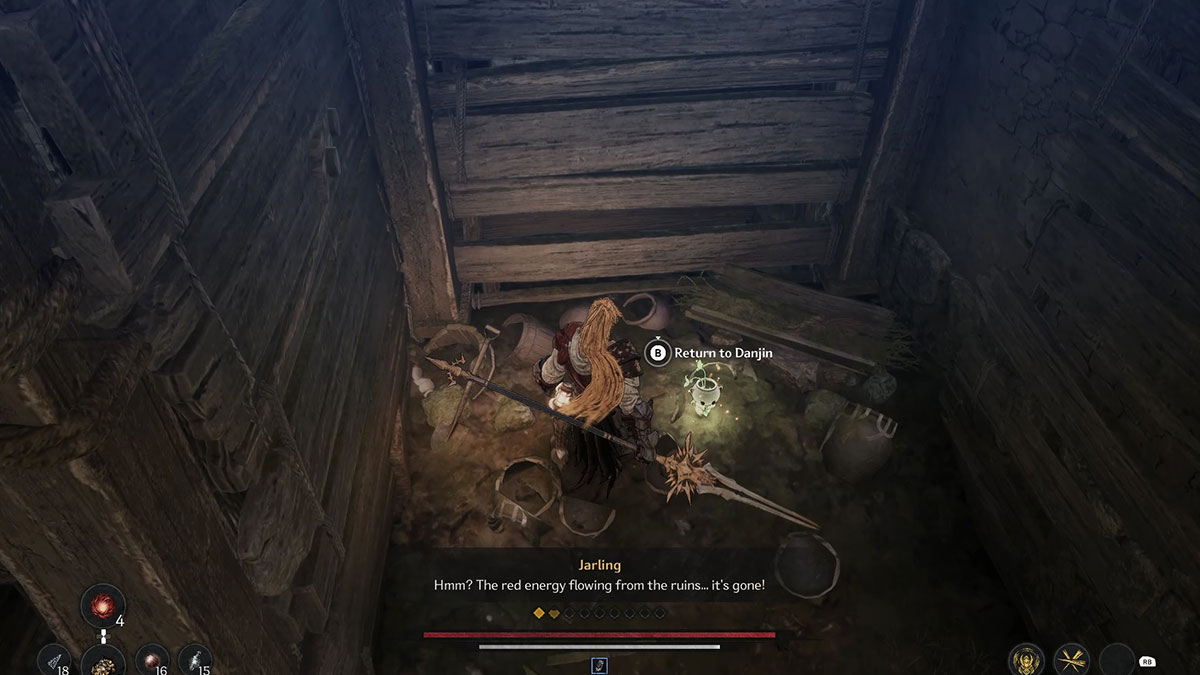
In a fortified wooden chamber close to the ambush site, you’ll discover the second soulstone. Make sure to defeat all adversaries before entering the room for safety and to obtain the soulstone.
All Jarlings Locations in First Act of Revenge Mission
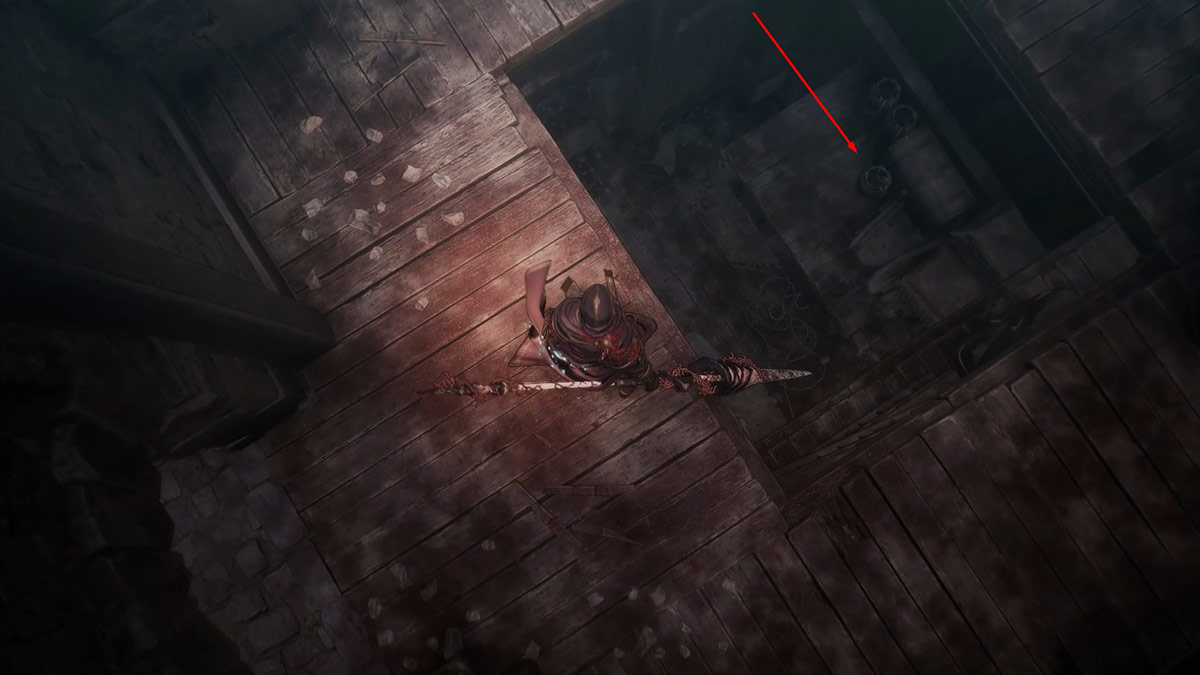
In my gaming adventure, I stumbled upon a unique Jarling collectible hidden within the First Act of Revenge. This elusive treasure can be found close to the initial soulstone. As you’re about to open the door that confronts an elite enemy, remember to climb the ladder right before the wolves appear. Once you reach the upper floor, jump down to the opposite side of the house through a gap, and there you’ll discover the Jarling tucked away in a corner.
All Soulstones and Jars Location Guide in Forgotten Temple Mission – The First Berserker Khazan
All Soulstone Locations in Forgotten Temple Mission
First Soulstone
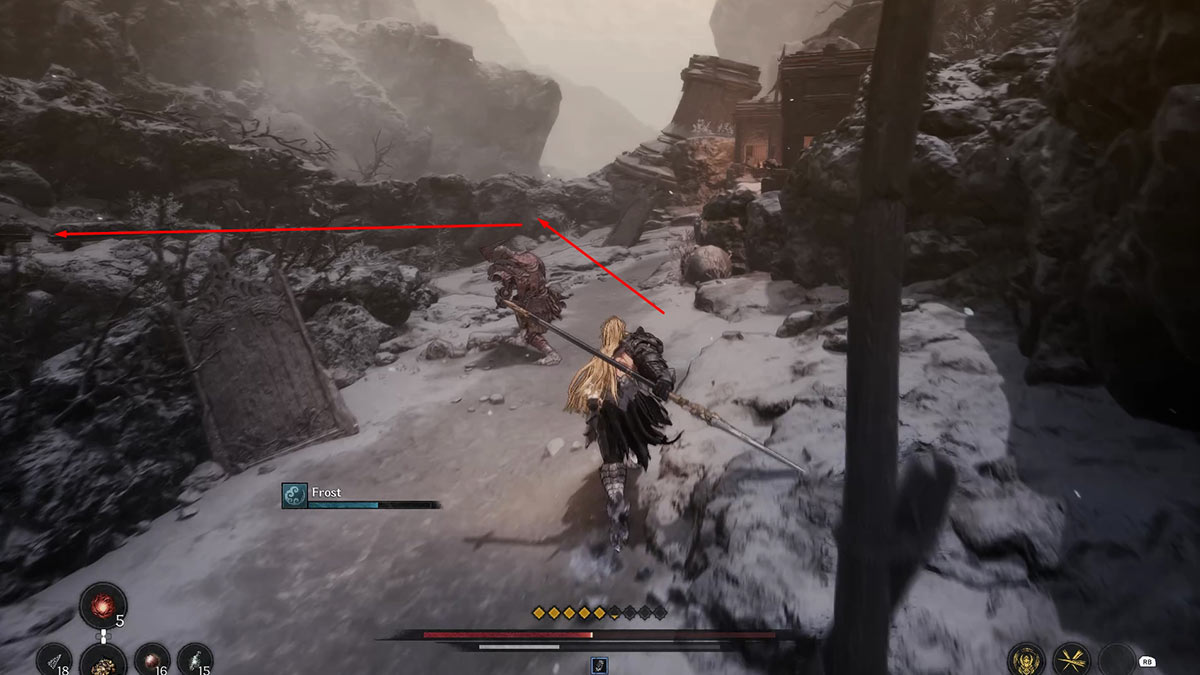
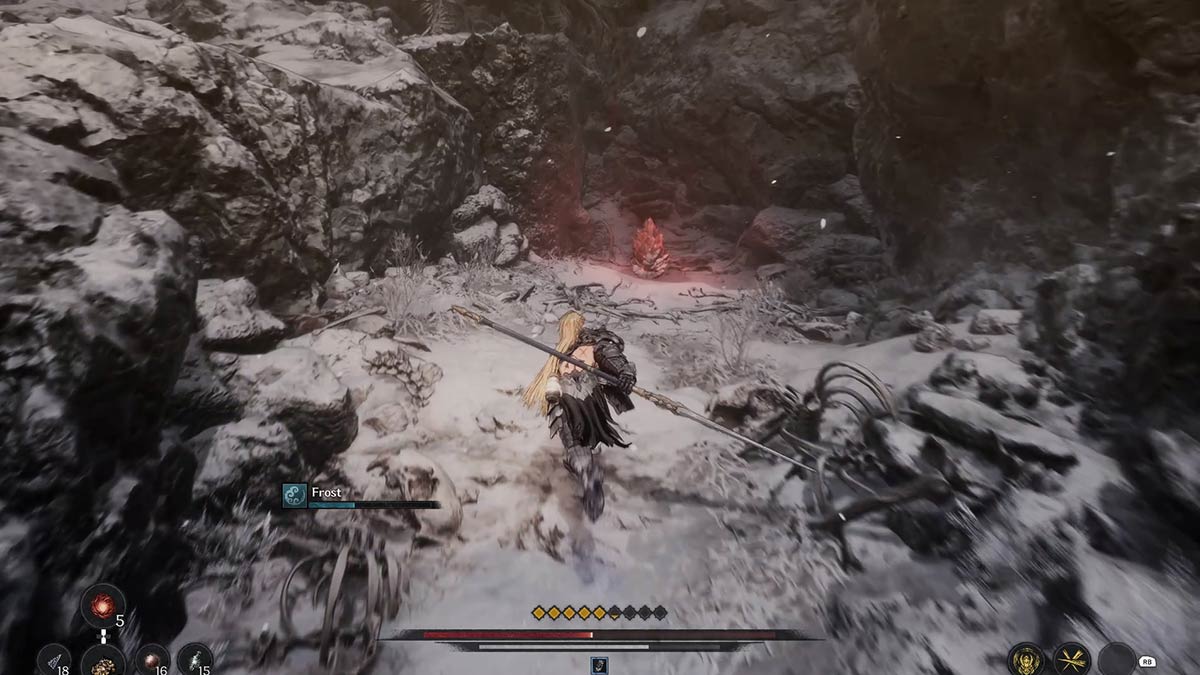
In the Forgotten Temple mission, the initial Soulstone is hidden in a chilly region. Prior to entering the temple, you’ll encounter a large enemy wielding a greatsword on the path. The route to your right will guide you towards the temple, while the one to your left will lead you to the Soulstone.
Second Soulstone
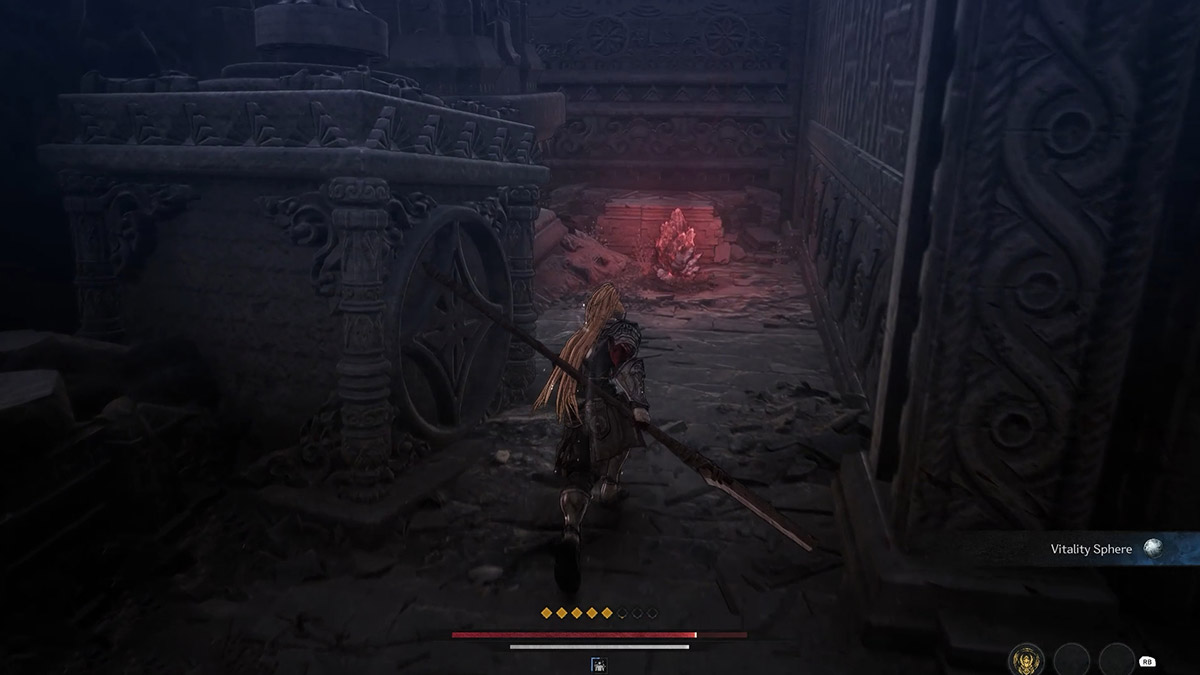
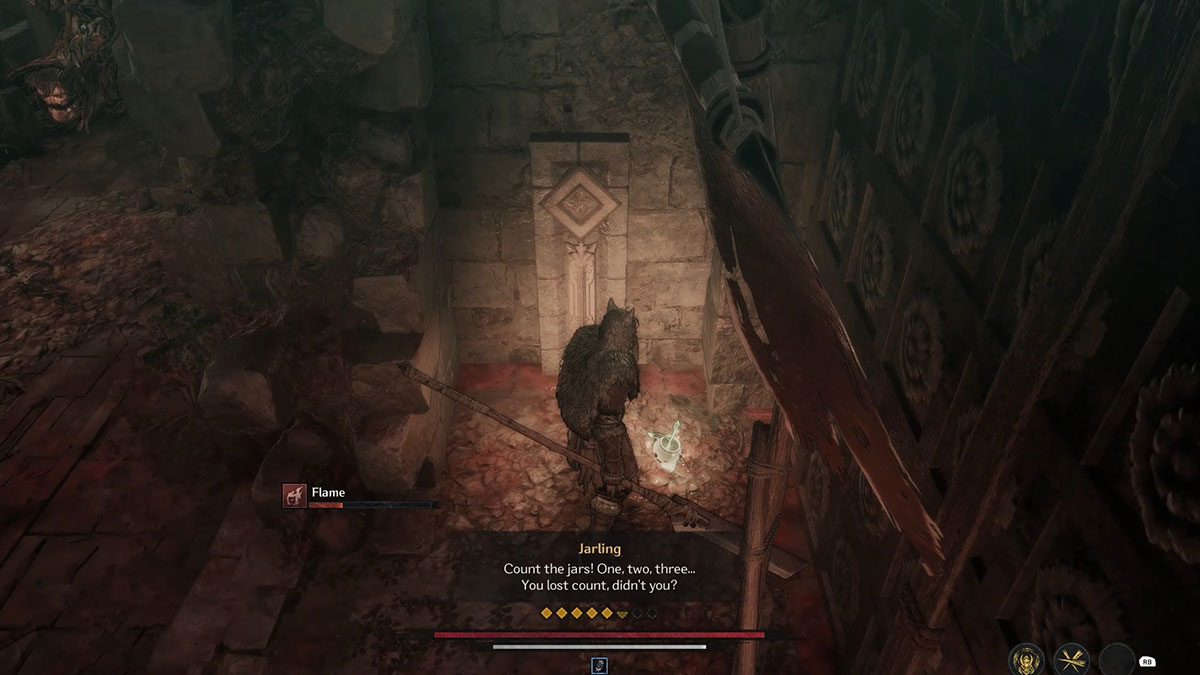
Inside the temple, you’ll discover the second soulstone near a massive statue with three crystals at its foot. Move towards the statue’s right side, where you’ll spot two pots tucked away in the corner. Before exploring the pots, take out any enemies lurking in this region first. Once they’re defeated, break the pots to uncover the hidden second soulstone.
Third Soulstone

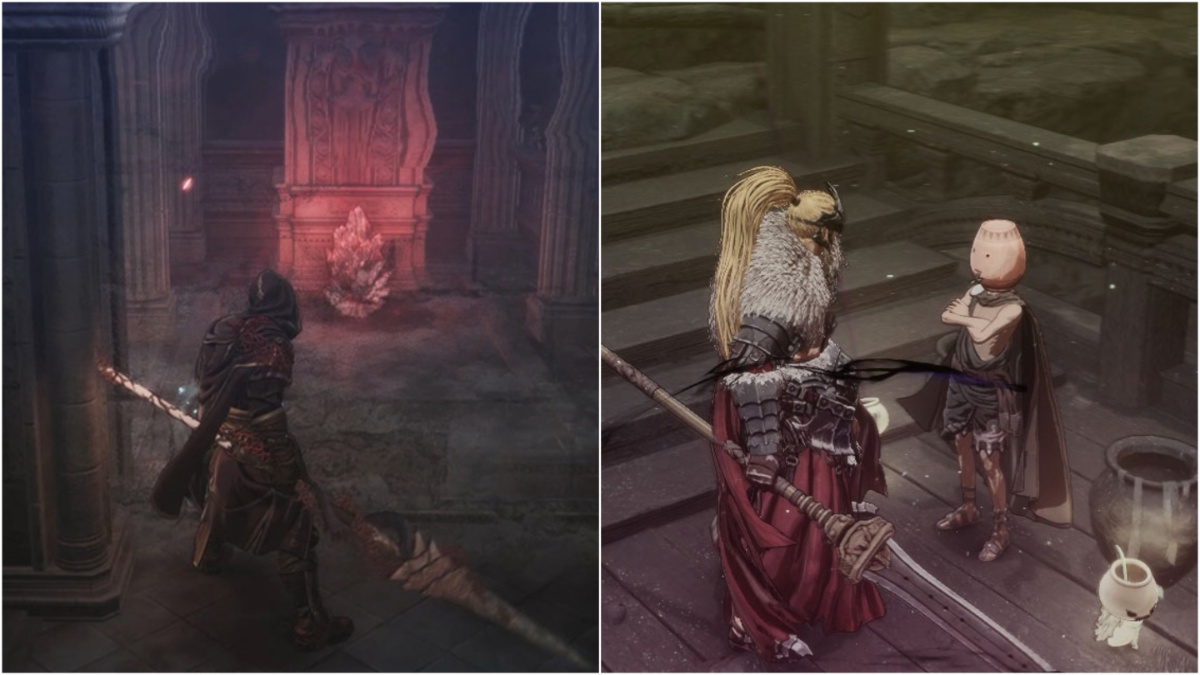
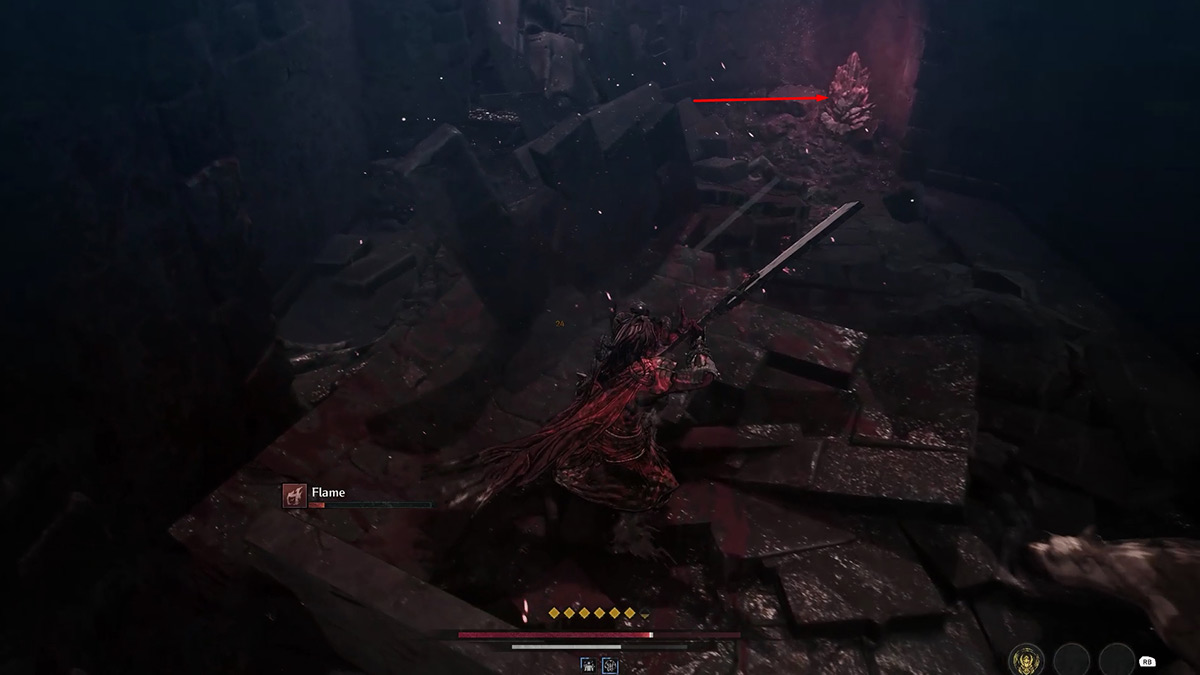
In the Forgotten Temple, you’ll find the last soulstone secretly tucked away behind the intricate second statue riddle. To access it, first, conquer the powerful adversary that stands in your way.
After you figure out the riddle of the statue, the soulstone will become visible. However, to shatter it, you’ll have to employ the Javelin because it will be beyond Khazan’s reach in a melee fight.
All Jarling Locations in Forgotten Temple Mission

In the Forgotten Temple mission, there’s just a single item known as a ‘jarling’. You can obtain it by disarming every energy device linked to the netherworld.
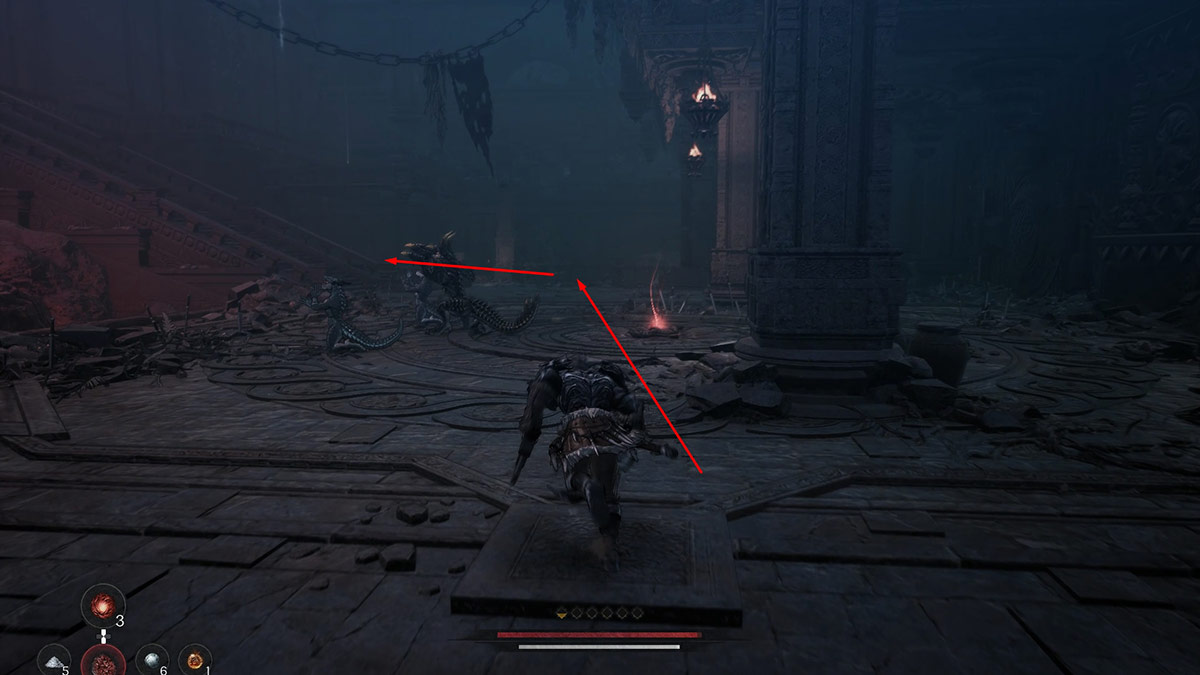
Following that, you’ll need to confront the Spirit of Adversity on the upper floor. However, prior to your journey there, please turn towards your left. You will come across a pot situated at the culmination of the pathway next to the staircase.
All Soulstones and Jars Location Guide in Night of Tragedy Mission – The First Berserker Khazan
All Soulstones Locations in Night of Tragedy Mission
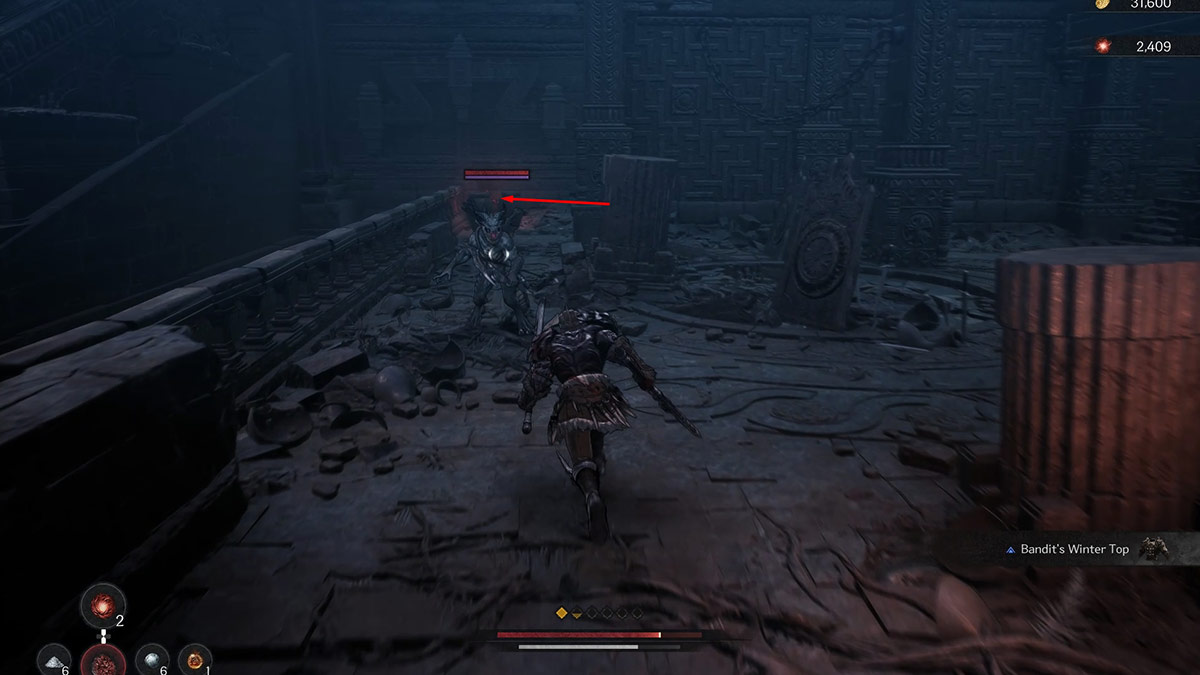
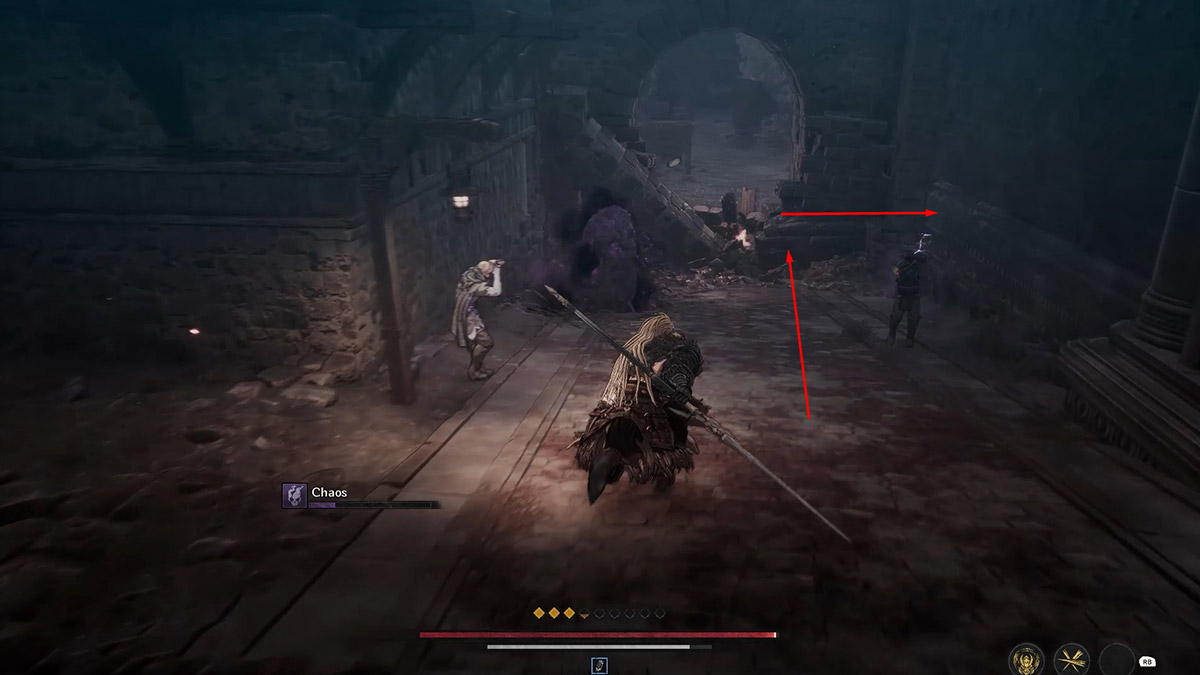
First Soulstone location
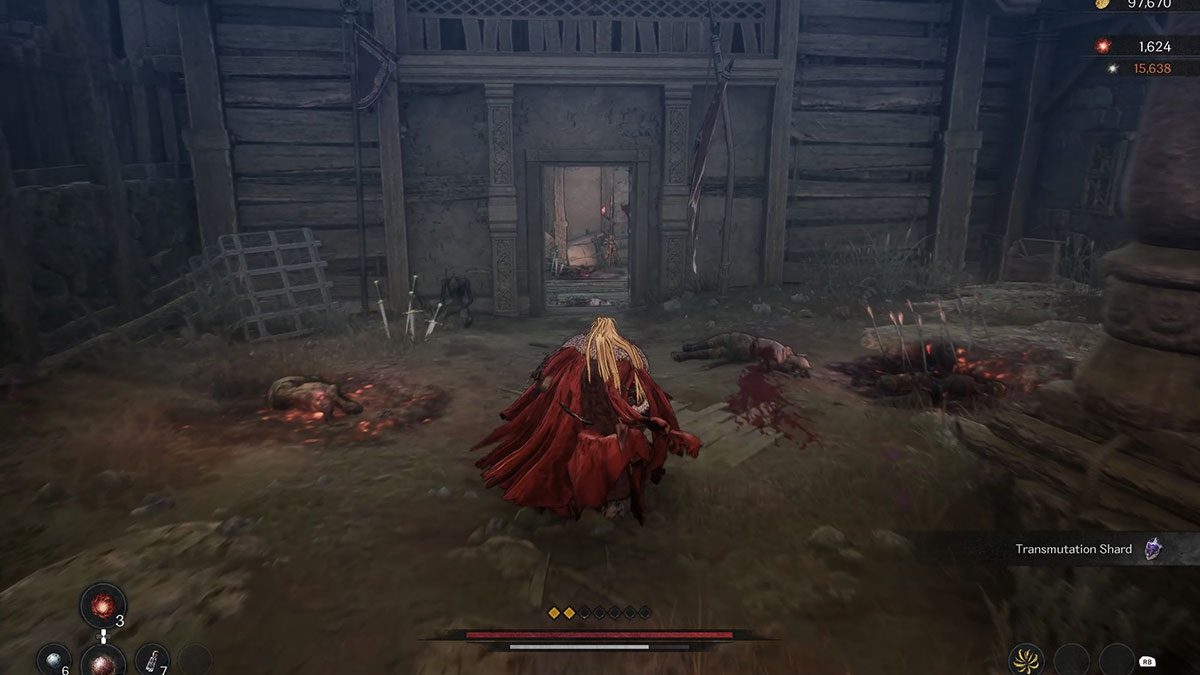
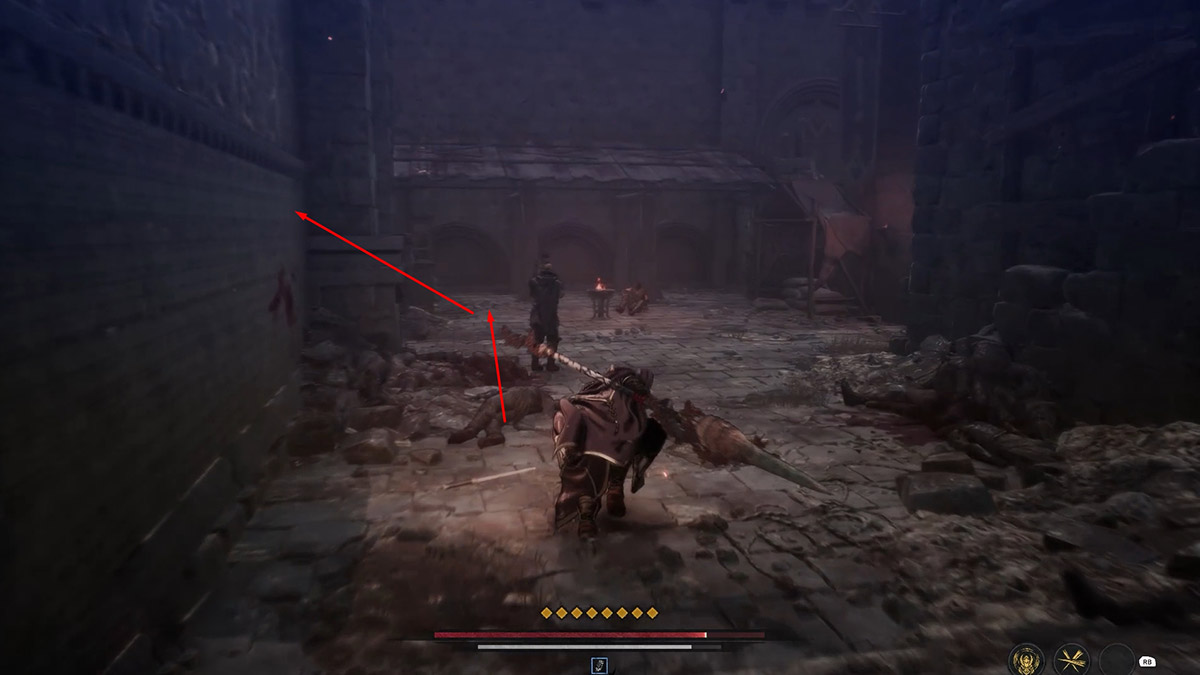
In the Night of Tragedy mission, the first Soulstone is hidden within a chamber that lies beneath where Khazan’s enemies launch surprise attacks. Upon entering this chamber, you’ll encounter an undead adversary wielding a greatsword. Overcome it and retrieve the Soulstone.
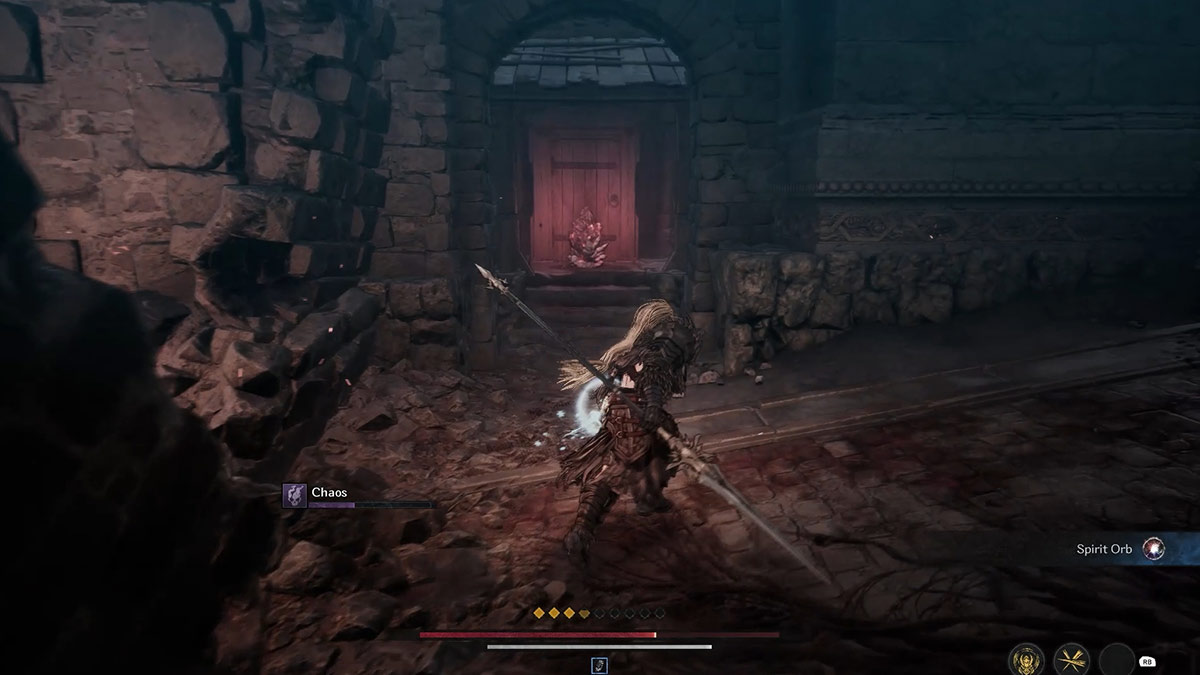
Second Soulstone location

In the following region, you’ll discover the second Soulstone, directly proceeding from the space where you retrieved the initial one. After exiting the chamber that housed the first Soulstone, continue along the path ahead.
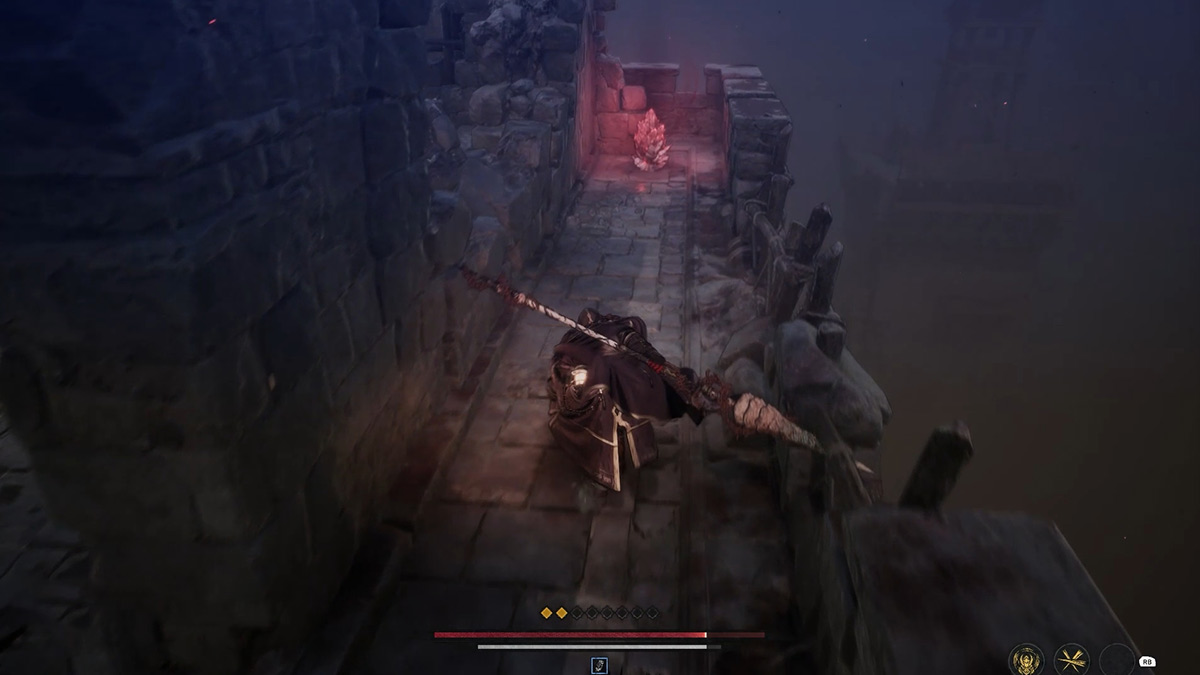
After that, lower yourself from the overhang, and you’ll discover the second soulstone situated beneath the bridge close to some steps. It won’t shatter with a melee weapon because it’s beyond Khazan’s reach. Instead, arm yourself with a javelin in this location.
All Jarling Locations in Night of Tragedy Mission

In the Night of Tragedy mission, there’s just one Jarling. You’ll spot it close to where the second soulstone is located. Simply head to the far end of the stairs, and you’ll see a couple of broken pots on the ground. Smash them, and the Jarling will be revealed!
All Soulstones and Jars Location Guide in Blacksmith’s Heirloom Mission – The First Berserker Khazan
All Soulstone Locations in Blacksmith’s Heirloom Mission
First Soulstone location

As I embarked on this quest, I noticed the starting point was my launching pad. On the very left of it, a stone monkey adversary stood defiantly. After subduing this foe, I shifted my gaze to the left, towards a towering wooden construct. Nestled in the corner near that structure, I chanced upon the first Soulstone, hidden within the Blacksmith’s Heirloom.
Second Soulstone location

The next Soul Stone is situated close to the final Blade Nexus spot. Upon vanquishing an airborne adversary, you’ll notice steps on your left. Ascend those steps and locate the Soul Stone at the culmination of the trail.
All Jarling Locations in Blacksmith’s Heirloom Mission

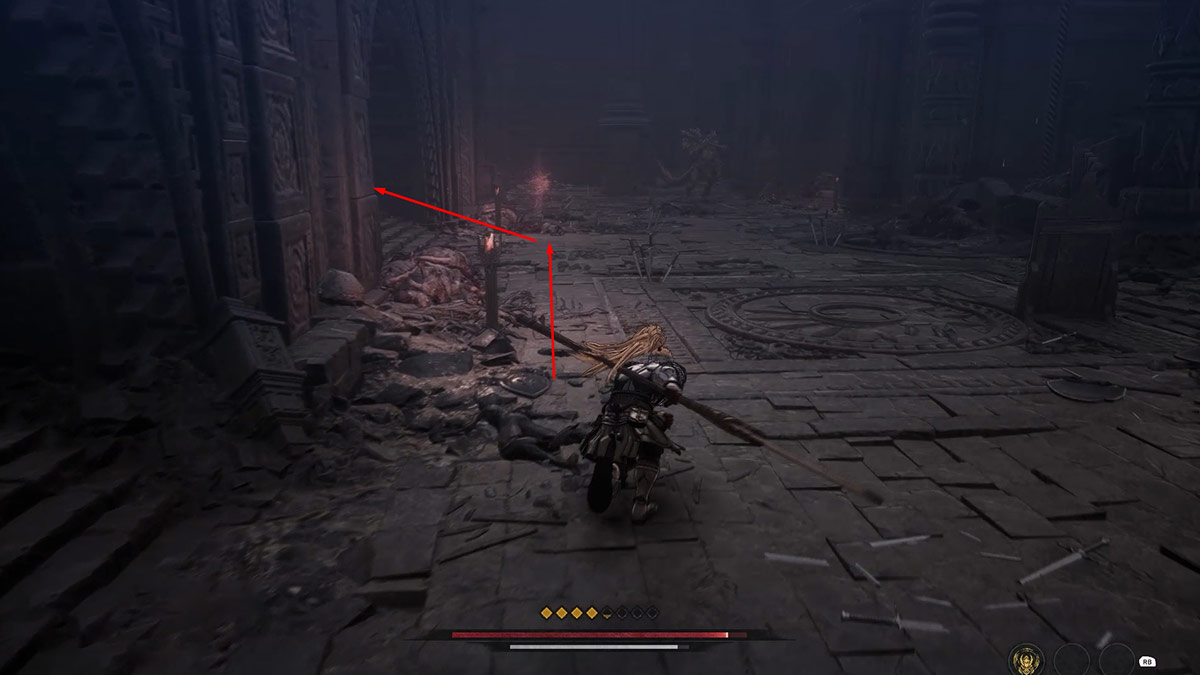
In this mission, there’s a hidden item that you should be aware of. After gathering the initial soulstone, search for it immediately. As you exit the first room in this mission, glance to your right on a raised area, and you will spot a deceased body emitting a red aura.
As you approach it, a hidden adversary will launch an ambush on you. Overcome this adversary and in the nearby corner, you’ll stumble upon several pots; among them, one will contain the Jarling.
All Soulstones and Jars Location Guide in Kaleido Mission – The First Berserker Khazan
All Soulstone Locations in Kaleido Mission
First Soulstone location

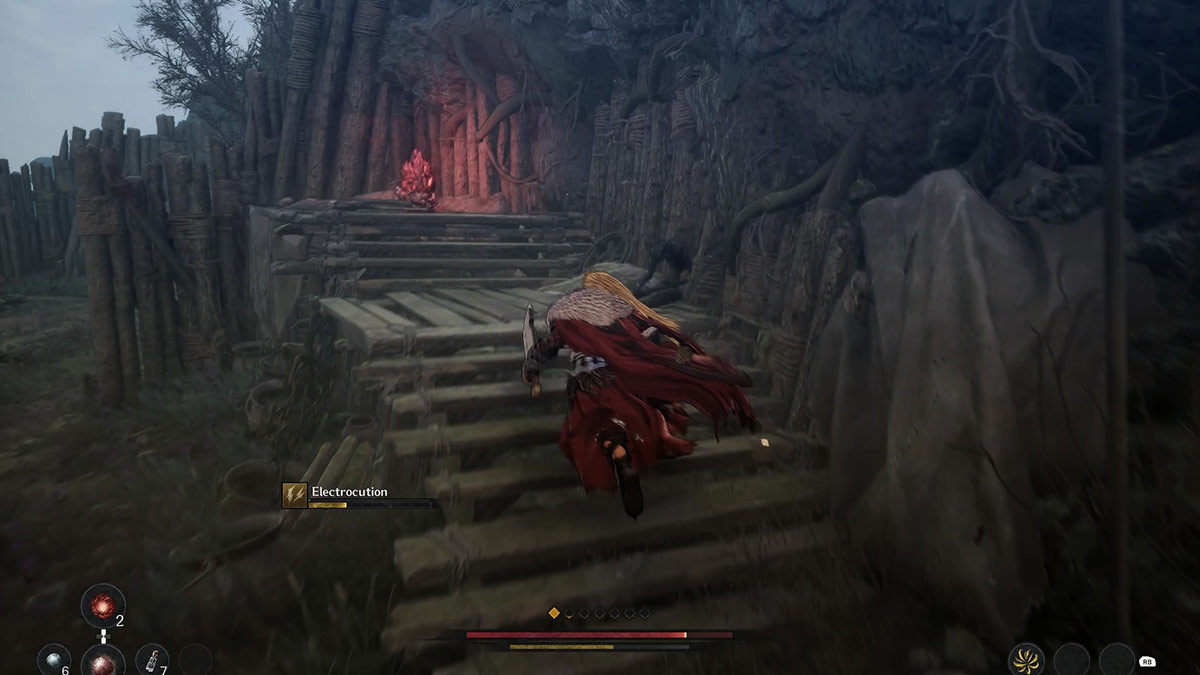
Once you’ve navigated past the fiery apparatuses, you’ll encounter a set of staircases ascending towards a disabled energy source in the Netherworld. The prized soulstone lies at its summit, though for a proper view, climb the stairs and vanquish the adversaries that lie ahead.
Then, stand near the ladder, and you will have a direct javelin shot that will break the soulstone.
All Jarling Locations in Kaleido Mission

In the adjoining room where you discovered the soulstone, you’ll find the jarling. As you descend the staircase, notice the pillars holding up the structure. The pillar on the left side has a pot at its foot. Smash this pot and inside, you’ll discover the jarling.
All Soulstones and Jars Location Guide in Veiled Knives Mission – The First Berserker Khazan
All Soulstone Locations in Veiled Knives Mission
First Soulstone location

In the left corner of Bandit’s Citadel Blade Nexus lies a room guarded by a locked gate. Inside this room, you’ll find the initial soulstone required for the Veiled Knives mission. To gain access, navigate to the left, climb up the stairs, and then lower yourself through the ceiling to retrieve the soulstone from above.
Second Soulstone location
You discover the second soulstone as you traverse the path leading to the grand entrance directly before the Bandit’s Citadel Blade Nexus. Upon reaching the highest level within it, you’ll encounter foes and a gaping hole in the floor.
Drop down through it and you will find the second soulstone in the corner.
Third Soulstone location

Right before engaging the boss battle in the Maluca region, you’ll come across the Veil Blade Nexus Throne. Behind this nexus, there’s a large gate that can be activated by interacting with it, opening up the path further.
Turn your gaze to your right side, and there you’ll spot the third Soulstone perched atop a wall. However, to shatter it, you’ll have to employ the Javelin for that task.
All Jarling Locations in Veiled Knives Mission

After navigating past a massive stone ball descending the staircase into a courtyard, you’ll encounter an elite adversary along with a handful of lesser opponents.
Once you’ve vanquished the high-ranking foe in the courtyard, who incidentally possesses the blueprint for crafting the Knight’s Scroll armor set, search for the jarling close to a shattered shield and armor monument. You’ll find several pots and chests scattered around the jarling on the ground nearby.
All Soulstones and Jars Location Guide in Human Xilence Mission – The First Berserker Khazan
All Soulstone Locations in Human Xilence Mission
First Soulstone location

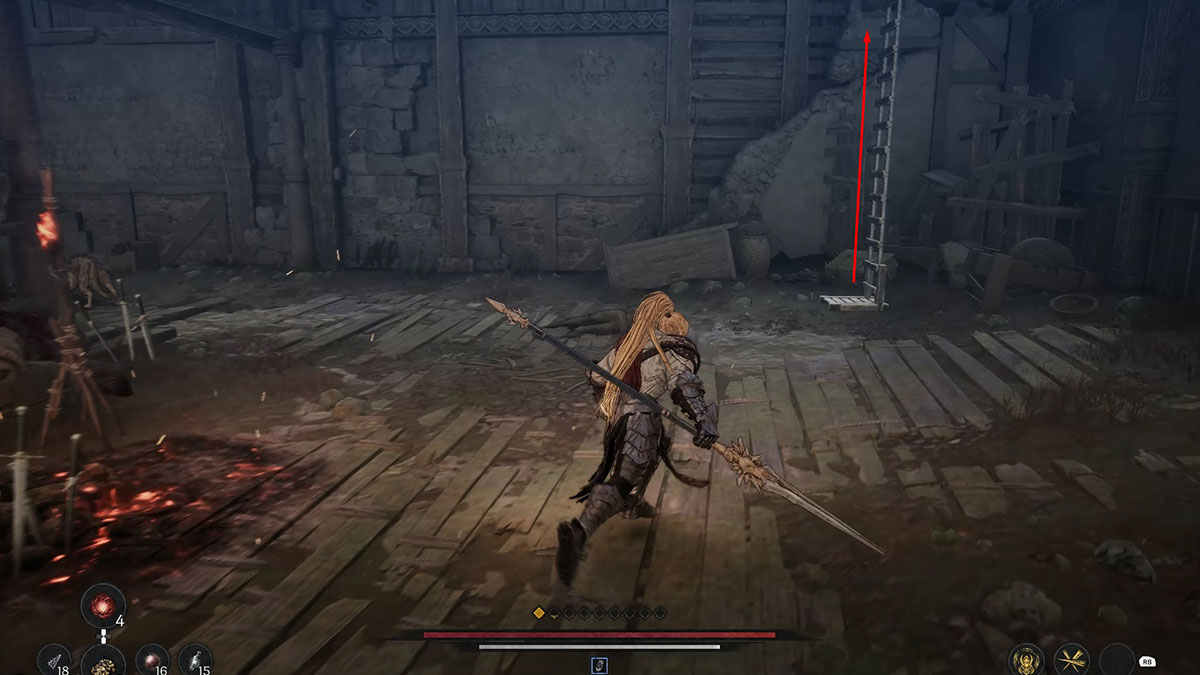
Following your battle against the powerful adversary armed with a hammer by the deteriorating energy machine from the underworld, you’ll then need to ascend a nearby ladder. Upon reaching the top of the ladder, glance to your right, and you will come across a statue that is holding a red crystal in both its hands.
Use the javelin to break the crystal and collect the first soulstone in the Human Xilence mission.
Second Soulstone location
As soon as I grab the first soulstone, I’ll navigate the stairway leading me into the next chamber. Then, I’ll veer left towards the initial room, and at the end of that hall, I’ll lay my hands on the second soulstone.
All Jarling Locations in Human Xilence Mission

After departing from the Main Cavern Stairway Blade Nexus by going straight ahead instead of turning left, you’ll reach a dead-end where you’ll discover several pots lying about. Among these pots, you’ll find one that holds a jarling.
All Soulstones and Jars Location Guide in Escaping Linon Mine Mission – The First Berserker Khazan
All Soulstone Locations in Escaping Linon Mine Mission
First Soulstone location

Behind some spider webs, you’ll discover the initial Soulstone. Following the staircase which leads to suspended bridges, glance to your right to locate the Soulstone.
Here, you can throw the javelin for distance, allowing you to move away. Alternatively, follow the path of the hanging bridges towards the soulstone, and once there, attack it with your close-combat weapon.
Second Soulstone location

The second Soulstone harmonizes beautifully with a colossal red crystal. To get here, you’ll need to traverse the path once you’ve gathered the initial Soulstone, then navigate down some stairs or a ladder.
Look at the base of the giant red crystal, and you will spot the soulstone.
All Jarling Locations in Escaping Linon Mine Mission
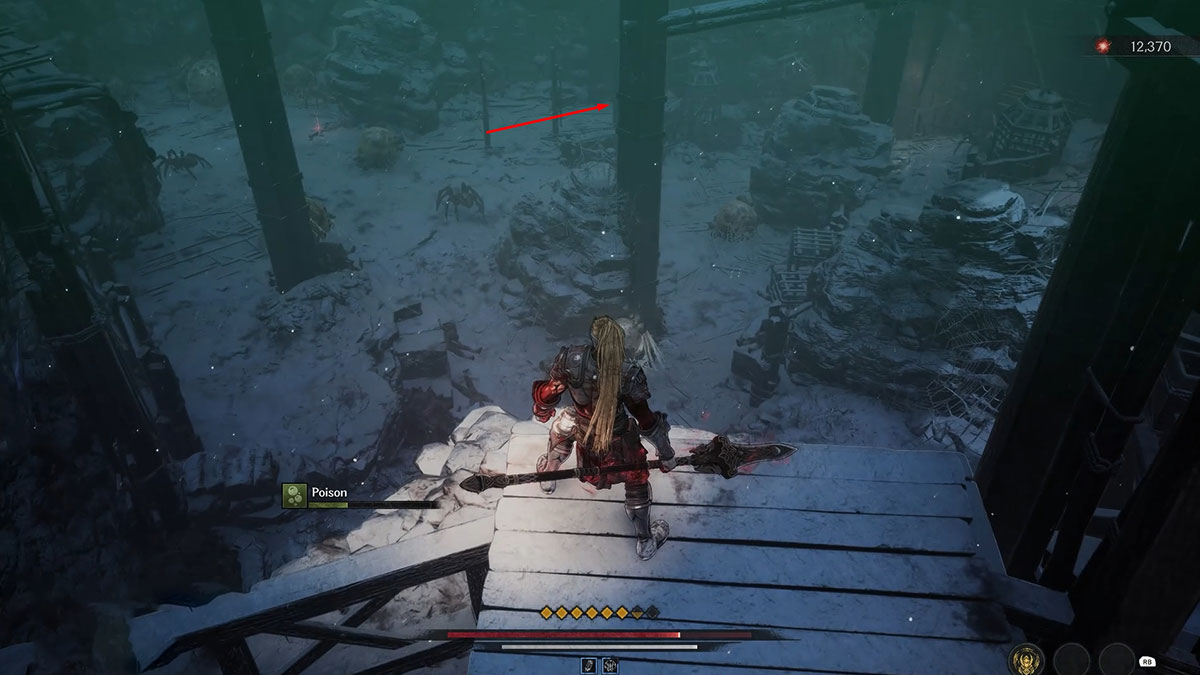
At Escaping Linon Mine, you’ll discover the jarling prior to getting to the initial soulstone’s location. Once you reach the vantage point where numerous spider sacs are visible on the ground, look for the jarling tucked away in one of the corners.
1. Get rid of all the spiders in this location, and you’ll discover a pot tucked away near a suspended cage in one corner. Smash it open to gather the jarling.
or
2. Remove every spider from the vicinity, and you’ll spot a pot by a hanging cage in a corner. Break it to get hold of the jarling.
All Soulstones and Jars Location Guide in Pavel’s Final Words Mission – The First Berserker Khazan
All Soulstone Locations in Pavel’s Final Words Mission
First Soulstone location

Following your conversation with Tristian, keep moving forward along the straight path in the hallway rather than veering to the right. At the end of the corridor, you’ll run into an enemy mage near a pillar supporting a coffin. The first soulstone is hidden behind this very coffin.
Second Soulstone location

After skipping the elevator ride leading to the Cavern Beneath the Citadel Blade Nexus, look upwards while facing the opposite direction. You’ll spot the second soulstone nestled between the pillars before getting on the lift.
All Jarling Locations in Pavel’s Final Words Mission
As I’ve just opened the secret door in the prisoner cell zone, before ascending the stairs towards the higher part of the mission, veer right and advance down the corridor. The room at its end is your destination. Inside, you’ll spot a pair of pots. Smash them to uncover the elusive Jarling!
All Soulstones and Jars Location Guide in Witch’s Castle Mission – The First Berserker Khazan
All Soulstone Locations in Witch’s Castle Mission
First Soulstone location

As you traverse the initial part of your mission and unlock a gate, you’ll eventually reach a vantage point where numerous adversaries are positioned below. Prior to leaping down, rotate the camera, and you’ll spot a radiant red light in one of the corners.
Go there and you will find the first soulstone of the Witch’s Castle mission.
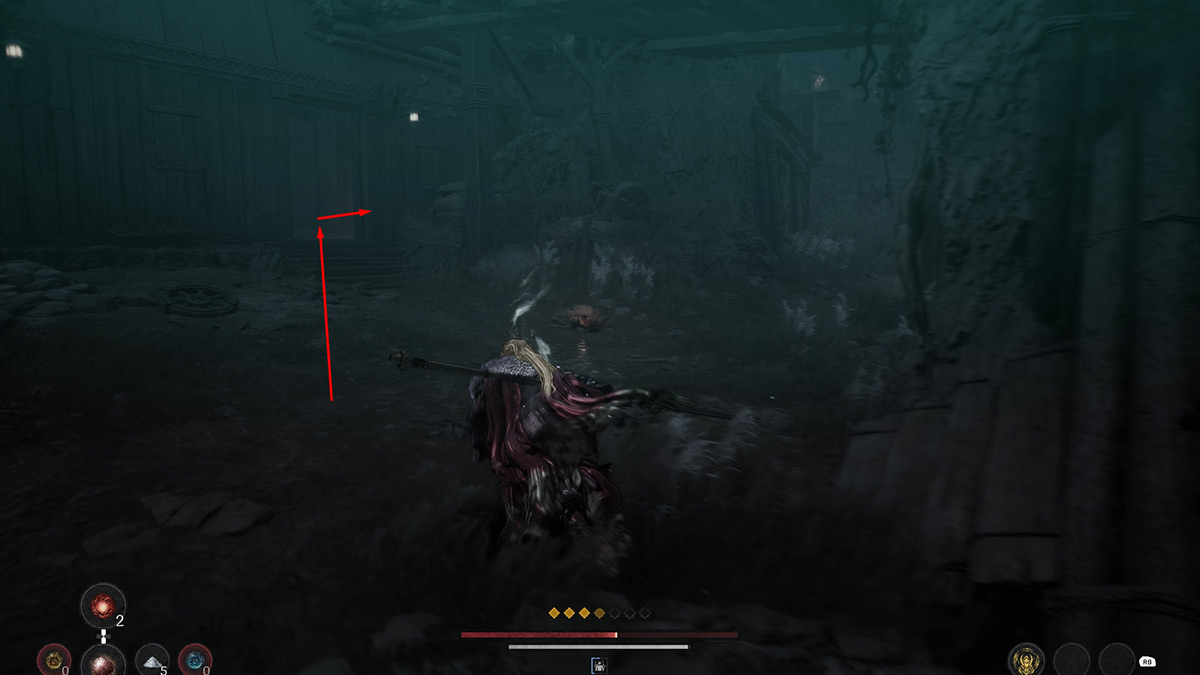
Second Soulstone location

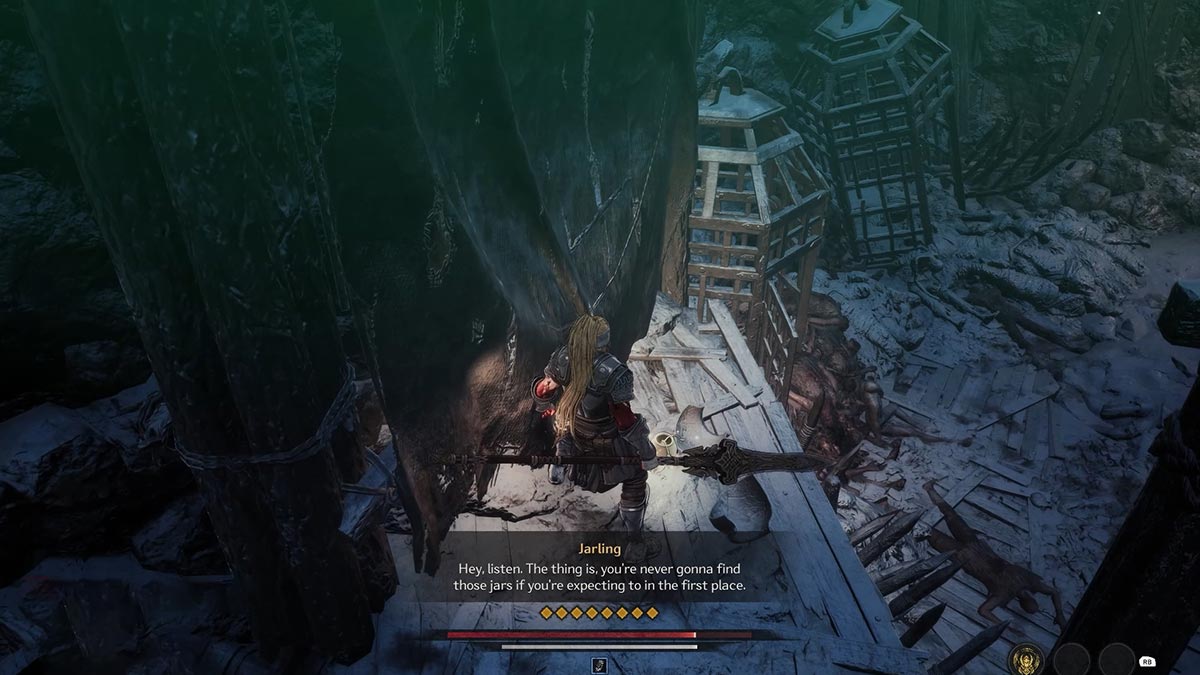
By pulling down the water level within the mission with a lever, previously submerged areas can now be reached. Head back to the closest Blade Nexus and retrieve the ladder that was underwater earlier.
Afterward, you’ll encounter a central location featuring houses and trees. Keep an eye out for a house that has wooden barriers on its entrance close to a tree. It is in this house where you will discover the second soulstone.
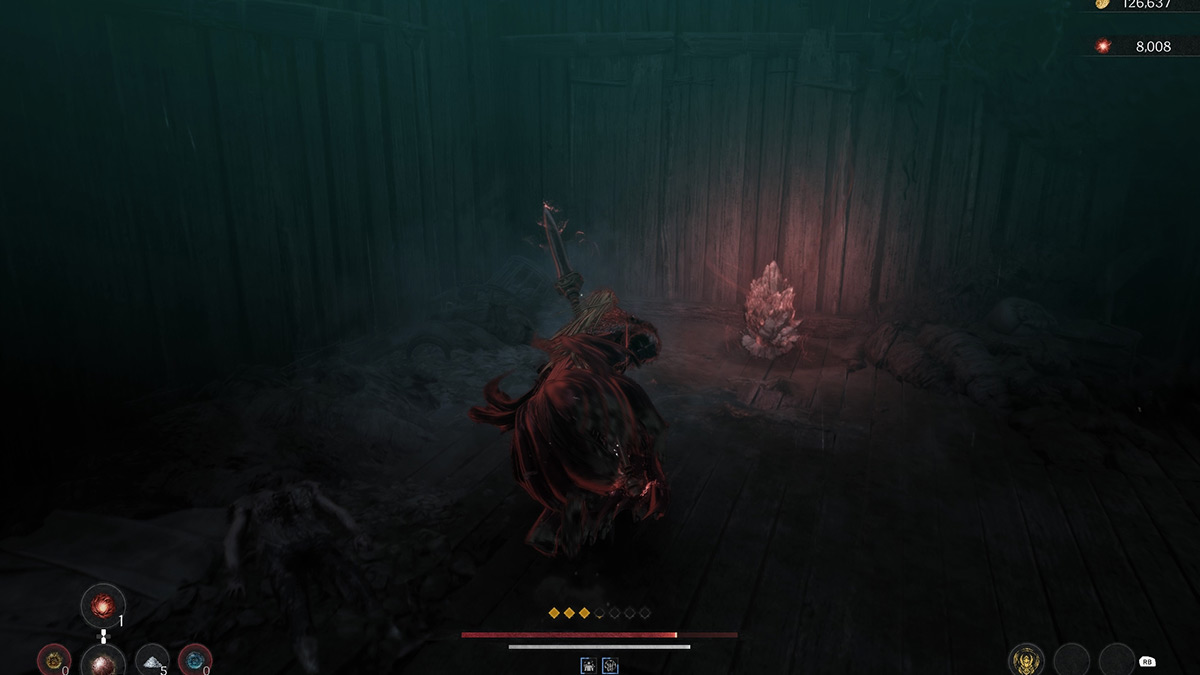
Third Soulstone location

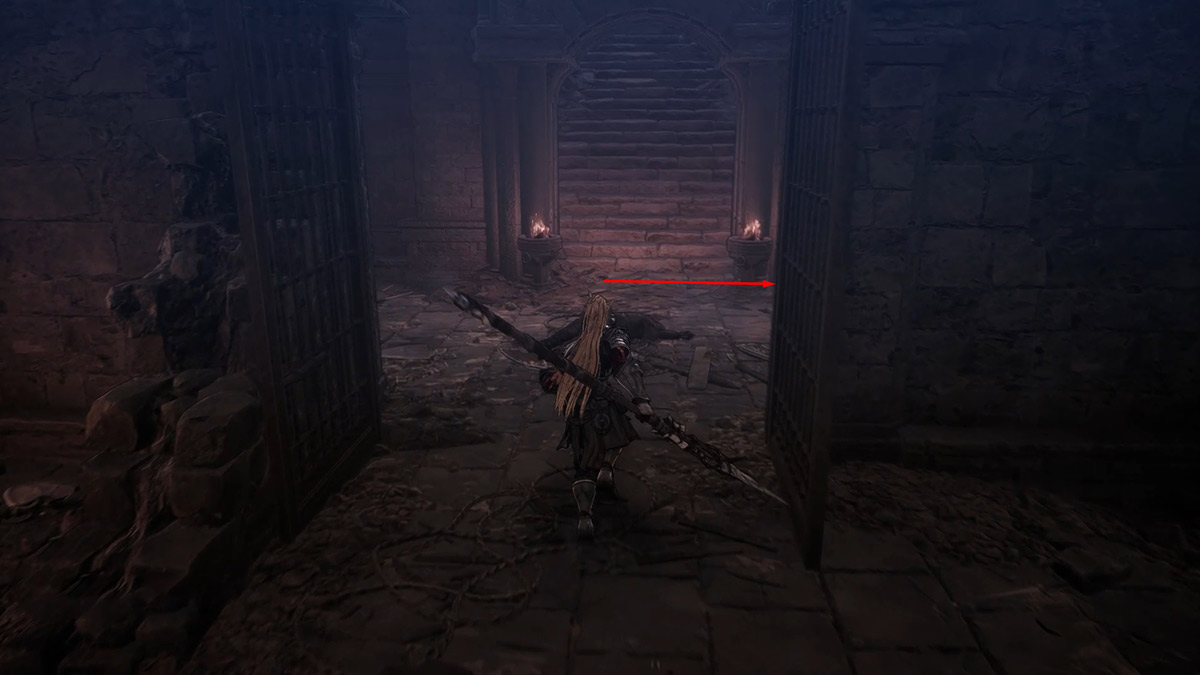
Keep venturing deeper into the region beyond where you discovered the second soulstone, and you’ll encounter a staircase that ends at a barricaded entrance. Along the path, you’ll face a group of undead archers and one with a greatsword. Overcome them all to unlock the door, revealing the third soulstone tucked within the room.
Fourth Soulstone location

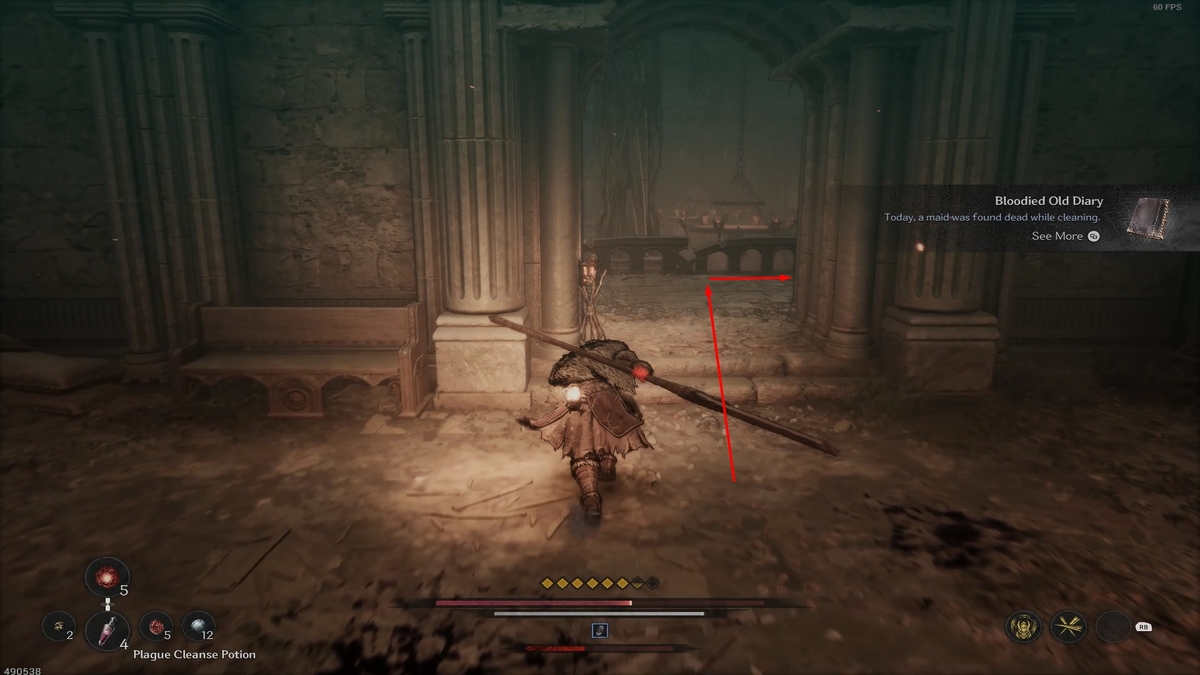
In the final stages of your quest, you’ll discover the fourth soulstone within the castle that houses a library on its second and third levels. Once you’ve crossed the Blade Nexus situated outside the castle, ascend the staircases in the main hall, then take the one on your right side to find it.
As you venture down the corridor, at its end, you’ll encounter a room filled with the undead. There’s a rickety old ladder within, climb it if you dare. Up there, an undead foe wielding a greatsword awaits your challenge. In the corner, should you conquer this adversary, you’ll find a precious soulstone hiding.
Fifth Soulstone location

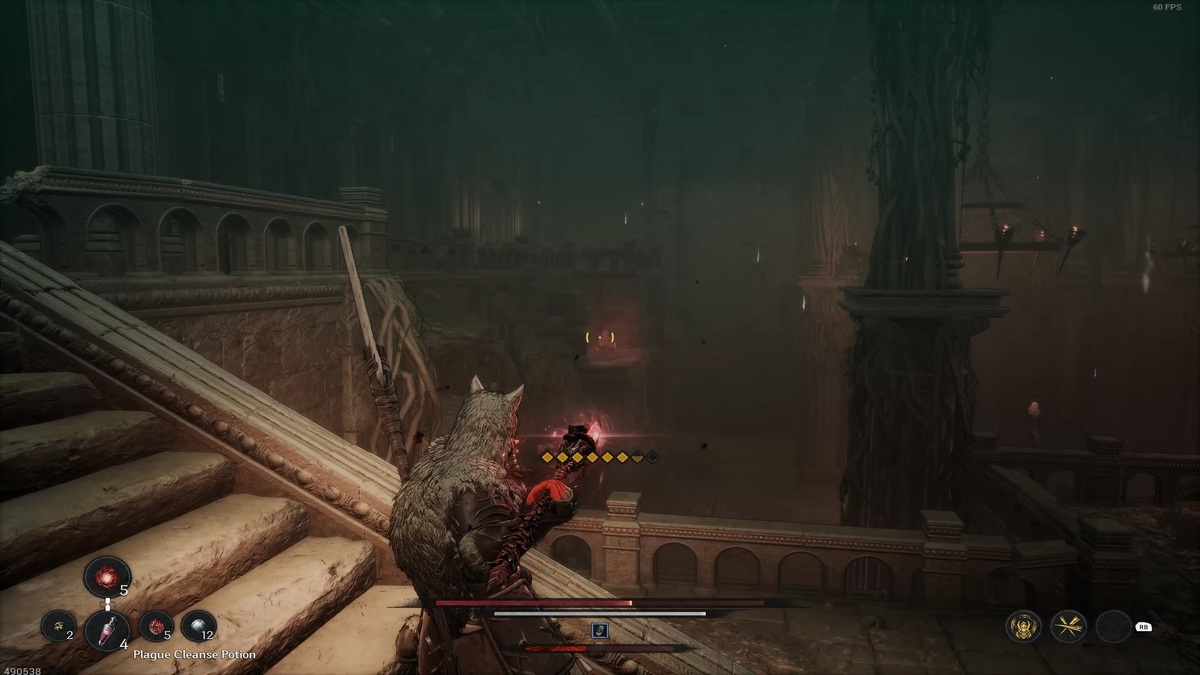
Once you’ve climbed up to the third story of the castle, entering via the left side of the grand hall, you’ll find yourself at the library section toward one end of that floor. Over in the shelves situated on the right side of this area, you’ll come across a green-hued book.
Engage with the book, and you’ll uncover a hidden chamber concealed among the bookshelves, containing the fifth Soulstone for the Witch’s Castle quest within it.
All Jarling Locations in Witch’s Castle Mission

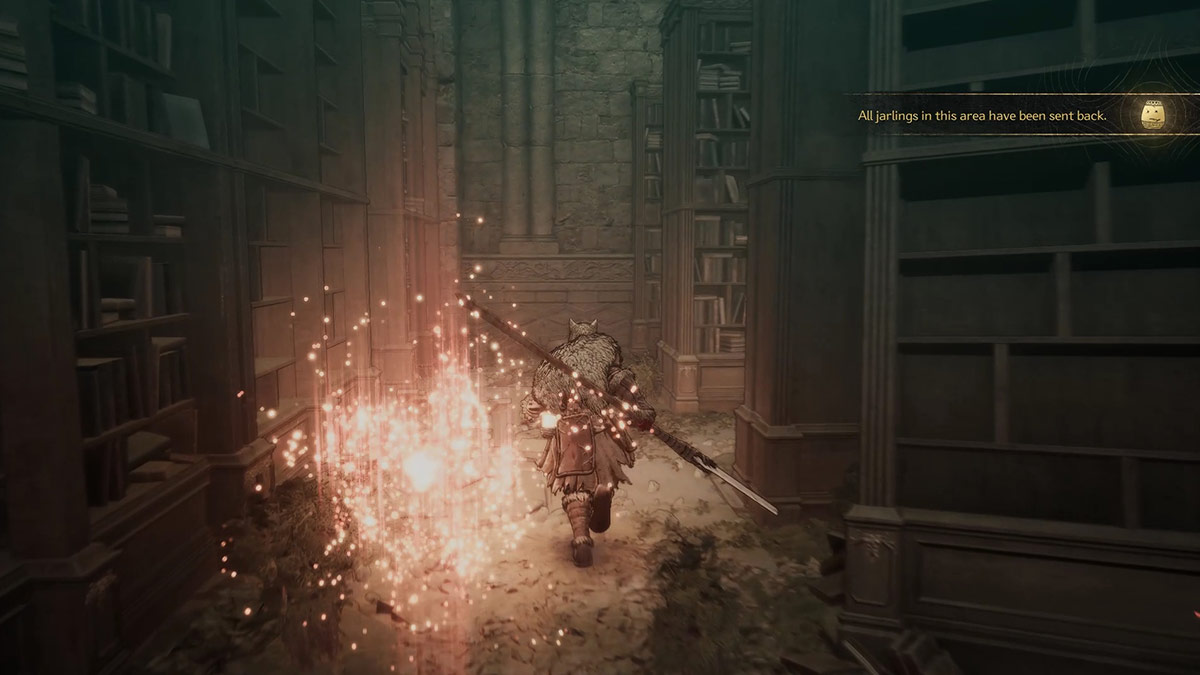
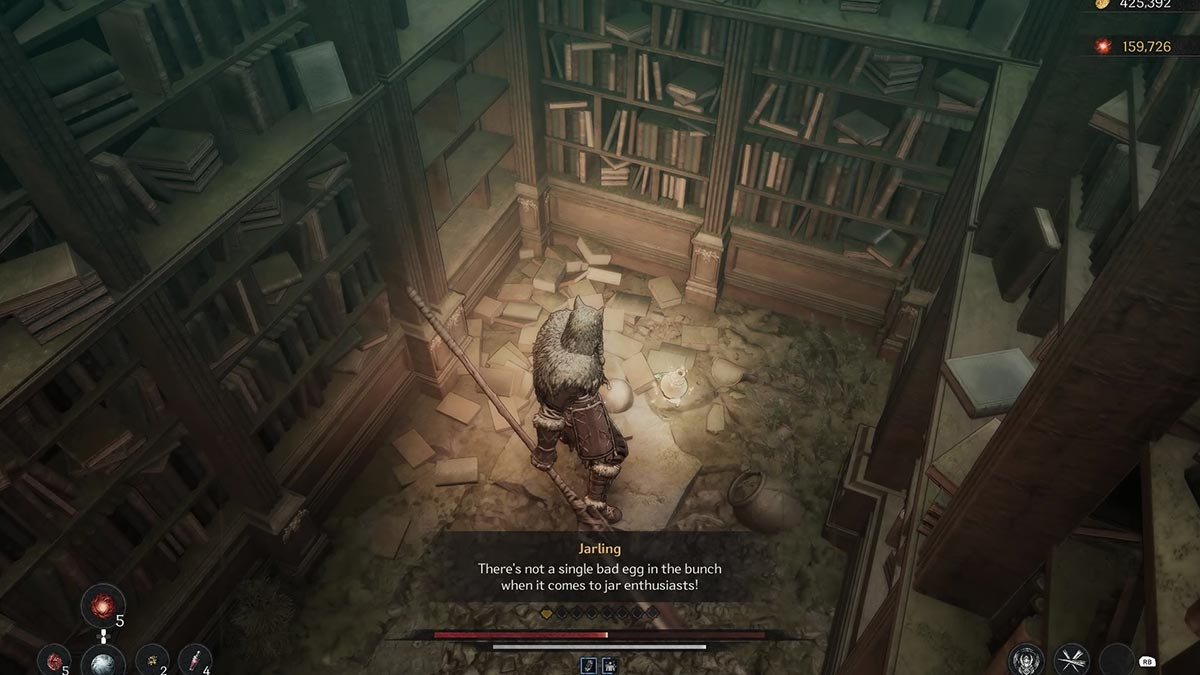
Just like previously, when you headed to the right corner of the library section to uncover a hidden room, this time, make your way to the left side instead. At the end of that pathway, you’ll come across a large pot. Smash it open to discover the jarling within!
All Jarling Location Guide in Lacrima Mission – The First Berserker Khazan
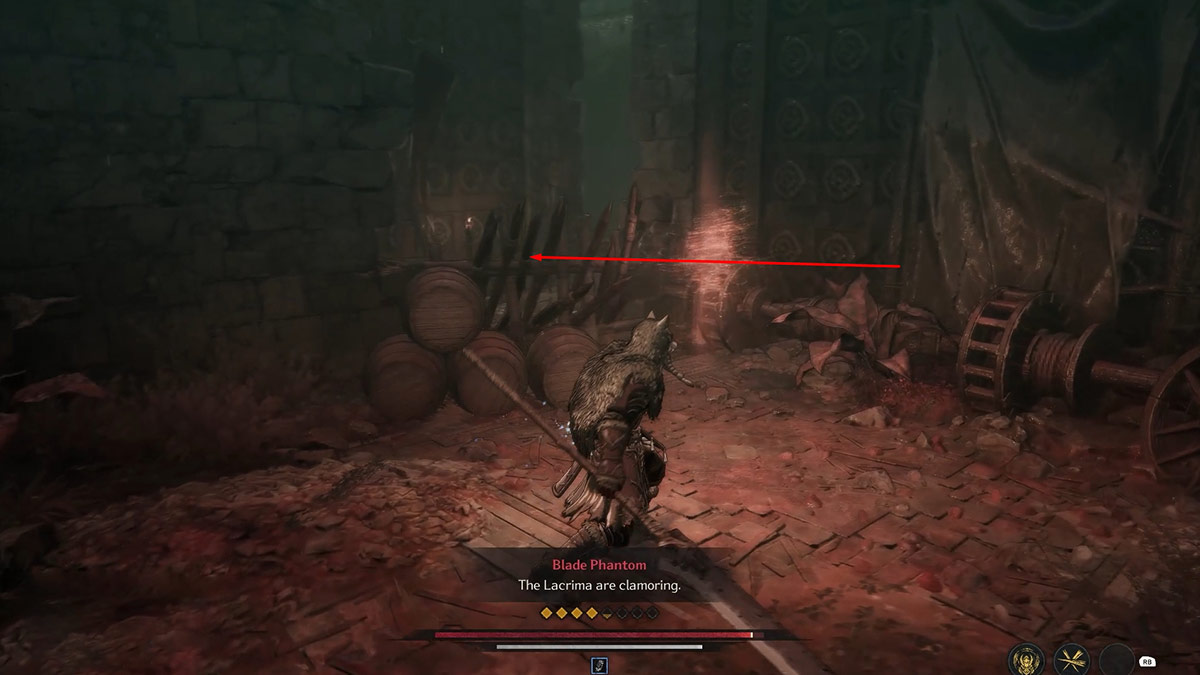
In the city of Lacrima, you won’t come across any soulstones. However, there’s something worth searching for – a jarling. After battling an adversary that shoots flames at the bridge’s end, head to the room on your left and then continue straight through a barrier on the next turn. You’ll discover the jarling tucked away in the corner, nestled inside a pot there.
All Soulstones and Jars Location Guide in Valus’s Axe Mission – The First Berserker Khazan
All Soulstone Locations in Valus’s Axe Mission
First Soulstone location

To reach the initial Soulstone, you’ll need to disable the purple gadgets located in a room adjacent to the main Blade Nexus. After switching off all these devices, the entrance to that room will open up for you.
The soulstone can be seen on a pipe, so look up as you get inside the room.
Second Soulstone location

Following your victory against the top-tier adversary deeper into the mission, you’ll discover big water tanks in the room to your left. Keep an eye out for the second soulstone tucked away towards the end of that room, hidden behind one of the water containers.
All Jarling Locations in Valus’s Axe Mission

In the room to your right, which was previously noted as the location where you battled an elite opponent, you’ll find another adversary that is invisible. Defeat this foe, then explore the end of the room. You’ll discover containers like pots and barrels, and in them, you’ll find the Jarling.
All Soulstones and Jars Location Guide in Atlante The Precise Mission – The First Berserker Khazan
All Soulstone Locations in Atlante The Precise Mission
First Soulstone location

After overcoming the powerful adversary and proceeding ahead, you’ll notice a set of stairs on your right side and some pots scattered on your left. Head towards the left side, and an undead warrior brandishing a greatsword will emerge to challenge Khazan there. Defeat this enemy and locate the soulstone that lies to the left of where the adversary appeared.
All Jarling Locations in Atlante The Precise Mission

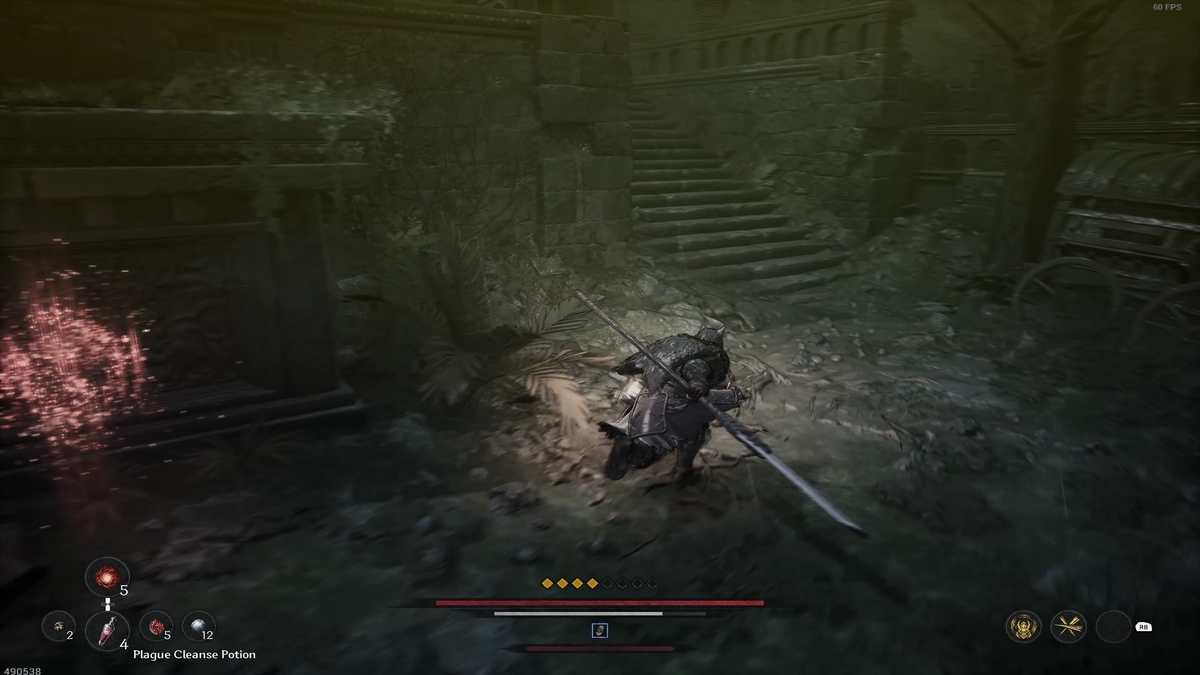
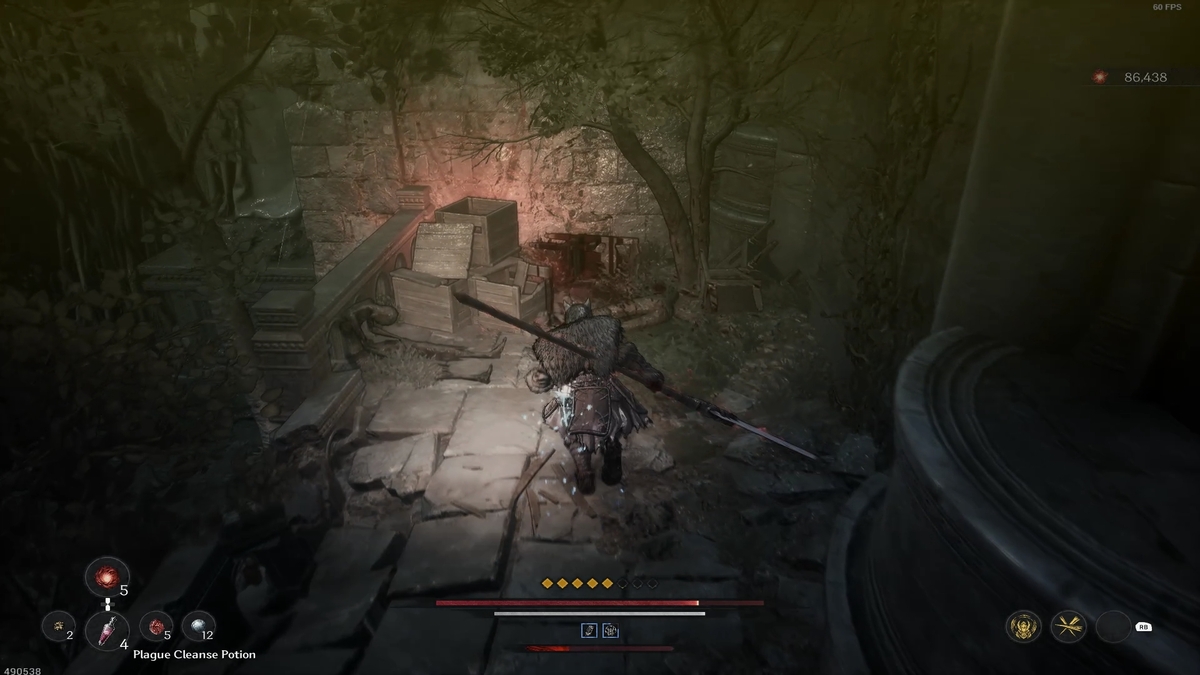
Near the site known as Where Death’s Edge Converges, you’ll find the elusive jarling. Follow the path, and you’ll come across an undead wielding a sword-like weapon. Overpower this adversary, and you’ll likely spot a large container close to the area affected by the Plague’s Creeping Vines. Shatter it to uncover the hidden jarling.
All Soulstones and Jars Location Guide in Corruptors’ Fortress Mission – The First Berserker Khazan
All Soulstone Locations in Corruptors’ Fortress Mission
First Soulstone location

Starting from the Massive Gate Blade Nexus, descend the stairs and retrace your steps to the cell area. There, you’ll encounter an undead adversary wielding a large shield initially, followed by another enemy armed with a saber in the next corridor. Proceed further, and you’ll discover a hole in the wall where you can retrieve the soulstone.
Second First Soulstone location

After ascending to the Vaisar Lookout Tower, the next Soulstone can be discovered. Proceed along the path, encountering adversaries and a formidable creature. Subsequently, you’ll need to scale the nearby ladder and vanquish two foes waiting at the peak.
Following that, you’ll encounter a ladder leading downwards. Before proceeding, glance to your left, into a modest room. At the entrance, there are several wooden crates, and the second soulstone is hidden somewhere within.
Third Soulstone location
To get to the third Soulstone, proceed along the path following the acquisition of the second one. Along your journey, you’ll come across an advanced adversary wielding a shield and spear. Overcome this foe, and you’ll find some NPCs ahead on the right-hand side of the path, while another will be to your left, heading towards the stars.
Take the left path, and at the corner you will find the third soulstone.
Fourth Soulstone location

Once you’ve successfully passed through the grand entrance, following your mission, proceed along the path beyond the gate. At its conclusion, you’ll encounter two knights. Prior to venturing any further, turn left and ascend the ladder that lies ahead.
You’ll come across some adversaries close to the catapult. Overpower them all, and afterward, locate the fourth Soulstone in the nearby room with the catapult.
Fifth Soulstone location

1. Option A: The fifth Soulstone is concealed by a deceptive barrier, which you’ll find in the corridor preceding the fight with the Skalpel boss. To uncover it, simply tap your weapon on the right wall in the area close to the statues.
2. Option B: The 5th Soulstone is hidden behind a false wall, located in the hall leading up to the Skalpel boss battle. Tap your weapon against the right wall nearby the statues in that hallway to expose it.
3. Option C: The fifth Soulstone is secretly tucked away behind an illusory wall; this can be discovered in the corridor just before engaging with the Skalpel boss. To bring it into view, give a quick tap to your weapon on the right wall near the statues in that hallway.
All Jarling Locations in Corruptors’ Fortress Mission

From the Massive Gate Blade Nexus, keep moving ahead, and you’ll eventually come across a basement. The object of interest, the jarling, is situated on an elevated platform. To access it, navigate to the nearby room where a staircase awaits.
After reaching the highest level, make sure to gracefully descend onto a platform filled with chests and pots rather than landing on the ground floor. Shatter the pots to reveal the elusive Jarling secretly concealed within them.
All Soulstones and Jars Location Guide in Last Command Mission – The First Berserker Khazan
All Soulstone Locations in Last Command Mission
First Soulstone location

In the Last Command mission, there’s just one Soulstone hidden, located close to a stairway within the courtyard. The quickest route to get there is by retracting your steps along the path from the Execution Ground Blade Nexus and utilizing your javelin to shatter the Soulstone once you arrive.
All Jarling Locations in Last Command Mission

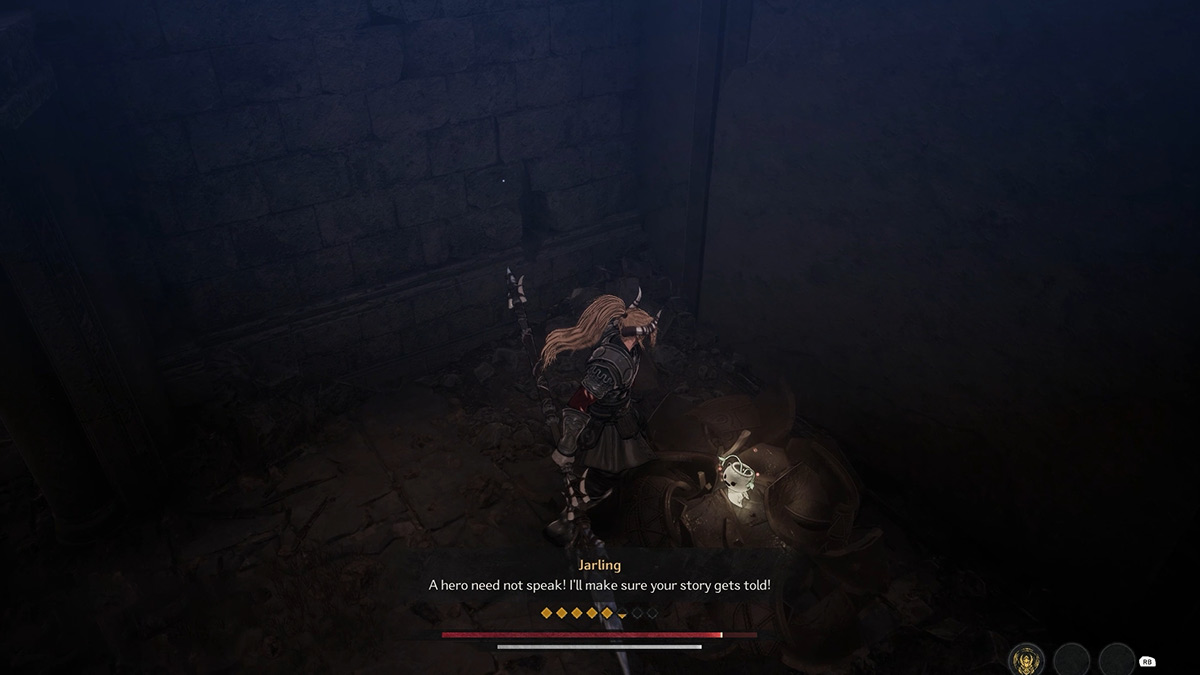
After liberating some NPCs confined in a cage close to archers and explosive containers, you’ll encounter a stack of logs and a pot nearby. Smash the pot to uncover the jarling concealed within.
All Soulstones and Jars Location Guide in Last Sentinel Mission – The First Berserker Khazan
All Soulstone Locations in Last Sentinel Mission
First Soulstone location

Starting from the Great Bridge Blade Nexus within the fortress, follow the left-hand path which leads to a bridge with two sets of stairs. Proceed by turning right and reaching the cul-de-sac; there, you’ll come across a soulstone resting atop a pillar in the distance.
You will need to use the javelin to break the soulstone.
Second Soulstone location

In the heart of the church lies the second soulstone. Remember, once you’ve vanquished every foe in this location, search for the soulstone hidden behind the altar before progressing further.
All Jarling Locations in Last Sentinel Mission

Following your victory over the powerful enemy creature on the bridge, proceed by ascending the winding staircase to access the next zone. Upon reaching the upper level, take a right turn and you’ll spot a pot near a tiny window. Smash it open and gather the jarling, then move left from the stairs and continue deeper into your mission.
All Soulstones and Jars Location Guide in Transcendental Sword Mission – The First Berserker Khazan
All Soulstone Locations in Transcendental Sword Mission
First Soulstone location
![]()
In the Transcendental Sword mission, the first Soulstone is situated where a half-collapsed bridge lies. As you’re making your way downstairs, avoid using the ladder. Instead, head towards the far end of the corridor and hit the cracks on the wall instead.
This will reveal the hidden path that will lead you to the soulstone at the end.
Second Soulstone location
![]()
In the course of your mission, you’ll encounter the second soulstone further along, leading eventually to a battle against a colossal beast on a bridge that features a door sealed shut and a handle at its end.
Simply cross over to the other side of this bridge, and you’ll come across the second soulstone enclosed within a suspended cage. The cage door should be open, so take careful aim with your javelin and throw it to shatter the soulstone and claim it as your own.
All Jarling Locations in Transcendental Sword Mission
![]()
Right before the second Soulstone, you’ll encounter a Jarling. On the ground nearby, there’s a trap button for a flaming arrow and some pots in the corner close to the wall. To gather the Jarling, simply smash the pots.
All Soulstones and Jars Location Guide in Crimson Trace Mission – The First Berserker Khazan
All Soulstone Locations in Crimson Trace Mission
First Soulstone location

At the onset of the mission, the first Soulstone can be quite elusive because it’s hidden near the beginning. Instead of moving forward, take a left turn towards the courtyard from the water fountain – that’s where you’ll start – and you’ll spot the Soulstone at its end.
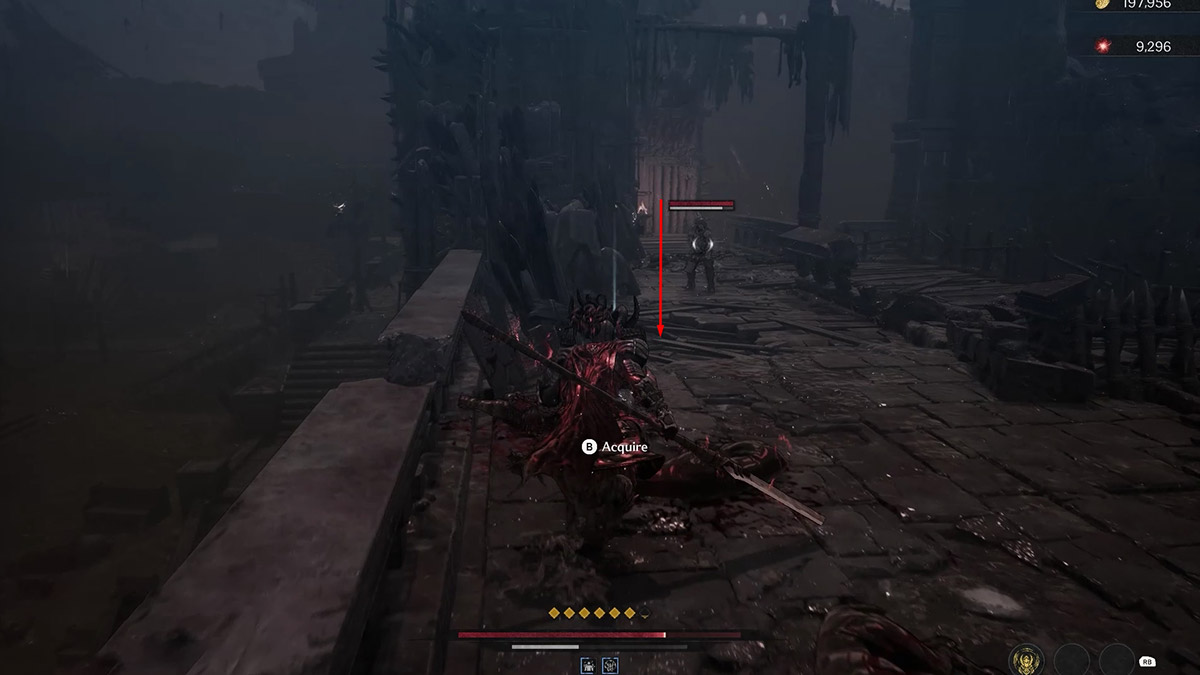
Second Soulstone location

After defeating the fiery-monster on the bridge, prior to continuing with our task, search for the soulstone positioned on the left side of the bridge.
You might overlook this since you can’t approach it closely and must shatter the soulstone with a javelin instead.
All Jarling Locations in Crimson Trace Mission

Following your victory against the superior foe near the bridge, avoid moving forward towards the fiery mutant creature. Instead, veer left and enter the chamber connected to the bridge. Inside this room, you’ll discover a broken pot among shields, wooden crates, and other debris on the ground. Breaking the pot will uncover the hidden Jarling.
All Soulstones and Jars Location Guide in Fall of the Empire Mission – The First Berserker Khazan
All Soulstone Locations in Fall of the Empire Mission
First Soulstone location

After making your way to Old Town Blade Nexus, look for the soulstone located near the corner. You can access it by going backward a bit and then passing through a wooden-barricaded opening. Inside, you can either attack with your weapon or dodge into the area, and upon doing so, the soulstone will be right in front of you.
Second Soulstone location
Heading backwards from Main Street Blade Nexus, crossing the bridge takes you to an area filled with chaos stones and a noticeable hole in the wall directly in front of you. Adjacent to this hole, there’s a narrow crack in the wall where you can discover the second soulstone.
Third Soulstone location

In the vast, open expanse of the sewer area, you’ll stumble upon the third soulstone. Here, you’ll come across two fierce creatures that spew flames and some damaged pipes. Additionally, there’s a flowing waterfall right here.
Taking a close look at the waterfall’s cascade reveals a reddish-glow emanating from its base. Head over there and you’ll discover that the third soulstone is concealed behind the waterfall.
Fourth Soulstone location

Upon arriving at the Church Blade Nexus, I discovered that the fourth Soulstone was hidden behind a towering statue, nestled among a cluster of ornate pillars.
Fifth Soulstone location

After gaining access to the shortcut door leading to the Blade Nexus, progress further in your quest. Eventually, you’ll come across a pair of carts loaded with wooden crates and a large pot.
Take the stairs right after these carts, and you will find the fifth soulstone at the end.
All Jarling Locations in Fall of the Empire Mission

Upon ascending to the upper level of the mansion, you’ll discover a gap in the wall that allows further exploration. In this chamber, there is a bed, several bookshelves, and a few pots in one corner. Shatter the pots to uncover the jarling hidden within.
All Soulstones and Jars Location Guide in Unrequited Love Mission – The First Berserker Khazan
All Soulstone Locations in Unrequited Love Mission
First Soulstone location
In the Unrequited Love mission, start your journey from the initial Blade Nexus, then ascend the nearby stairs. Conquer any adversaries on your way, and at the culmination of this stairway, you’ll discover the soulstone concealed behind a few wooden crates.
Second Soulstone location
The second soulstone can be found just outside the library area. Once you’ve left the book-lined corridor, you’ll notice chandeliers ahead and a pathway that leads to some stairs. Stand where the stairs begin, look back towards the hallway exit you just came from, and there you’ll spot the second soulstone.
All Jarling Locations in Unrequited Love Mission
In the Unrequited Love mission, you’ll discover just one Jarling. To get to it, navigate to the library’s second floor. Once there, head towards the section filled with numerous book-lined shelves. On your left, in a corner, you’ll come across enemies secretly lurking and waiting to ambush Khazan. Go there to uncover the hidden Jarling.
Here’s what you should know about all Soulstones and Jarlings locations in The First Berserker Khazan. For additional advice on the game, check out our guides for The First Berserker Khazan: Optimal Greatsword Build and Best Spear Build.
In The First Berserker Khazan, you’ll find all information about Soulstones and Jarlings locations here. For more gameplay tips, explore our guides for The First Berserker Khazan: Ideal Greatsword Build and Best Spear Build.
Read More
- Clash Royale Best Boss Bandit Champion decks
- Vampire’s Fall 2 redeem codes and how to use them (June 2025)
- Mobile Legends January 2026 Leaks: Upcoming new skins, heroes, events and more
- How to find the Roaming Oak Tree in Heartopia
- World Eternal Online promo codes and how to use them (September 2025)
- Best Arena 9 Decks in Clast Royale
- Clash Royale Season 79 “Fire and Ice” January 2026 Update and Balance Changes
- Clash Royale Furnace Evolution best decks guide
- Clash Royale Witch Evolution best decks guide
- Best Hero Card Decks in Clash Royale
2025-03-28 23:26