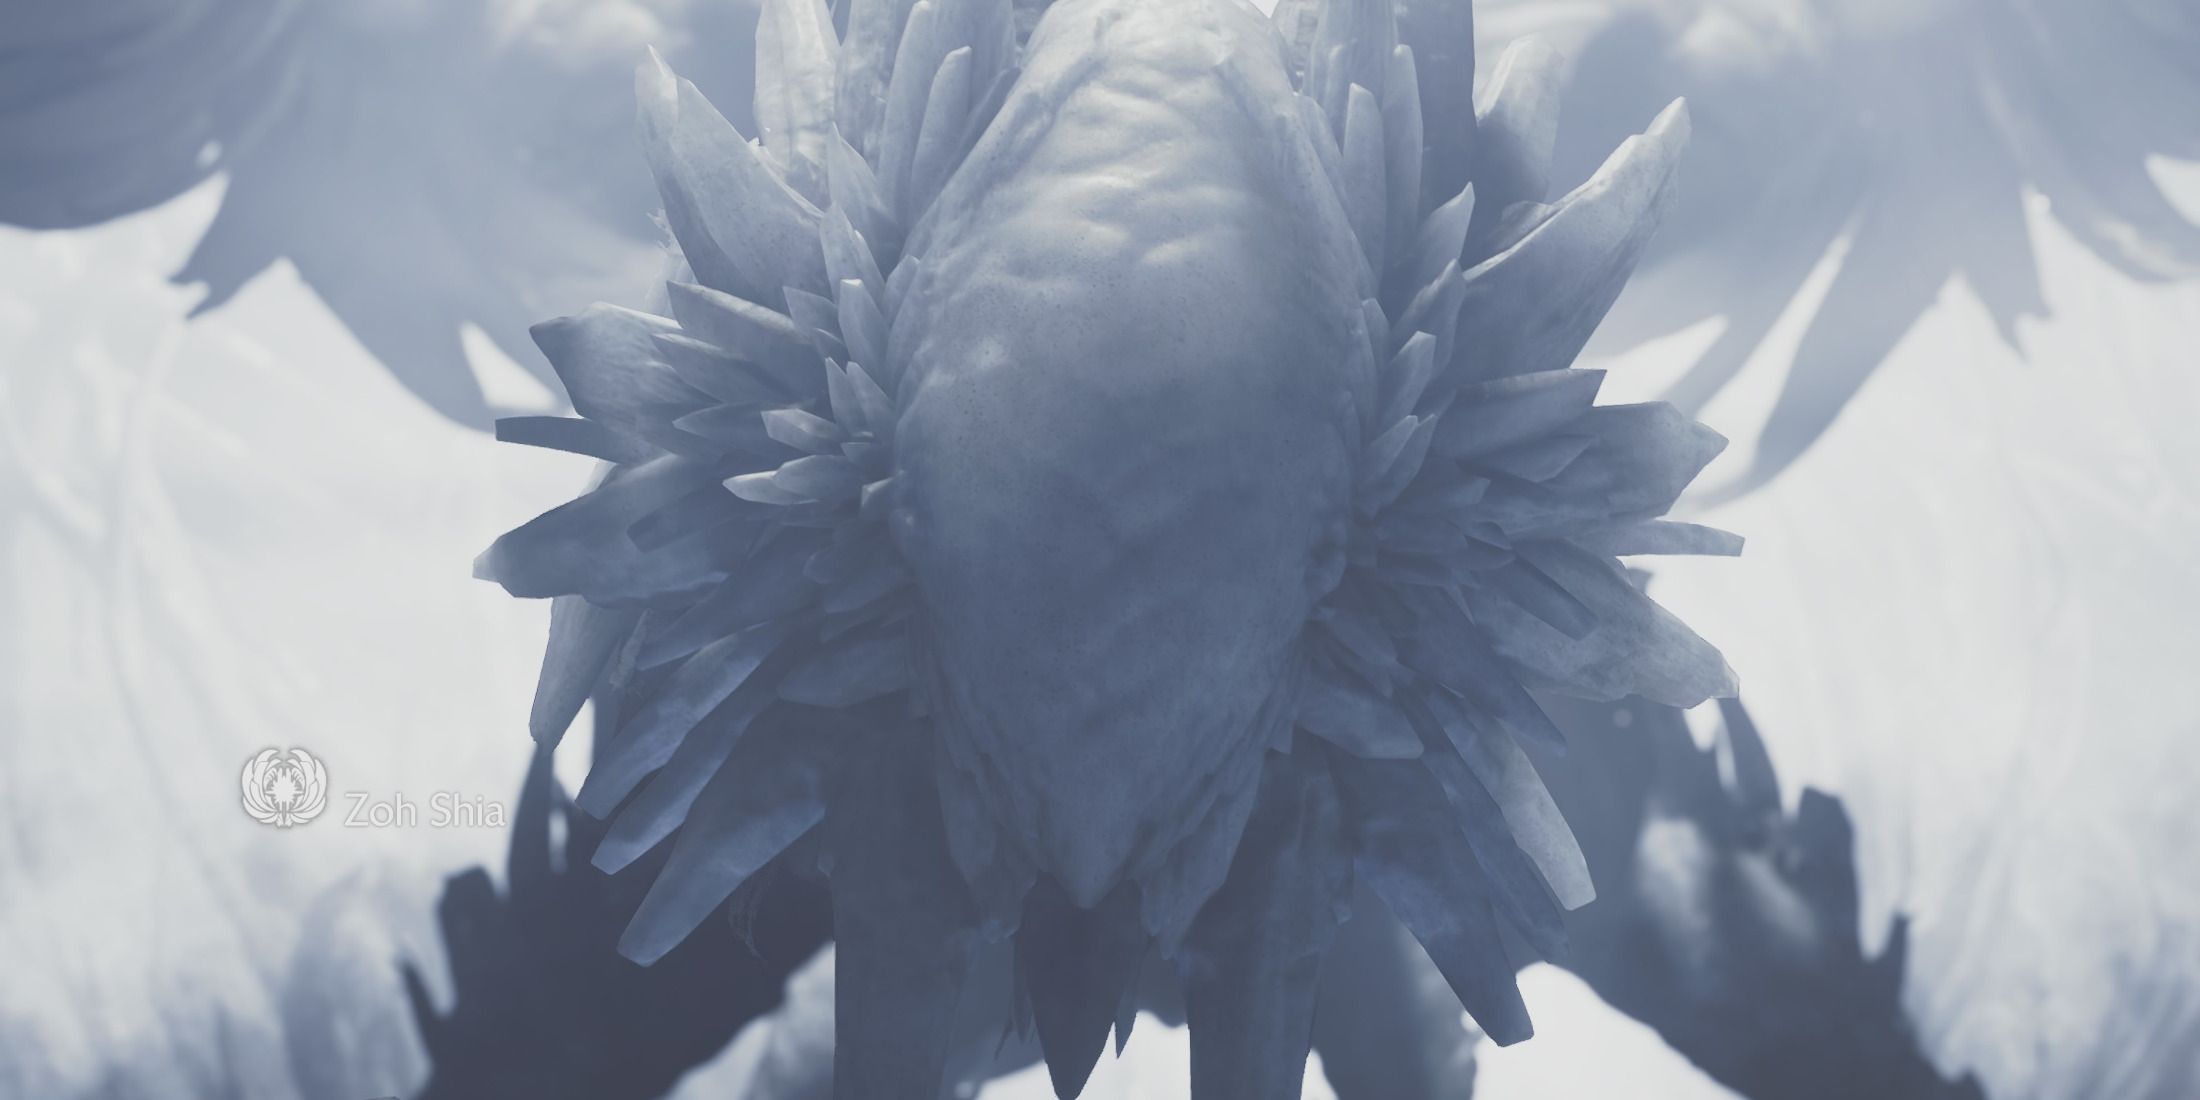
In Monster Hunter Wilds, Zoh Shia serves as the final boss in the Low Rank tier. This battle is quite difficult with four distinct stages, and it possesses an unexpected move during the fight which could potentially ignite you if you’re not adequately prepared.
Luckily, this write-up is packed with details about the moves, vulnerabilities, rewards, and additional facts regarding that difficult Monster Hunter creature. Not only will you grasp how to evade its colossal strikes, but you’ll also master the ultimate strategy to conquer the final boss battle forever.
Zoh Shia Moveset in Monster Hunter Wilds
In the realm of Monster Hunter Wilds, I’ve come across a unique foe named Zoh Shia. Unlike other beasts I’ve faced, its arsenal of moves evolves as the battle unfolds and I chip away at its armor. Here are the different stages of this fight, along with details about its moves, how to dodge them, and what clues to watch for:
1. First Phase: This is when Zoh Shia is fully armored. It’s a good time to get a feel for its basic attacks.
2. Second Phase: As I manage to break off some of its armor, it starts to use more aggressive moves. I need to be extra alert here.
3. Third Phase: The beast becomes even more vicious as more armor is destroyed. I’ll have to adapt my strategies accordingly.
4. Final Phase: With all its armor gone, Zoh Shia goes all out in this final stage. It’s now or never!
Here are the details about its moves and how to handle each phase effectively. Good luck, fellow hunter!
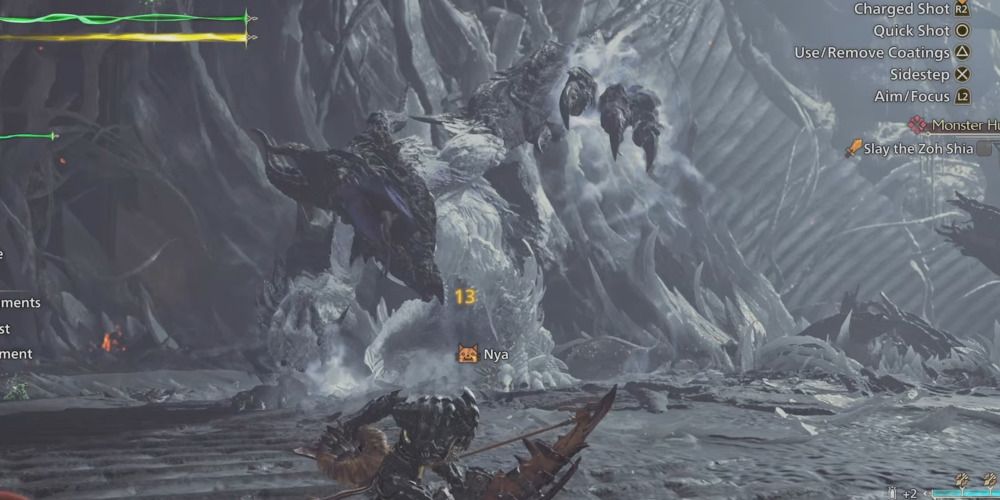
- Phase 1: This is the beginning phase before any of Zoh Shia’s armor is knocked off. It will only attack with the two Phase 1 Attacks in Monster Hunter Wilds.
- Phase 2: The wyvren milk has been destroyed from Zoh Shia’s head and left it black-colored and exposed. In Phase 2, it can attack with both Phase 1 and 2 attacks.
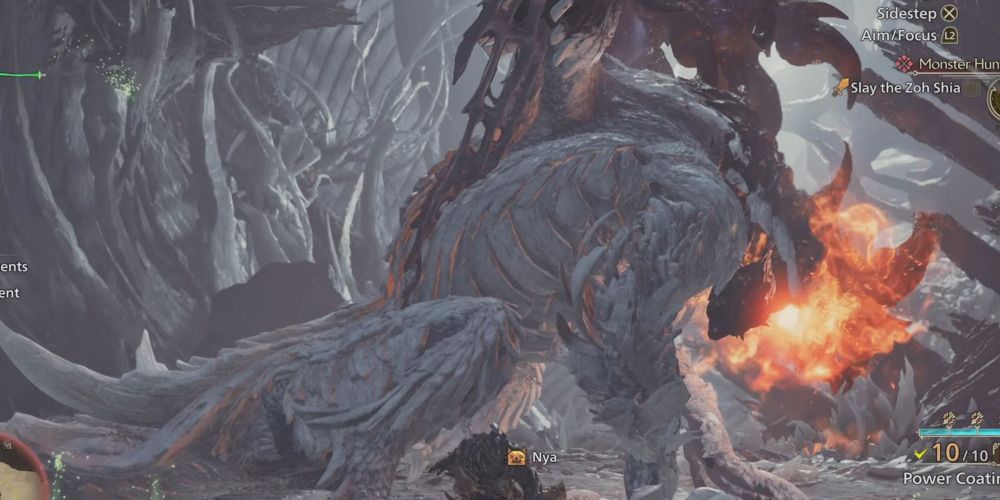
- Phase 3: Both the wingarms and head are exposed. Zoh Shia can attack with Phase 1, 2, and 3 attacks.
- Phase 4: The entire body is armorless, black, and exposed. This will have all Phase 1 through 4 attacks.
Phase 1: Swipe
When the Zoh Shia raises either an arm or wing, followed by a swoop in your direction, the best way to evade this strike is to move backward or slide beneath its body. If you find yourself close to the beast, it can perform a modified attack, such as a tail swipe or bite. It will lift its claw, jaw, or prepare its tail for a swing at you in these cases. After its limbs are raised or it is fully exposed, this move will inflict extra fire damage.
Phase 1: Ground Explosions
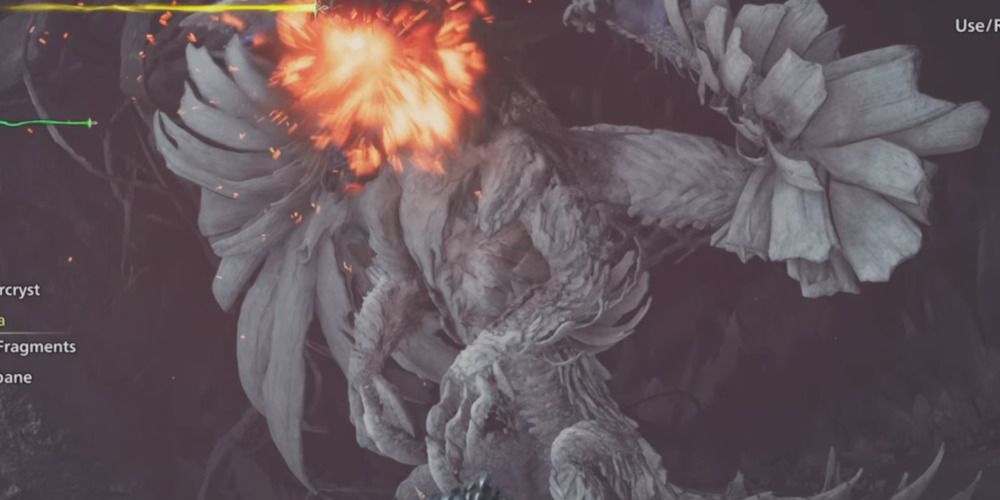
When Zoh Shia elevates a wing, it slams it forcefully into the ground, causing an explosion line. If it lifts its right wing, it triggers a diagonal series of explosions from its right side, extending across its body and to the player’s right. To dodge this, try moving towards the raised wing. There is a variation where Zoh Shia performs a charge-up move, lifting its wingarm higher, which only impacts the ground in front of it. This maneuver can be done with either arm, and to evade it, you should move backward. Additionally, Zoh Shia can create a horizontal explosion line by raising both hands. In such cases, moving backward is also advisable. During Phase 3, when Zoh Shia exposes its wings, these moves will be accompanied by fire damage.
Phase 2: Small Fireballs
During Phase 2, Zoh Shia acquires multiple fireball abilities. One of these is a small fireball that’s signaled by its wings flaring out on both sides before it generates fire in its mouth. To evade this attack, you should quickly roll to the side. Your movement should be horizontal, away from the fireball. The Ajarakan set is particularly effective for this battle as it offers high resistance to fire and includes Part Breaker.
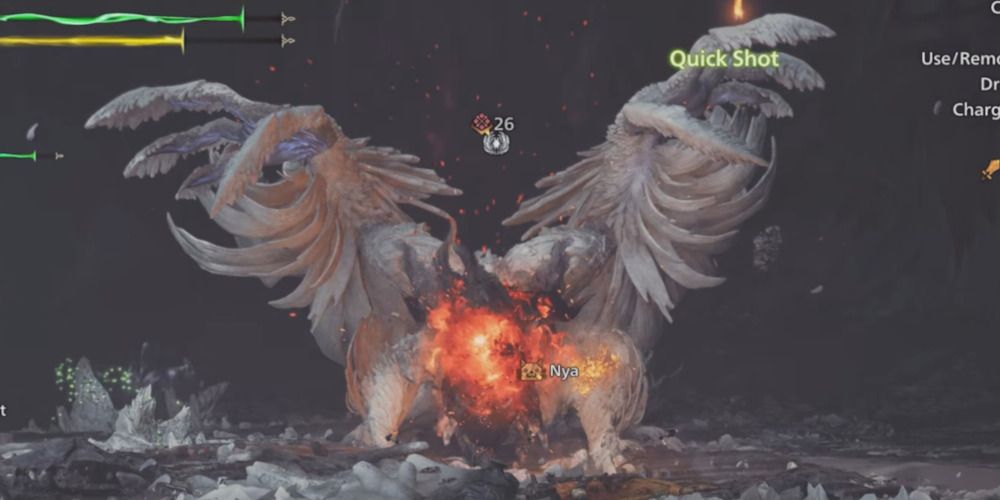
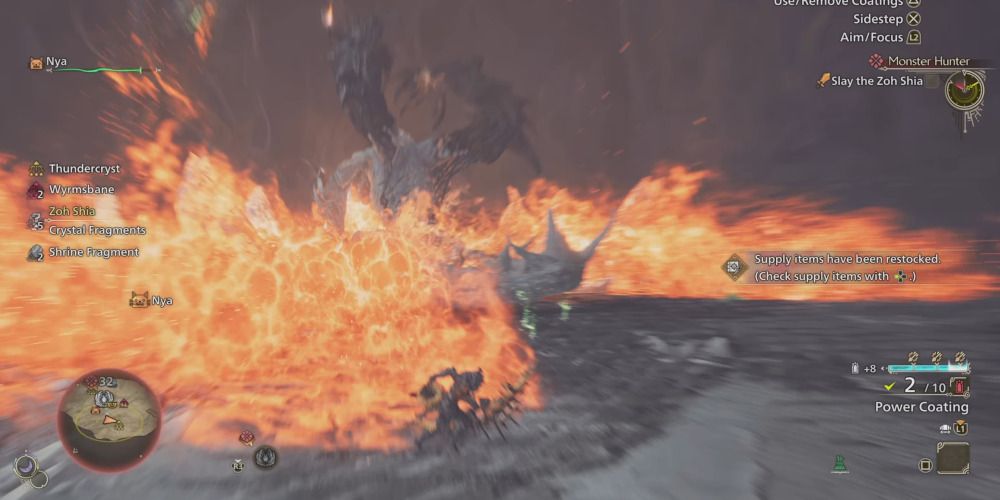
Phase 2: Big Fireballs
When the Zoh Shia assumes a stance on its hind legs and lets out a thunderous roar, preparing to unleash fire within, it’s readying for a massive fireball attack. This blaze scorches the ground ahead, creating a pool of fire that inflicts substantial damage. To escape this fiery assault, it’s advisable to wait until the fireball is launched, then swiftly move to either the left or right side of the Zoh Shia to avoid the flames. Make sure you roll away as the fireball hits the ground to activate your invincibility frames (i-frames), thereby shielding you from the spreading inferno.
Phase 2: Bouncing Fireballs
When Zho Shia’s head becomes visible, you should be prepared for the “Bouncing Fireball” maneuver. This move shares similarities with other fireball moves, but what sets it apart is the appearance of multiple red spots on the ground just before the area ignites. These spots mark where the fireballs will bounce. To avoid getting hit, you should steer clear of Zho Shia and the marked areas on the floor. Here’s a strategy: Dodge to the side of Zho Shia and away from the red spots, then swiftly roll either to its left or right after the spots detonate. This is because the fireballs will bounce in various directions, and the one from its mouth will move forward.
Phase 2: Fire Breath
In a new fire assault, Phase 2 Zho Shia is set to unleash a unique attack – a fire breath that spews flames onto the floor right beneath it. Unlike other attacks, its mouth will be directed downwards instead of towards you. Since the area of effect for this attack is quite compact, it would be wise to move away from Zoh Shia’s immediate vicinity.
Phase 2: Fire Cone
During Phase 2, Zoh Shia can perform a smaller version of its colossal fire assault. It will encircle itself with a ring of crystals before shooting out a burst of flames in a cone-like pattern around itself. However, there will be an area free from flames directly behind it. To dodge the attack, try to move behind Zoh Shia.
Phase 3: Charge
After revealing its head and wingarms, Zoh Shia will launch its charge attack. It initiates by raising its arm, emitting a growl before charging towards you with its entire body, potentially trampling you if you’re not cautious. To dodge this move, swiftly move to either the left or right side of the monster to minimize damage. The attack doesn’t seem to follow you, so moving one way or the other should be sufficient.
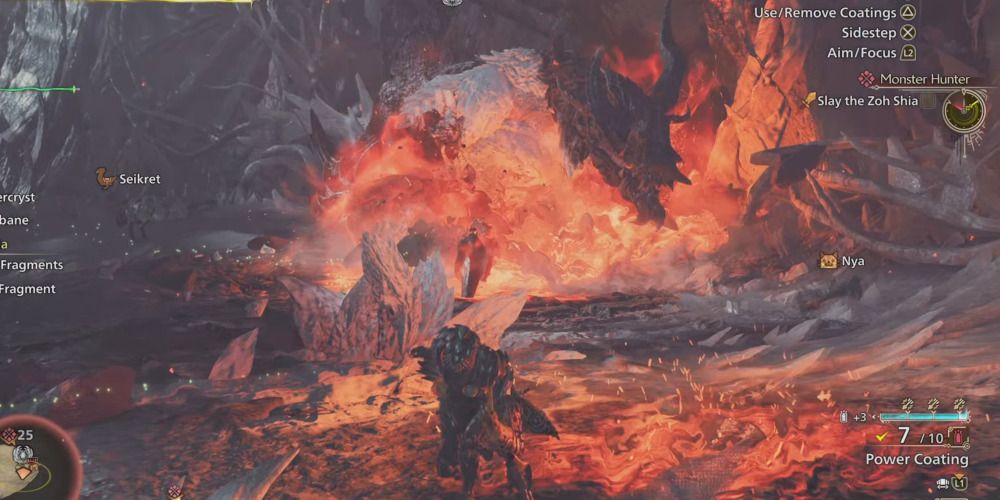
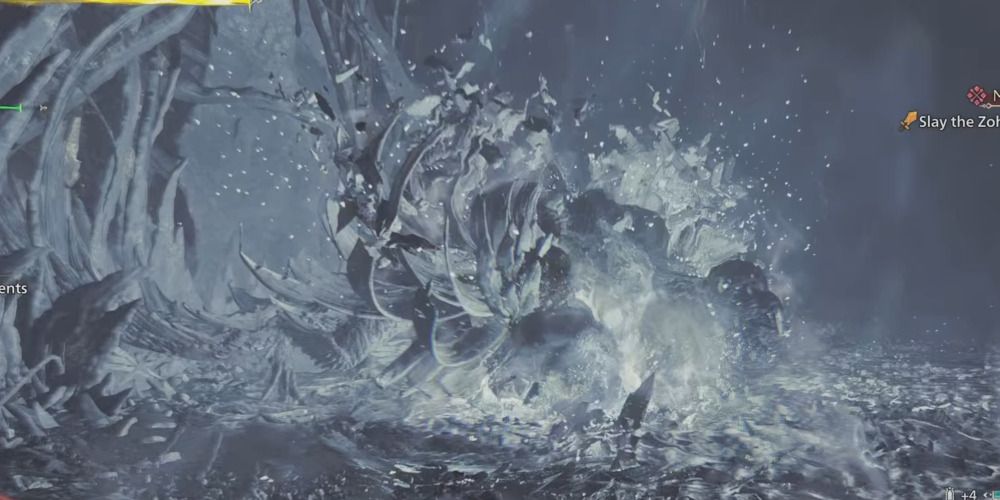
The Halfway Point: The Inferno
At the midpoint of the battle, Zho Shia will unleash a devastating assault. Your character might exclaim “Something’s happening in this area… It’s not good!” This onslaught will trigger a colossal blaze engulfing the ground with fire. As you notice, crystals will emerge from the ground. These crystals intensify the fire’s potency, making it risky to seek shelter behind them. Instead, aim to reach the other side of the arena, as remaining near the inferno will likely prove fatal. Try to maintain a safe distance and dodge any fireballs it launches in preparation for this attack.
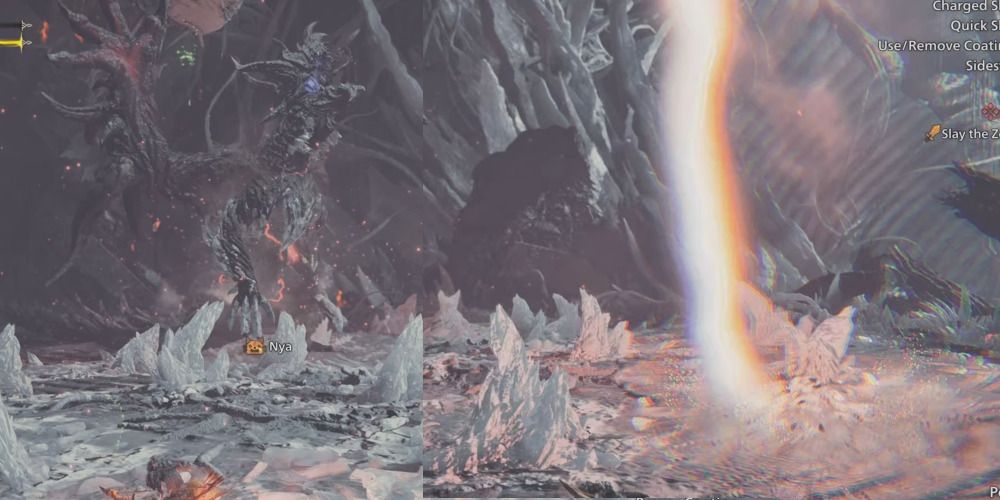
Phase 4: Lighting Attack
In the course of Phase 4, Zoh Shia has two types of lightning attacks: one where it forms a circular pattern on the ground at the start, and another that resembles a lightning line. To stay clear of the circular attack, ensure that you are not within the circles when they appear. For the linear lightning attack, move either forward or backward to dodge it since the line will run horizontally across your character, placing the monster and you on opposite sides of it.
Zoh Shia Weaknesses and How to Fight It in Monster Hunter Wilds
Zoh Shia is an exceptionally tough adversary. It’s known for its swift movements and the ability to strike you with lightning and fire attacks while you diligently chip away at its armor. To successfully finish the story, achieve the Monster Hunter Bringer of Hope accolade, and gain access to High Ranking materials, it’s crucial to keep these factors in mind:
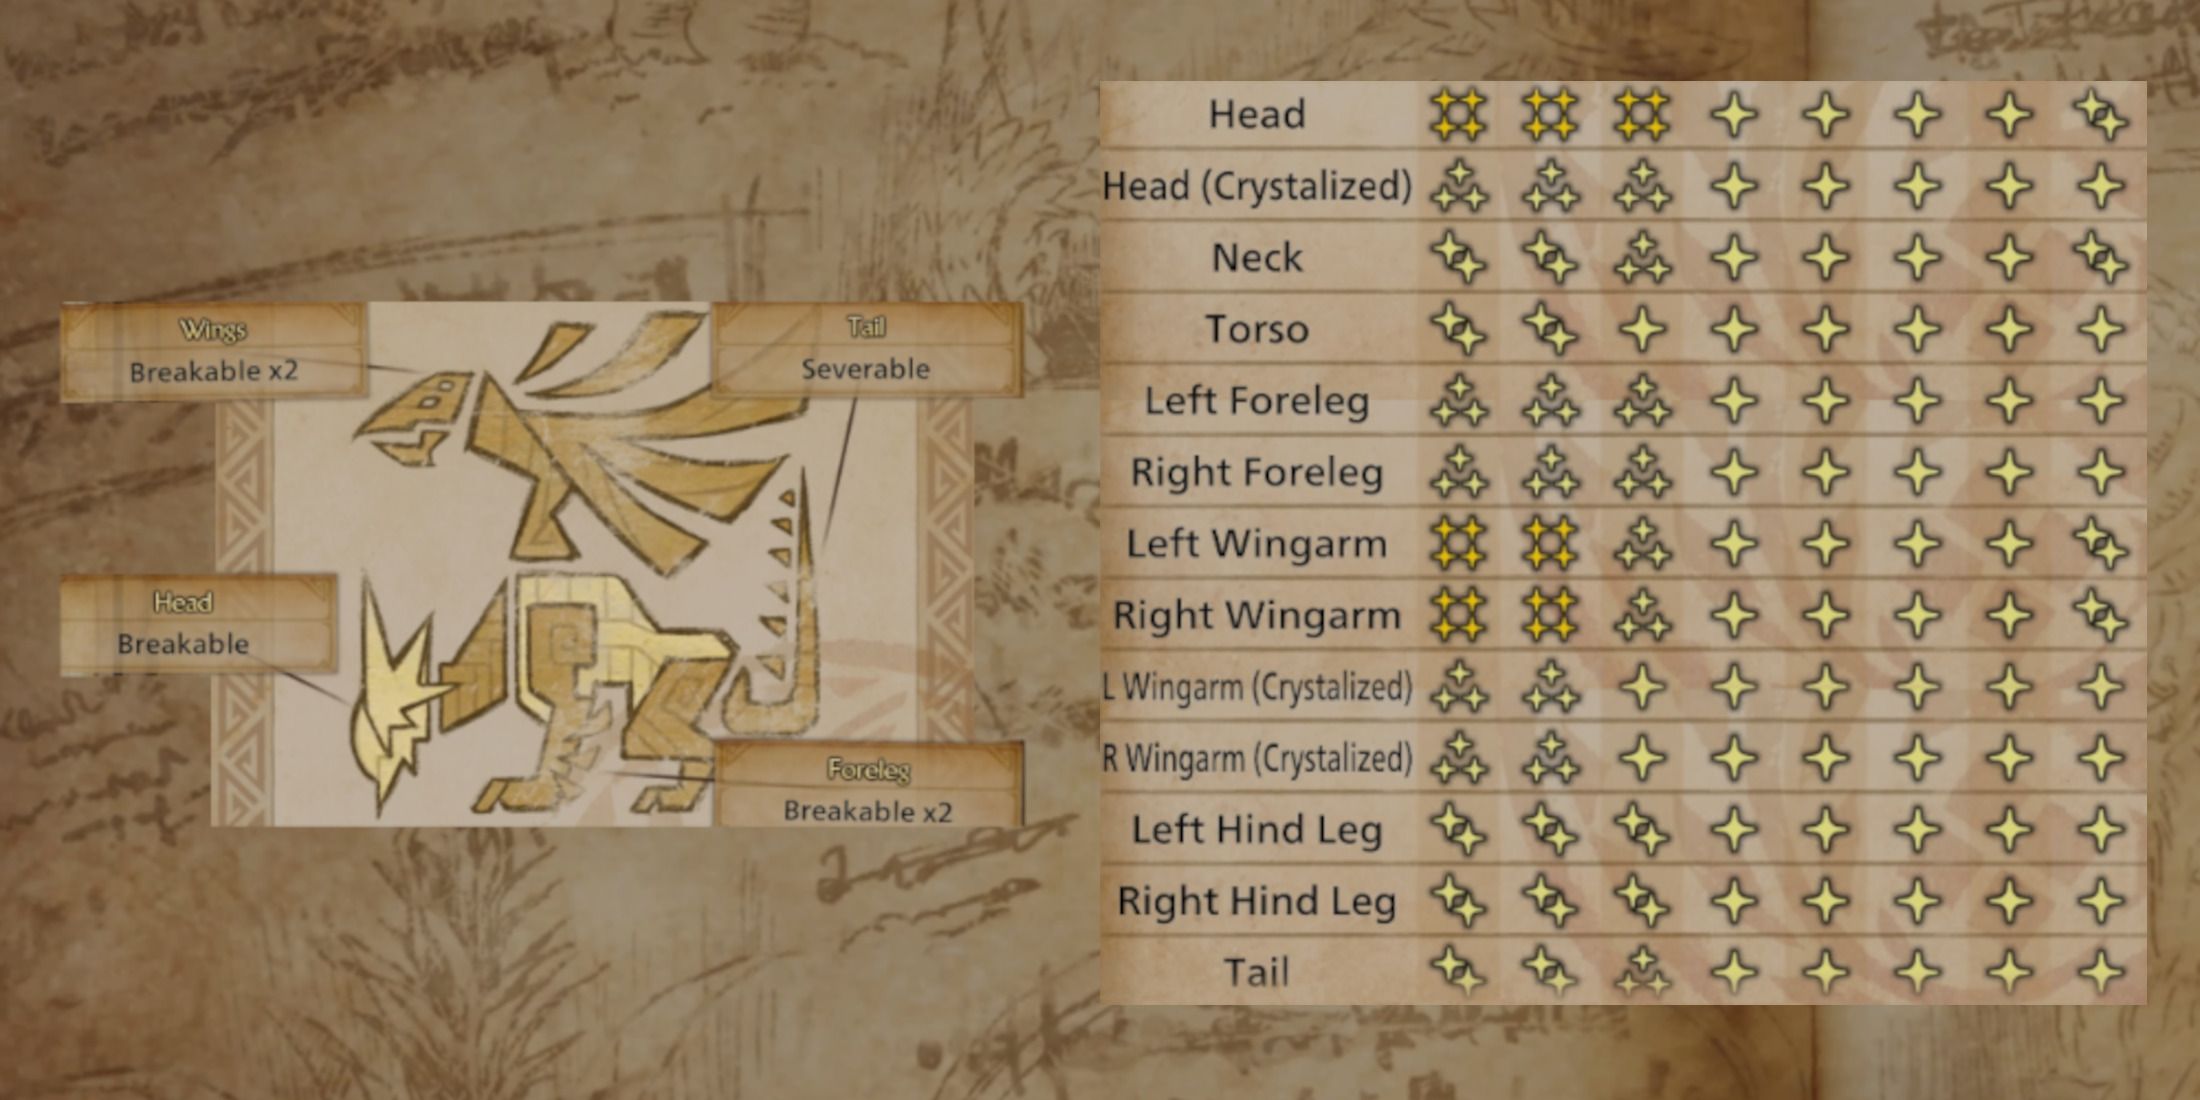
- Both the left and right wings are weak to sword and hammer damage.
- The head of Zoh Shia is weak to all three types of damage.
- It has no specific elemental weaknesses.
- This monster can inflict the status ailments called Fireblight and Thunderblight.
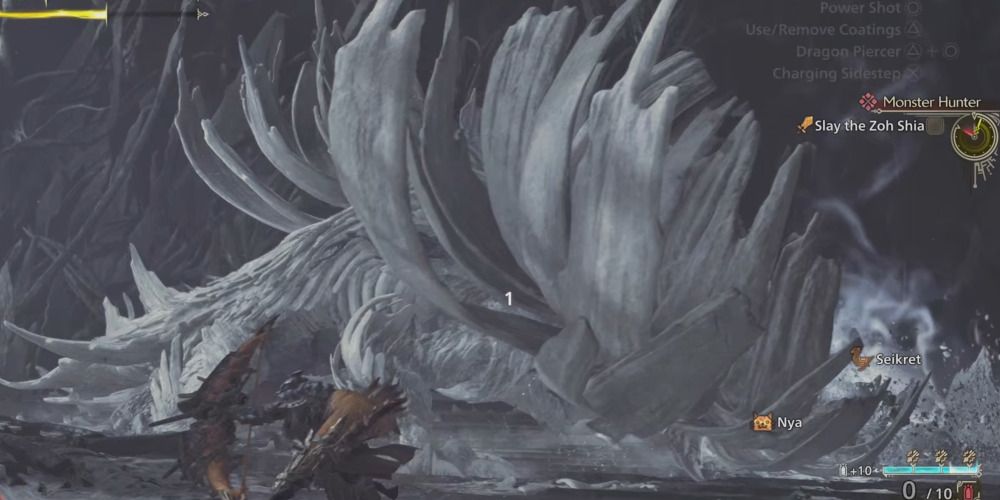
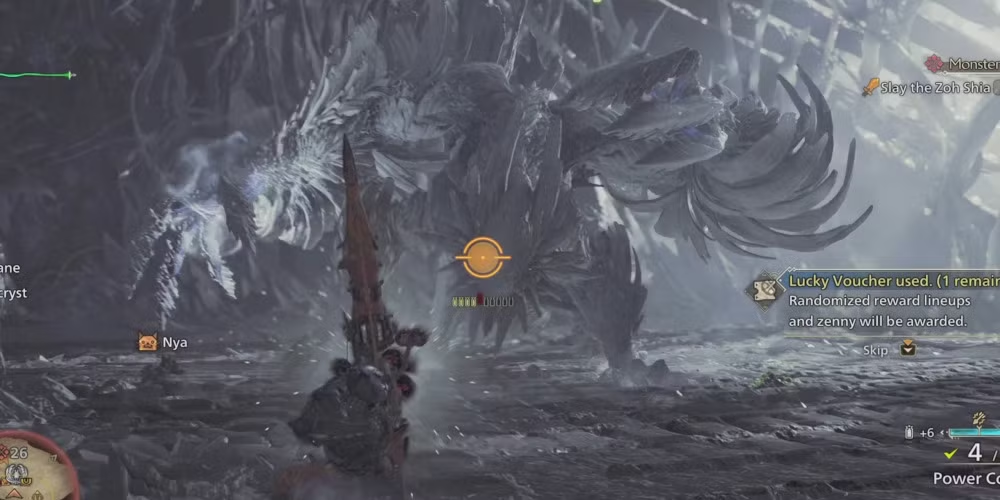
- Zoh Shia has three different stages of its fight with different attacks and a different look to its body.
- Dragon Pods are an excellent way to make Zoh Shia flinch.
- Break the surrounding area to drop it onto Zoh Shia and deal some damage.
Zoh Shia Drops in Monster Hunter Wilds
At present, you’re only able to battle Zoh Shia once. Compared to other monsters, it doesn’t yield as many items and lacks High-Rank drops. However, with upcoming updates and Monster Hunter Wilds DLC, Zoh Shia may become a monster that can be farmed repeatedly. For now, here are all the items you can obtain from battling Zoh Shia:
This version maintains the original meaning while sounding more conversational and easy to read.
| Low-Rank Mats | Item | Drop Rates |
| Target | Nourishing Extract | 30% |
| Tough Guardian Bone | 20% | |
| Guardian Blood | 20% | |
| Guardian Scale | 15% | |
| Guardian Pelt | 15% | |
| Wound Breaking Mechanic | Guardian Blood | 50% |
| Guardian Scale | 50% | |
| Break (Head) | Guardian Blood | 100% |
| Break (Either Foreleg) | Guardian Scale | 100% |
| Break (Either Wingarm) | Guardian Pelt | 100% |
Read More
- Clash Royale Best Boss Bandit Champion decks
- Mobile Legends: Bang Bang (MLBB) Sora Guide: Best Build, Emblem and Gameplay Tips
- Vampire’s Fall 2 redeem codes and how to use them (June 2025)
- Best Hero Card Decks in Clash Royale
- Clash Royale Furnace Evolution best decks guide
- Best Arena 9 Decks in Clast Royale
- Dawn Watch: Survival gift codes and how to use them (October 2025)
- Clash Royale Witch Evolution best decks guide
- Wuthering Waves Mornye Build Guide
- ATHENA: Blood Twins Hero Tier List
2025-03-12 15:08