As a devoted Monster Hunter fan, I can’t help but sing praises for the Long Sword! It’s a weapon that strikes a perfect balance – easy enough for beginners yet boasting a steep learning curve for those seeking mastery. In the thrilling world of Monster Hunter Wilds, the Long Sword shines brighter than ever before.
If you’re ready to embark on the journey to master this versatile weapon, I’ve gathered the top Long Sword builds and armor sets within Monster Hunter Wilds, complete with a suggested progression from low to high rank. Happy hunting!
Table of contents
- How to play the Long Sword in Monster Hunter Wilds
- Best Low Rank Long Swords
- Best Long Sword builds and armor
- Long Sword Crit build
- Long Sword Paralysis Sleep combo build
How to play the Long Sword in Monster Hunter Wilds
The Long Sword may appear straightforward, making it accessible for anyone to wield during swift and victorious hunts. However, understanding its intricacies and truly mastering the Long Sword are two distinct abilities. Here, we’ll explore the fundamentals of the Long Sword and effective strategies to employ within Monster Hunter Wilds.
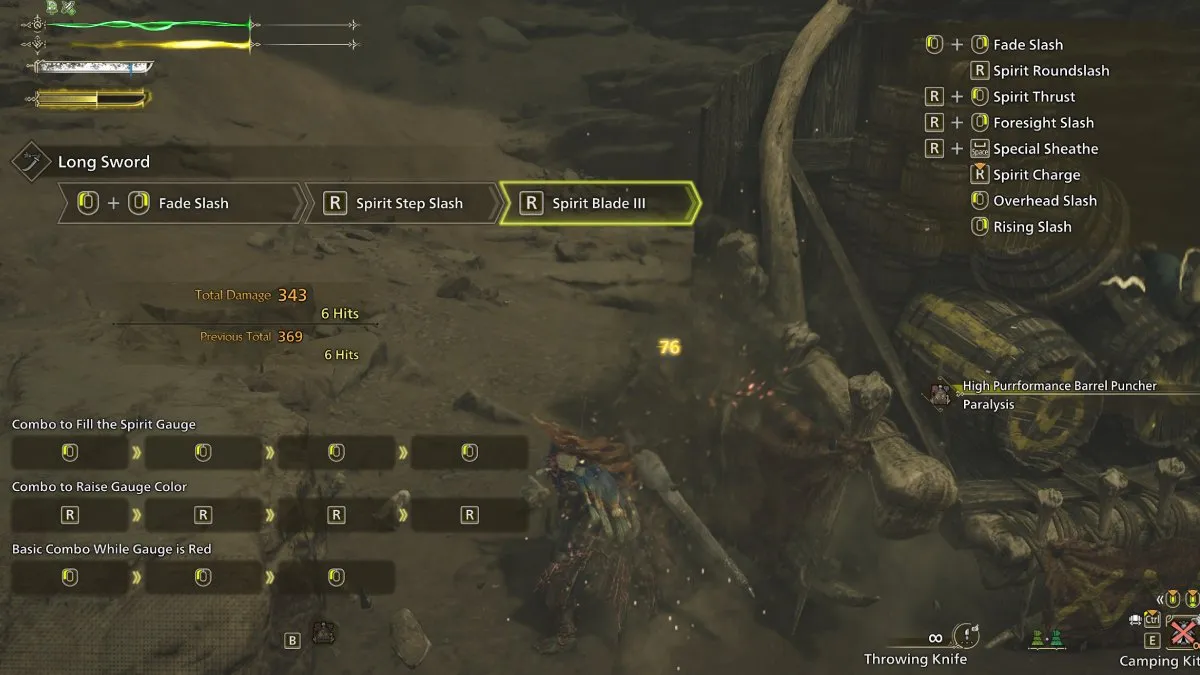
- Pay attention to your Spirit Gauge meter: Your Spirit Gauge meter has three levels and a charge bar used to perform the Spirit Slash attacks. Using normal attacks builds up the bar and landing the final hit of the Spirit Slash combo, Spirit Roundslash, increases your Spirit Gauge meter to the next level. Each level of the Spirit Gauge meter increases your damage output and lets you perform different special attacks.
- The best combo to build your Spirit Gauge meter: Rather than spamming light and heavy attacks, it’s better to use the Fade Slash attack by pressing both the thrust and slash attack buttons. It builds a significant amount of Spirit Gauge meter and you can directly go into Spirit Slash III, skipping a large portion of the combo.
- The Foresight Slash also increases your Spirit Gauge level: The Foresight Slash ability gives you i-frames as long as you can land the dodge and the follow-up attack. Missing it depletes your gauge, but landing it gets you another level to your Spirit Gauge meter. The i-frames are quite generous and it can cancel several animations, so be sure to master this tool.
- Use the Special Sheathe skills: What separates the average Long Sword player from the best is how they use their Special Sheathe abilities. You have two Sheathe abilities, the first being a quick double slash that gives you passive Spirit Gauge meter regeneration and the second one is a parry ability that negates damage and raises your Spirit Gauge level.
- Spirit Release Slash is your strongest attack: Once you’re at the Red Spirit Gauge meter at level three, you can unleash the Spirit Helmbreaker and follow it up with the Spirit Release Slash. This move consumes three of your gauge levels but deals devastating damage. It’s your primary source of nuke damage.
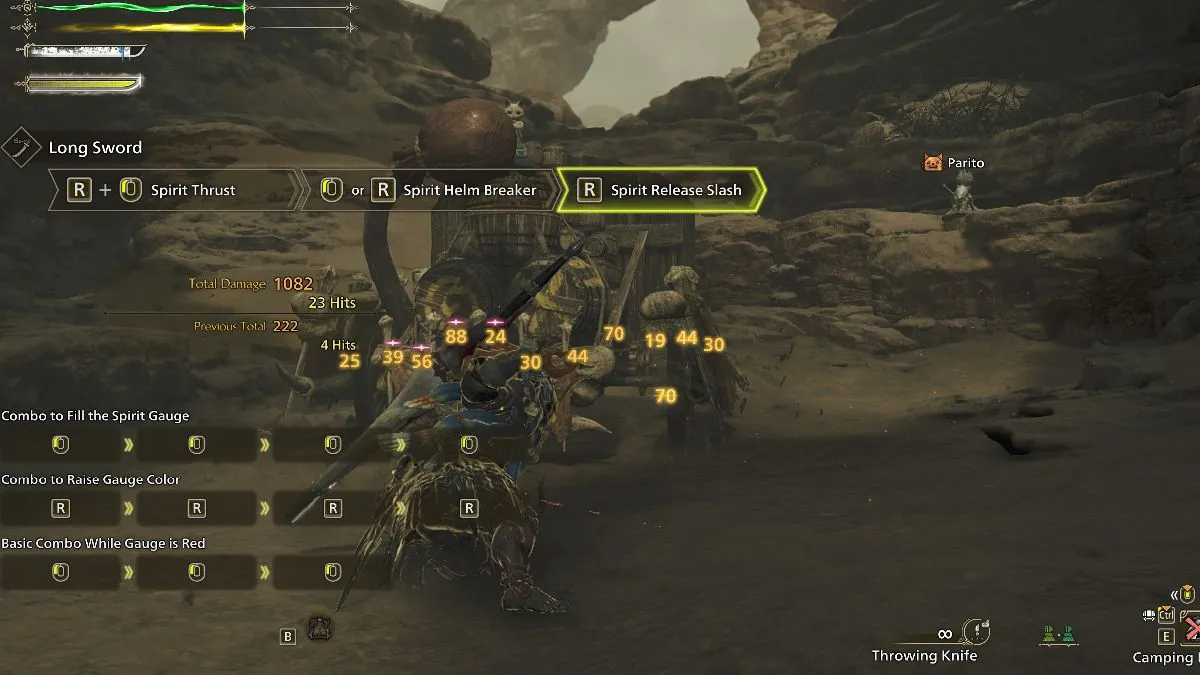
- How to best use the Red Spirit Gauge meter: While the Spirit Release Slash is extremely powerful, the Red Spirit Gauge state is also a lot more powerful than before in Monster Hunter Wilds. Perform your standard Spirit Slash combos and regular Slash combo strings while you have a red meter before using up the gauge levels as they deal a ton of damage too.
- Use the Iai Spirit Slash: After learning the monster’s attack patterns, you should learn how to mix in Iai Spirit Slash counters. It lets you counter and negate any single damage instance and increases your Spirit Gauge level by one.
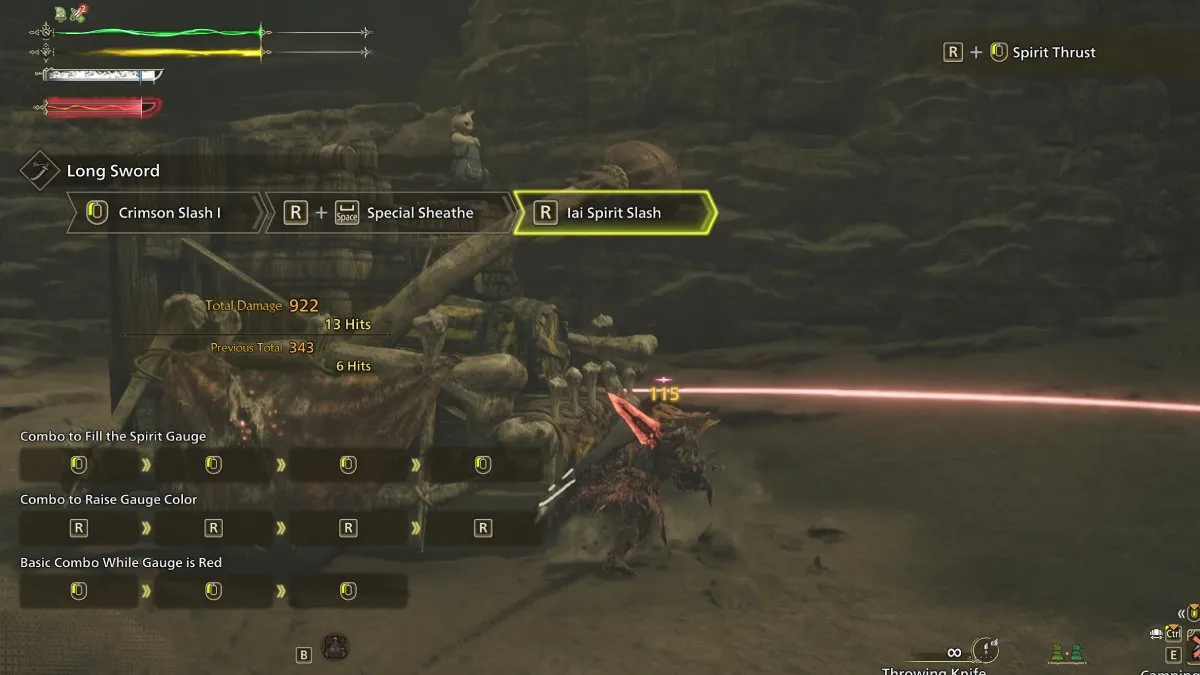
- The Quick Sheathe skill is vital: The Quick Sheathe skill lets you access your Iai Slash and Iai Spirit Slash much more quickly making it a must-have Long Sword skill if you plan on mastering the weapon. Without the Quick Sheathe skill at Level three, the Long Sword can feel quite clunky to use. Prioritize getting this skill for every Long Sword build.

Best Low Rank Long Swords
As a diehard Monster Hunter Wilds enthusiast, I’ve found that making headway through the early-game and low-rank content can be quite the grind. Upgrading your Long Sword is crucial to keep pace with the escalating difficulty. During my journey through the main story, the specific build doesn’t seem to matter much due to limited access to top-tier armors, charms, or weapons. Instead, it’s all about focusing on the stats and elements of your Long Sword. Here’s a list, ranked in order, of the best longswords for smoother early-game progression:
1. [Name of the first sword] – This sword offers great balance between attack power and speed, making it ideal for newcomers.
2. [Name of the second sword] – While a bit harder to obtain, this sword boasts impressive raw damage, perfect for taking down tougher monsters.
3. [Name of the third sword] – This longsword offers excellent sharpness, ensuring you can maintain maximum damage output throughout your hunts.
4. [Name of the fourth sword] – Although it requires more effort to craft, this longsword’s elemental properties make it a valuable addition to your arsenal for certain monster types.
- Dosha Fatecleaver I (Rarity 2)
- Uth Khlunda I (Rarity 3)
- Wyvern Blade Ash I (Rarity 4)
- Wyvern Blade Verde I (Rarity 5)
- Windclaw Blade II (Rarity 5)
For each rarity level within the game, these swords represent the top-tier Long Swords available at that stage. Mastering the basics of the Long Sword and learning how to optimize your damage output will allow you to effortlessly complete the story missions and progress to the more demanding High Rank quests.
Best Long Sword builds and armor
Long Sword Crit build
| Weapon | Element | Affinity | Helm | Braces | Coil | Greaves | |
|---|---|---|---|---|---|---|---|
| Stahlrecht | Dragon | 20% | Gore Helm β | Arcvulvan Mail β | Gore Vambraces β | Arkvulcan Coil β | Arkvulkan Greaves Alpha |
For enthusiasts of Affinity who enjoy landing powerful critical hits with each strike, the Long Sword crit build is a perfect fit. This setup concentrates on optimizing your Affinity attribute to ensure consistent critical attack sequences and activate skill combos based on critical hits, resulting in massive bursts of damage and Spirit Slash Releases. This build offers raw damage stats that are suitable for players who have mastered the fundamentals of using the Long Sword. The preferred weapon for this setup is the Stahlrecht from the Gore Magala lineage, although a Artian Long Sword with superior statistics may offer better performance.
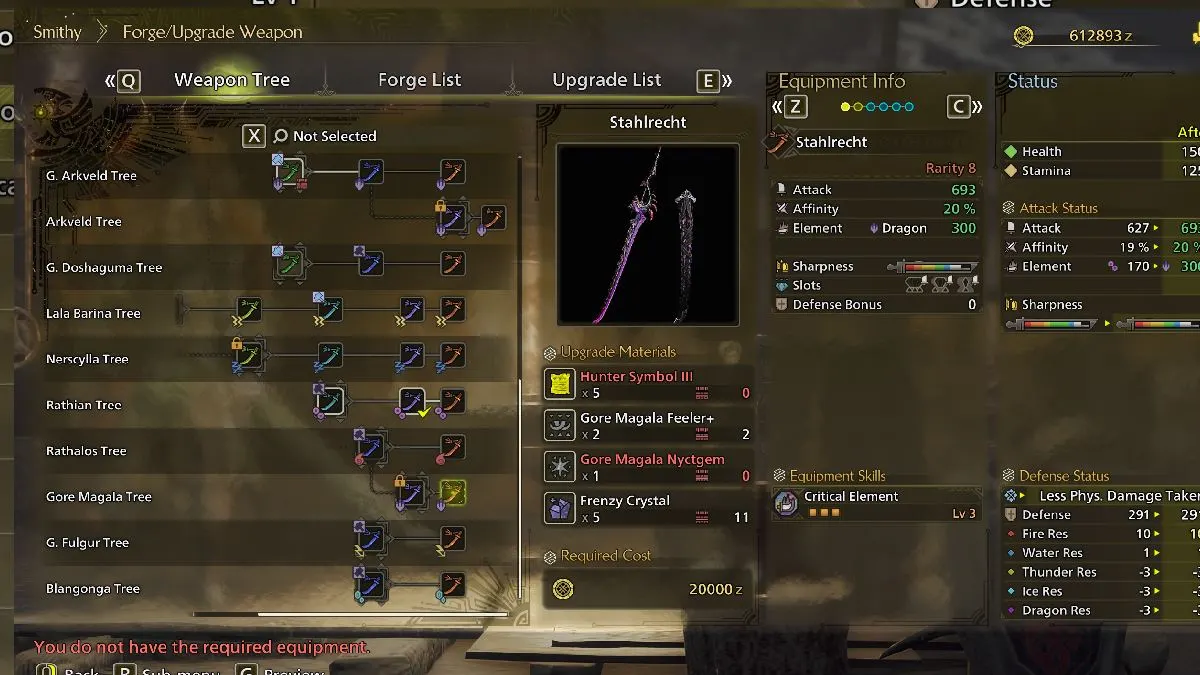
The Arkveld armor set provides Weakness Exploit, boosting your Affinity against injuries. Two Gore Magala components were selected for the Gore Magala’s Tyranny buff, causing Frenzy. Once you conquer the Frenzy, an extra 15% Affinity is granted to you. This additional Affinity complements your weapon’s inherent 20-30% Affinity. All armor pieces are Beta versions, allowing for additional decoration slots, with the exception of the Arkvulkan Greaves, which offer Quick Sheath Level 2, a crucial benefit.

Additionally, consider selecting the Corrupted Mantle to boost your Affinity should you find it insufficient.
Best skills and decorations
Here are the best skills and decorations for the Long Sword crit build:
- Quick Sheathe: Faster sheathe animation.
- Critical Eye: Increases your Affinity(Crit rate).
- Critical Boost: Increases critical attack damage.
- Critical Draw: Increases Affinity to 100 percent for draw attacks.
- Weakness Exploit: +30 percent Affinity for weak point attacks and a further 20 percent for wounds.
- Master’s Touch: Critical hits don’t reduce weapon sharpness.
- Antivirus: Enables the Affinity bonus after recovering from Frenzy.
- Maximum Might: Increases your Affinity if your stamina remains full for a short period.
- Focus: Improve Spirit Gauge charge rate.
Long Sword Paralysis Sleep combo build
| Weapon | Element | Affinity | Helm | Braces | Coil | Greaves | |
|---|---|---|---|---|---|---|---|
| Lala Ornithocton | Paralysis | 15% | G. Arkveld Helm β | G. Arcvulvan Mail β | G. Arkveld Vambraces β | G. Arkveld Coil β | G. Arkveld Greaves β |
A captivating method of wielding the Long Sword lies in employing a build that consistently inflicts conditions like sleep and paralysis on enemies. This renders them immobile and defenseless at various points during combat, allowing you to experiment with all the powerful longsword combo attacks fearlessly. This build is particularly robust if you find it challenging to dodge incoming attacks. If your goal is to incapacitate and dismantle monsters, this build could be ideal for you.
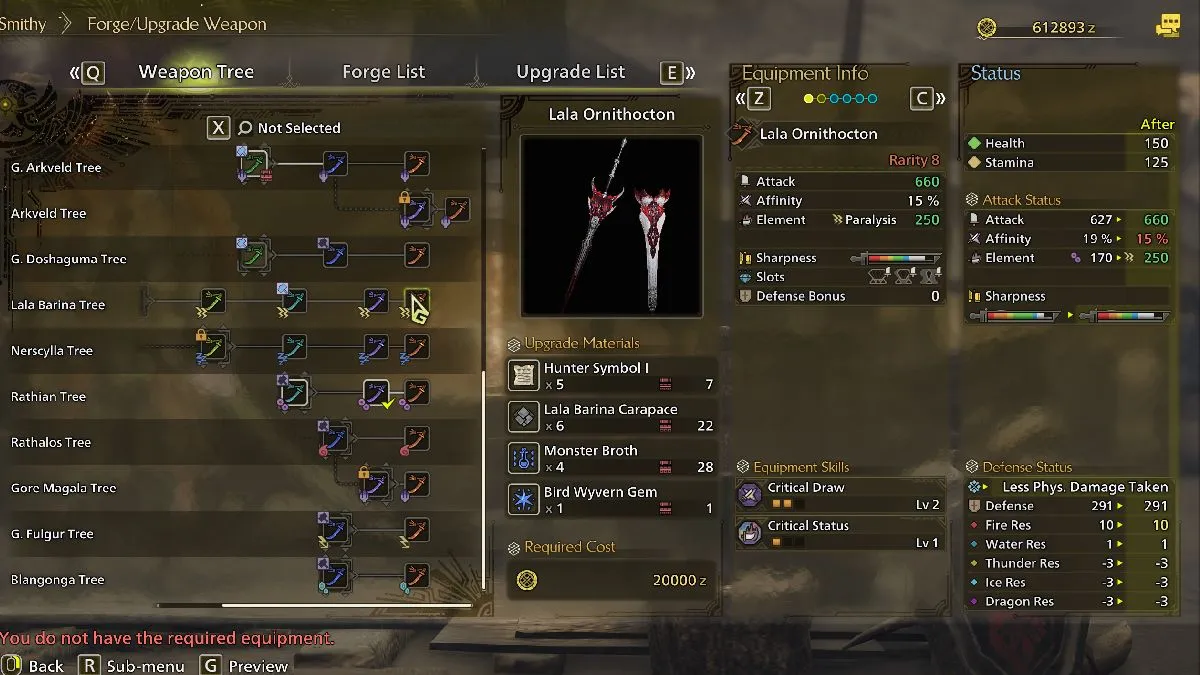
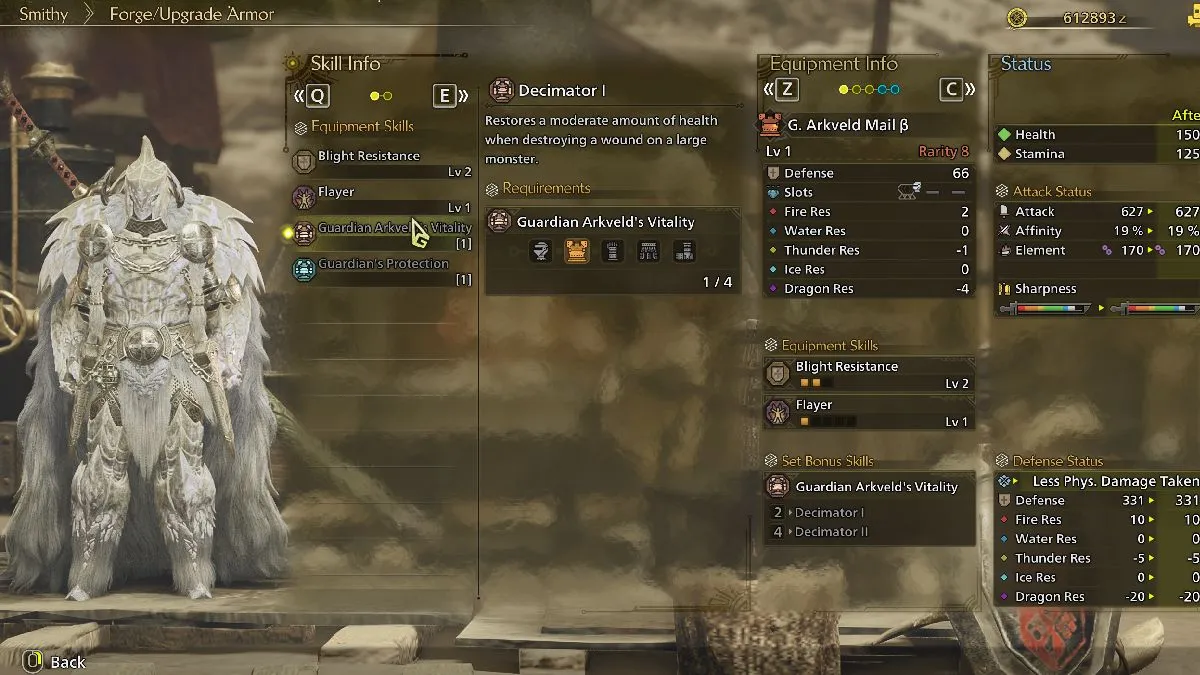
In this scenario, we’ll be using the Lala Barina Rarity 8 weapon, specifically the Lala Ornithocton, which has the ability to swiftly immobilize opponents through paralysis. Alternatively, you may opt for an Artian weapon imbued with a Paralysis element. For armor, we’ll be donning the Guardian Arkveld armor set. This set boosts your proficiency in Flayer and Weakness Exploit skills. The Guardian Arkveld’s Vitality skill offers substantial durability for extended combat sessions. Since we want to make the most of the Decoration slots, we’ll be utilizing the beta set as it lacks unique abilities compared to the rest of the set, and we need all the available slots we can get.
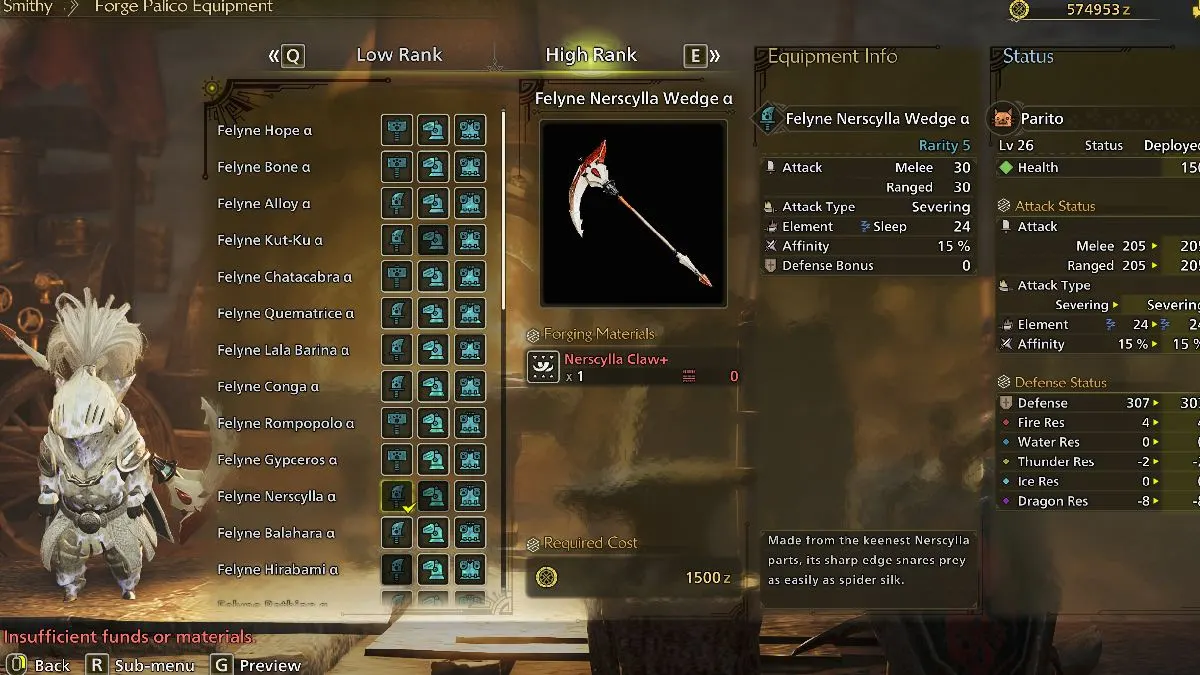
The true key to mastering this construction relies on your Palico companion. It’s no surprise that your Palico proves more valuable than any other ally in Monster Hunter. By arming your Palico with a potent sleep weapon, it can deliver enough blows to promptly induce Sleep in the target monster. Consider crafting the Felyne Nerscylla Wedge using Nerscylla Claws for your Palico. When combined with your own paralysis ability and the traps that your Palico lays down, this setup often allows you to slay monsters before they manage to flee from the initial territory.
Best skills and decorations
- Flayer: Makes it easier to inflict wounds and increases non-elemental damage.
- Critical Status: Increases effectiveness of status effects when landing critical hits.
- Weakness Exploit: +30 percent Affinity for weak point attacks and a further 20 percent for wounds.
- Paralysis Attack: Increases the rate of paralysis build-up.
- Quick Sheathe: Faster sheathe animation.
- Critical Eye: Increases your Affinity(Crit rate).
- Divine Blessing: Reduce damage taken by 50 percent.
- Guardian Arkveld’s Vitality: Restore health while attacking and destroying wounds.
This construction may not yield the quickest completion times, but it’s an exceptionally robust configuration that significantly reduces the likelihood of defeat and optimizes damage delivery through debilitating effects.
You’ll find some exceptional strategies for wielding the Long Sword, along with tips on how to effectively use it in Monster Hunter World. For additional guidance, explore our comprehensive collection of all monsters, their vulnerabilities, and the top character build codes.
Read More
- Clash Royale Best Boss Bandit Champion decks
- Vampire’s Fall 2 redeem codes and how to use them (June 2025)
- World Eternal Online promo codes and how to use them (September 2025)
- Best Arena 9 Decks in Clast Royale
- Mobile Legends January 2026 Leaks: Upcoming new skins, heroes, events and more
- Country star who vanished from the spotlight 25 years ago resurfaces with viral Jessie James Decker duet
- How to find the Roaming Oak Tree in Heartopia
- M7 Pass Event Guide: All you need to know
- Solo Leveling Season 3 release date and details: “It may continue or it may not. Personally, I really hope that it does.”
- ATHENA: Blood Twins Hero Tier List
2025-03-06 07:08