

Overview
- B2 Iron RL Supporter with a focus on buffing, with stronger buffs every second Burst.
- Wants to be the sole B2 to be Bursting, or else she won’t have access to her stronger buff.
- Her wide spread of buffs to give make her excellent for funnel team compositions, where one DPS is the main focus at the expense of the other DPS units.
- Her standard buffs are average for the B2 slot nowadays, making her a weak buffer for regular teams if you already have the more standard options available.
- Since she only gives away a wider variety of buffs on even Bursts if played properly on her own, one B3 unit will be ‘neglected’ and have weaker buffs normally.
- Massively upgraded by Prika. This will be discussed in Prika’s article, as she is very mediocre on her own, unlike Mint.
Should You Pull?
Okay, so Mint’s a solid support character. I really like that she gives a little boost to my team’s damage no matter what, and then even bigger boosts if we can keep chaining those bursts together. It’s cool that anyone can benefit from those buffs! But honestly, to really get the most out of her, you need a team built around critical hits. Just stacking crit buffs isn’t enough – you need characters who can actually land those criticals, or deal extra damage with them. Otherwise, it feels a little wasted, you know? She’s good, but needs the right setup to shine.
Mint’s buffing ability is unique – it doesn’t apply consistently. When she first uses her Burst in battle, the buff is weaker, and this pattern repeats with every other Burst, prioritizing healing at those times. However, during the Bursts where she doesn’t focus on healing, she provides stronger buffs. This means units bursting alongside Mint during these cycles will deal more damage than those bursting when she’s focused on healing.
When paired with Prika, Mint becomes a top-tier support character. Together, they significantly boost the performance of most damage-dealing units, but this relies on having both of them. Mint can provide some support on her own, but Prika is much less effective unless she’s specifically helping Mint.
Like Tia and Naga, Mint and Prika work best when paired together, unlike Mast and Anchor. Mint is strong on their own, but becomes much more powerful with Prika’s help. Because of this synergy, players will likely choose to acquire Mint, both characters, or neither.
Mint is decent on her own, but getting both her and Prikka is the best way to maximize their potential, as they’re likely to be very powerful together. However, it takes a lot of attempts to get both of them, so it’s okay to skip them if you don’t have the resources. While they’re better than most single-target buffers (except for Nayuta and Crown) when used together, you need both to see that benefit. If you don’t get Mint before her banner ends, there’s little point in trying for Prikka.
Newbie/Incomplete Box Section
Mint is a powerful support character who stands out thanks to her special ‘stance’ ability. While she can be an excellent buffer, her effectiveness really shines with certain team setups and in specific situations.
Buff comparison with Mint vs. other B2 contemporaries.
Mint
- Attack Damage: +30.02% for 10 sec. when Bursting
- Max Ammunition Capacity: +40% for 10 sec. when Bursting
- Critical Damage: +45.05% for 10 sec. when Bursting.
- Caster ATK: +45.02% for 3 sec. with every Full Charge when Singing
- Critical Rate: +19.94% for 10 sec. when Singing.
- Projectile Explosion Damage: +50% for 10 sec. when Singing.
- Pierce Damage: +32.72% for 10 sec. when Singing.
- Healing: +1.8% of caster’s final Max HP/s for 3 sec with every Full Charge when Dancing
Ade: Agent Bunny
- Caster ATK: +15.2% for 5 sec when releasing a Full Charge attack (effectively permanent)
- Pierce Damage: +18.36% for 5 sec. when releasing a Full Charge attack (effectively permanent)
+10.13% for 10 sec. when using Burst. - Attack Damage: 55.04% for 10 sec. when using Burst.
Grave
- Attack Damage: +48.2% for 10 sec. when using Burst
- Pierce Damage: +39.98% for 10 sec. when using Burst
+48.4% when in her unique reload (mutually exclusive with her Burst buff)
Crown
- Caster ATK: +64.51% for 15 sec. when entering Full Burst (effectively permanent with enough Burst gen)
- Reloading Speed: 44.35% for 15 sec. when entering Full Burst (effectively permanent)
- Attack Damage: 20.99% for 7 sec. when receiving a heal effect.
36.24% when using Burst for 15 sec. (effectively permanent)
Crust
- Caster ATK: +10% when in Maillard Status permanently
+20% when entering Full Burst when in Maillard Status for 10 sec. - Attack Damage: +20% when using Burst for 10 sec.
- Distributed Damage: +60% when using Burst for 10 sec. when in Maillard Status.
Mint offers a lot of different benefits compared to other Support characters. However, while she boosts attack damage consistently, her critical rate and damage boosts are less reliable and weaker. Plus, most of her buffs only work when she’s actively singing, which means she isn’t always the best fit for every team composition.
She functions like a typical support character, offering buffs everyone can benefit from. However, because her most powerful damage-boosting buffs only activate while she’s singing, one damage dealer will often miss out on optimal performance during the fight. The best time for a damage dealer to attack is usually during their special ‘Burst’ ability, but her buffs aren’t consistently available then, leaving one player at a disadvantage.
If your team has two damage dealers with similar power, Mint is generally weaker than other options. However, Mint can be very strong when one damage dealer is much stronger than the other, especially if you also have a third unit that boosts the primary damage dealer’s power.
Mint works really well with Prika! When Prika uses her abilities, Mint automatically starts providing buffs. While Mint can buff one damage dealer on her own, she shines when paired with Prika, as they can both buff damage dealers, and their combined buffs are very powerful.
Basic Information
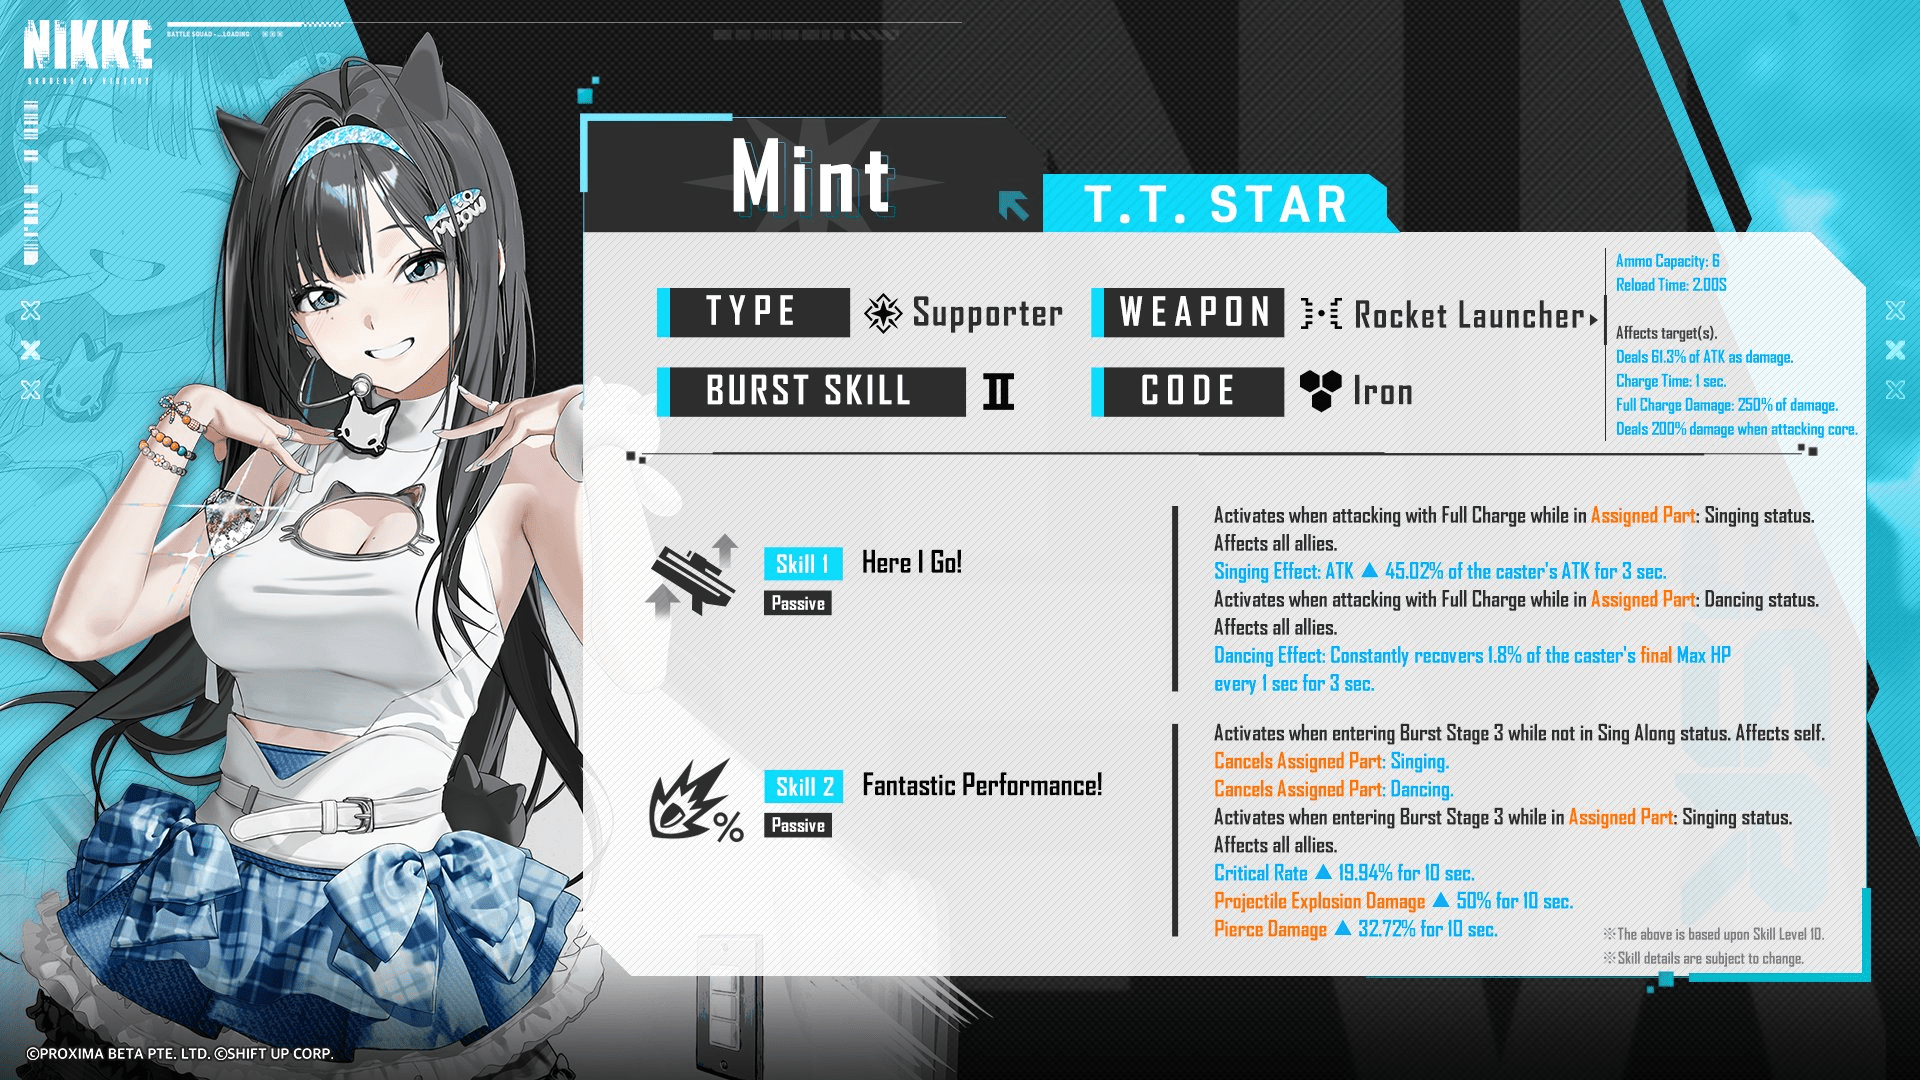
- Skill 1: Here I Go!
- Skill 2: Fantastic Performance!
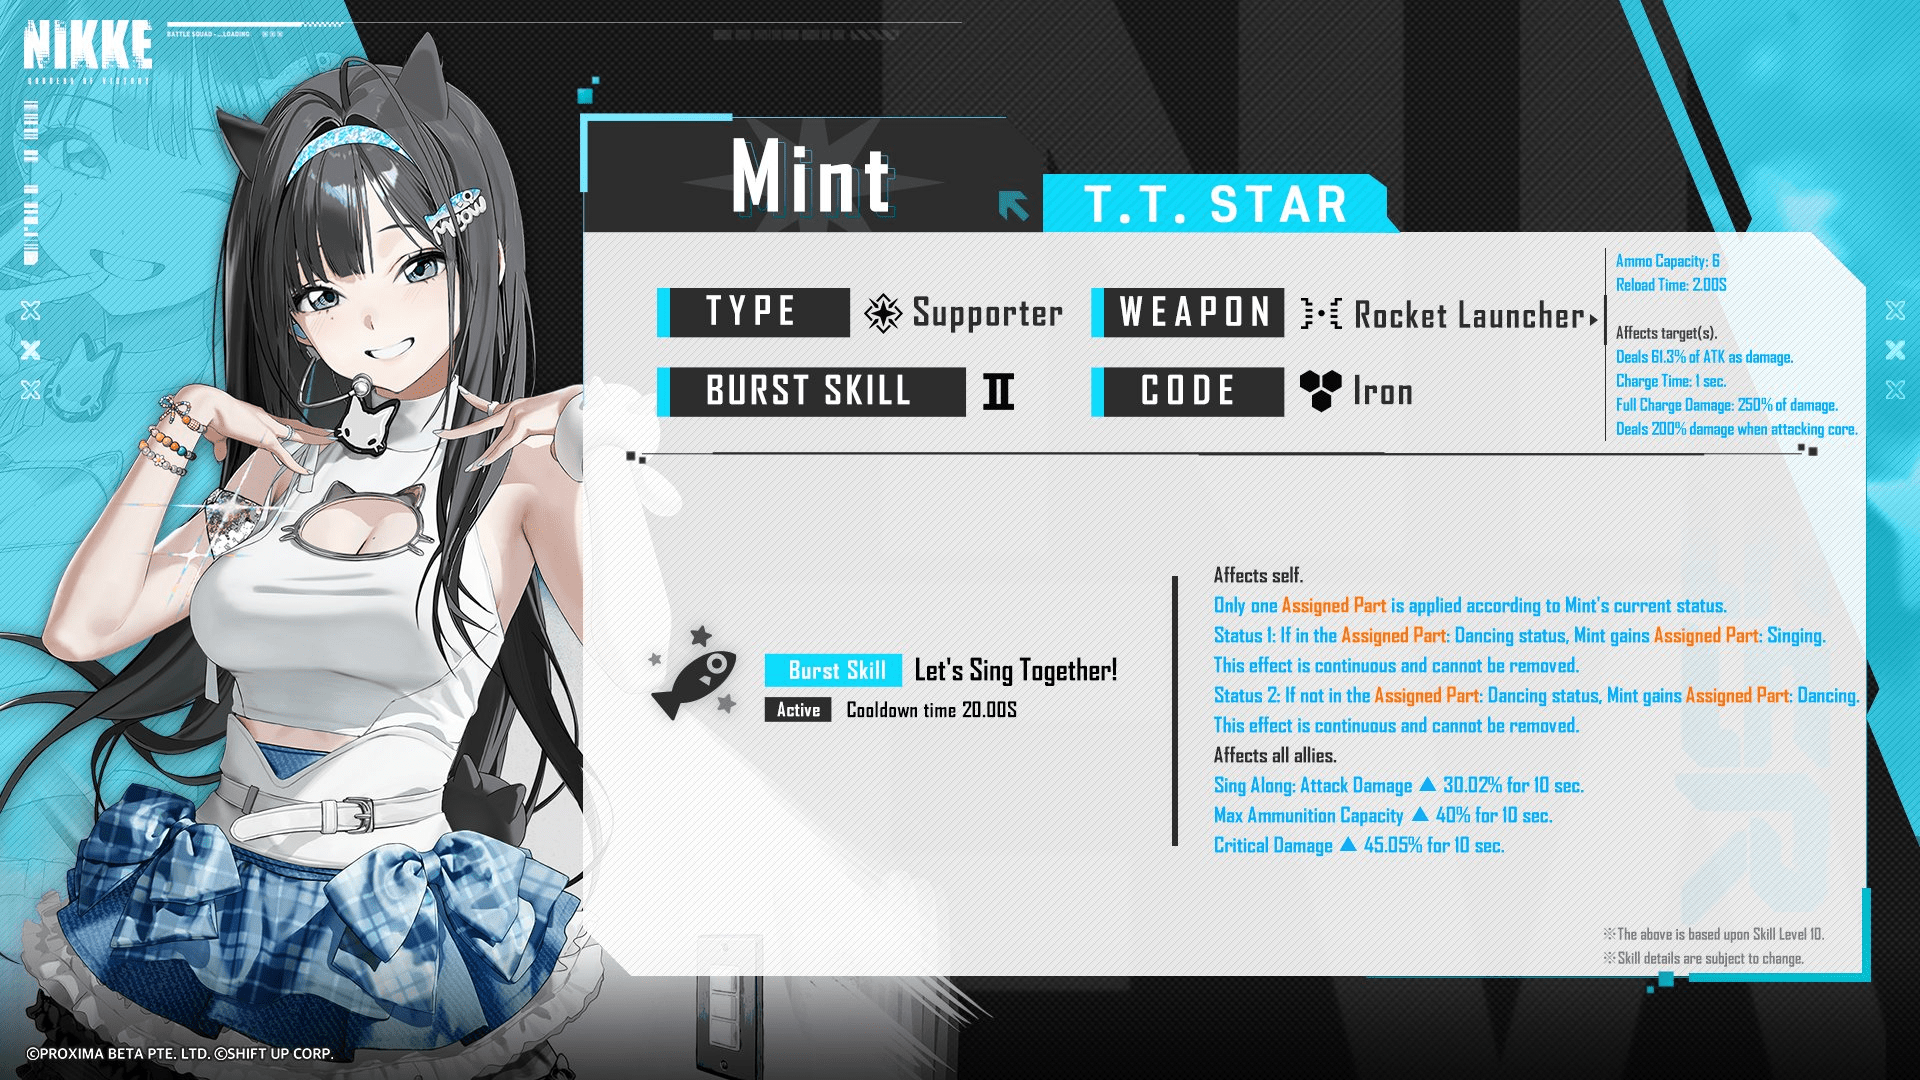
- Burst: Let’s Sing Together!
- Cooldown: 20s
- Rarity: SSR
- Burst: II
- Weapon: RL
- Class: Supporter
- Element: Iron
- Manufacturer: Tetra
- Squad: T. T. Star
- Weapon Name: Coyly Star
Skill Overview
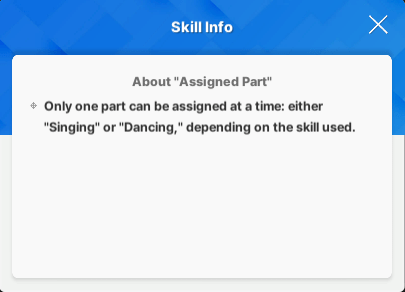
It’s best to explain how some of her abilities work upfront, as knowing this will make the rest of her skillset easier to understand.
Only one Assigned Part is applied according to Mint's current status.
Status 1: If in the Assigned Part: Dancing status, Mint gains Assigned Part: Singing.
This effect is continuous and cannot be removed.
Status 2: If not in the Assigned Part: Dancing status, Mint gains Assigned Part: Dancing.
This effect is continuous and cannot be removed.


Activates when entering Burst Stage 3 while not in Sing Along status. Affects self.
Cancels Assigned Part: Singing.
Cancels Assigned Part: Dancing.
Burst’s initial effect changes Mint’s status. If Mint isn’t already Dancing, she’ll enter that state. If she is Dancing, she’ll switch to Singing. Essentially, Mint begins battles with no special status, and using Burst for the first time will always give her the Dancing status.
After she uses her next Burst, she’ll switch to Singing instead. Keep in mind that if she isn’t already Dancing, using Burst again will make her start Dancing. Because Singing and Dancing are different, she’ll keep switching between these two states each time she uses Burst.
Skill 2’s first effect means that if she reaches Burst Stage 3 without the ‘Sing Along’ buff (gained from using her Burst), she’ll lose both her Singing and Dancing statuses. Since a lot of her damage boost comes from being in Singing status – which she achieves by using Burst after Dancing – she absolutely needs to be the second character to use her Burst consistently. If she doesn’t, her Burst will always start with Dancing, and she’ll never get the benefits of the Singing status.
She has two states, but can only be in one at a time. She begins in the Dancing state when she uses Burst for the very first time. If she uses Burst again without interruption, she’ll switch to the Singing state. After that, each subsequent use of Burst will cause her to switch between Dancing and Singing, as long as she continues to use Burst uninterrupted.
Because of her special Burst ability, Mint will constantly be singing whenever Prika is present. More details about this ability will be explained in Prika’s dedicated article.
Skill 1: Here I Go!
When you attack with a Full Charge while your unit is in its Assigned Part, it enters a Singing status, boosting the attack of all allies by 45.02% of your unit’s attack for 3 seconds.
Similarly, attacking with a Full Charge while in the Assigned Part activates a Dancing status. This constantly restores 1.8% of your unit’s maximum HP to all allies every second for 3 seconds.
As a Mint fan, I’ve been figuring out how to maximize her abilities! Basically, if she uses her Full Charge attack while Singing, she gives the whole team a really strong boost to magical attack for 3 seconds. But if she’s Dancing when she uses it, everyone gets healed a bit every second for those same 3 seconds – it’s a percentage of her total health, so it scales! The cool thing is, because her charge and reload times are fairly quick (1 and 2 seconds respectively), if you can speed up either of those – especially her reload speed – you can practically guarantee she’ll always have one of those buffs active, since you can keep up with the 3-second duration. It’s all about keeping that Full Charge going!
Mint will change to a ‘Dancing’ state after her first Burst use. Her second Burst, used without interruption, will switch her to ‘Singing’. From then on, she’ll alternate between these two states with each Burst. Because of this alternating pattern, Mint provides an attack boost every other Burst. To maximize this, the damage-dealing character she’s supporting should use their Burst at the same even intervals as Mint.
Skill 2: Fantastic Performance!
This skill activates when you reach Burst Stage 3, unless you are currently dancing. It affects yourself, canceling any assigned singing role. If already singing when reaching Burst Stage 3, the skill activates for all allies, increasing their Critical Rate by 19.94%, Projectile Explosion Damage by 50%, and Pierce Damage by 32.72% for 10 seconds.
If Mint doesn’t use her special ability (Burst) and the team reaches the final stage before Full Burst, she’ll lose either her Singing or Dancing bonus. However, if she does use her Burst to reach that final stage while already Singing, she’ll give the entire team a significant boost to Critical Rate, Projectile Explosion Damage, and Pierce Damage.
When Mint enters Singing mode, she gains a powerful attack boost from her Skill 1, significantly increasing the damage her Burst attack deals. This is especially helpful because she doesn’t receive these benefits while Dancing.
Burst: Let’s Sing Together!
Cooldown: 20 seconds.
This ability impacts both Mint and all allies. Mint receives a continuous effect based on their current status. If Mint is in Dancing status, they gain the Singing effect. If Mint is not in Dancing status, they gain Dancing. This effect cannot be removed.
Additionally, all allies receive the following benefits for 10 seconds:
Attack Damage increases by 30.02%
Max Ammunition Capacity increases by 40%
* Critical Damage increases by 45.05%
Okay, so here’s how Mint’s Burst works. If she’s not already in ‘Dancing’ mode, using her Burst will put her into it. While Dancing, every time she lands a Full Charge attack, she’ll heal! If she is already Dancing, she’ll switch over to ‘Singing’ instead. That’s where things get really good – Singing gives a big damage boost from both her Skill 1 and Skill 2. Plus, she’ll also boost my Attack Damage, Max Ammo, and Critical Damage. Just a heads-up about that Max Ammo buff though – it doesn’t actually refill your magazine, so it’s not super helpful for Nikkes who don’t reload during their Burst.
These benefits happen constantly because they’re linked to Mint’s Burst ability, not just when she’s Singing. Since Singing provides many other helpful boosts, a team member who Bursts with Mint while she Dances will likely see a significant drop in damage output, as they won’t receive all of her buffs. Therefore, Mint works best in teams designed around a single, main damage dealer – often called ‘funnel’ teams – where everyone, including other damage dealers, focuses on supporting that one unit.
When calculating damage, both projectile explosions, piercing damage, and regular attacks are treated as the same type of damage. If a unit is already increasing its attack damage with its own abilities, adding more of the same type of boost won’t be as helpful, as these boosts become less effective when stacked together.
Mint’s buffs that increase Critical Damage aren’t as reliable as her other abilities. This is because Critical Damage relies on actually landing a critical hit, and it’s already competing with other stat boosts before any additional buffs are applied. So, while Mint has good buffs overall, the Critical Damage buffs aren’t consistently strong by themselves.
Combining critical hit chance and damage boosts can be very strong, but currently, there aren’t many top-tier options. Because Mint offers rare and valuable critical hit modifiers, she has potential for future units that don’t rely heavily on increasing their attack damage – units like Liberalio, Neon: Vision Eye, and, to some degree, Rapi: Red Hood, who already generate a lot of damage themselves.
Campaign
Mint isn’t very strong as a solo Campaign unit. She can only significantly boost one ally at a time, leaving the others with minimal benefits. In difficult situations where maximizing everyone’s output is crucial, her healing isn’t impactful enough. Her power boost doesn’t fully activate until her second Burst, and she constantly switches between providing a strong damage buff and a weaker one with each use of Burst.
Prika and Mint work incredibly well together as support units, offering a powerful buffing combination that can even surpass Crown, particularly for units that focus on piercing damage. Prika’s healing also keeps the team alive during battles. The main drawback is a slower start to combat, as Prika needs to activate her abilities first to allow Mint to reach her full potential as a buffer.
This initial boost doesn’t significantly increase your team’s damage output, regardless of whether Mint is playing alone. If you need to quickly eliminate enemies at the beginning of a fight, like in a campaign, you might want to choose a different support character who provides a more powerful, immediate damage buff.
Arena
Mint isn’t a strong choice for Arena combat. Her damage boost is underwhelming, her healing isn’t effective against quick, powerful attacks, and she doesn’t generate burst damage very quickly. Pairing her with Prika in PvP isn’t a good strategy either, because it takes too long to get their combination going, and most PvP fights are won with the first big attack.
Special Interception | Union Raid | Solo Raid
Because of her abilities and how well she works with Prika, she can fill two roles during raids. Most commonly, she’s used alongside Prika as a general support character, boosting the power of other units. She’s particularly effective with units that deal Piercing damage or use Rocket Launchers, as she provides extra buffs specifically for those damage types.
These units aren’t required for success, but they work best when used with Mint and Prika. This combination adds extra damage that other teams can’t achieve. It’s similar to how Mast and Anchor benefit units that deal ‘Distributed Damage’ – it’s helpful, but not essential.
Mint can also be effective in solo raids by pairing her with units that work well with her ability to direct energy – her ‘funnel’ kit. While not as strong as using her with Prika, certain team setups allow one unit to do the majority of the damage. Without Prika, you also have more flexibility in building your team, freeing up a support slot for other options.
This strategy is best for experienced players. Without Prika, Mint’s default buffs aren’t as effective because they primarily boost damage output only some of the time, leaving your other damage dealers weaker.
Because Mint only transforms into her powerful Singing mode when she uses Burst as her second action and is the only unit active, the character responsible for dealing damage should use Burst second.
Zwei, when paired with Mint, significantly boosts her allies’ critical hit rate – almost reaching the maximum (starting at 15%, plus 63% from Zwei and 20% from Mint equals 98%). Even a single line of the ‘Critical’ attribute on gear will guarantee a 100% critical hit rate, ensuring all attacks land as critical hits. Her ability to greatly increase Pierce damage makes her especially effective when used with Nikkes who wield Pierce-type weapons. Because Zwei doesn’t reduce cooldown times herself, it’s essential to include a cooldown-reducing unit in the B1 slot, which unfortunately means Prika can’t be used in this setup.
She significantly boosts her attack power through her skills and when her Burst is active. She also deals a lot of extra damage thanks to buffs from her Skills 1 and 2, especially while her Burst is up. Because of this, typical attack-boosting buffs aren’t as helpful on her – buffs that increase critical damage or debuffs that make enemies take more damage are much more effective.
Combining her with Zwei and Mint ensures all her attacks, even her rapid-fire burst attack, hit critically, dealing more damage than typical setups. Pairing her with a unit that boosts her overall damage, like Guillotine: Winter Slayer or Privaty (Treasure), further increases her potential.
Snow White doesn’t strengthen herself directly, but she pairs wonderfully with Mint. This is because her main attack is a powerful single hit that gets a big boost from most buffs – anything except Charge Damage. Her base damage is already incredibly high, at 4995% when fully charged (calculated as 499.5% base damage multiplied by a 1000% Charge Damage bonus).
To maximize Snow White’s damage, it’s best to equip her with as many damage-boosting buffs as possible. Mint is particularly good for this because she offers a wider range of buffs than most other B2 support units. When paired with a B1 support and a B3 unit like Maxwell, who buffs while dealing damage, Snow White will be significantly more powerful than before.
Strengths
- A wide spread of buffs to give out to allies compared to other B2 units.
- None of the buffs given out are of low value, nor do they have low numbers.
- Can be played on her own or with Prika, each team composition with their own pros and cons, giving her a degree of flexibility.
- When combined with Prika, the buffs the two provide have the highest general DPS up to the majority of allies, not taking into account ammo management.
- Wide variety of buffs allow her to be more efficient in how she buffs, especially when combined with other buffing units in the team.
Weaknesses
- A major part of her DPS buffs are only active half the time if she is by herself; Prika is required to make them effectively permanent.
- Regardless of whether she is played on her own or with Prika, the bulk of DPS buffs will strictly kick in on the second Burst; in an intense Campaign combat situation where the first burst matters a lot, this can be a major downside.
- Mint’s Max Ammunition buff is somewhat useless or even detrimental; since it doesn’t come with a magazine refill, it does nothing for allies mid-Burst time unless they reload partway through Burst time. It is an active detriment for allies reliant on Last Bullet mechanics, such as Anis: Sparkling Summer.
- While her buffs don’t have low numbers, none of them are also particularly high aside from Pierce Damage and Projectile Explosion Damage when combined with Attack Damage (same damage category), making her a jack-of-all-trades, master of none without Prika.
Rating
| Category | Rating |
|---|---|
| Overall | SS |
| Story | S |
| Bosses | SS |
| Arena | B |
These Power vs. Environment (PvE) ratings assume she’s paired with Prika. Without Prika, achieving optimal performance requires specific team compositions, and her overall rating would be closer to an A. Specifically, she’d score a B in Story mode and an A against Bosses.
Recommended Cubes
Mint’s special ability (S1) only lasts for 3 seconds, so her weapon normally can’t keep it active automatically. With a 2-second reload and 1-second charge-up, the buff disappears each time she fires. Using a Resilience cube solves this problem by maintaining the buff.
Doll Priority
Although she’s a support character who doesn’t directly deal damage, her skill one provides a significant attack boost based on caster attack – 45% at its highest level. While this boost isn’t for her own attacks, it greatly benefits damage-dealing characters, as they receive a substantial increase to their attack power when she uses the skill.
For this reason, I would recommend at minimum having her equipped with an SR Doll at Stage 5.
Expected Skill Priority
| Nikke | Budget Skill Investments | Recommended Skill Investments | Skill Priority | Notes | Investment Priority |
|---|---|---|---|---|---|
| Mint | Skill 1: 4 Skill 2: 7 Burst: 7 |
Skill 1: 7 Skill 2: 10 Burst: 7 |
S1 < S2 | Skill 1 is where her caster ATK buff originates from, Recommended to max once you have a doll max and/or some spare bodies, thanks to its above average scaling.
Skill 2 is where half of her DPS buffs come from, especially the critical rate. Burst is where another part of her buffs come from. However, the ammo is mostly useless, the Attack Damage is inferior compared to standard B2 buffers and the Critical Damage buff is weak on its own, making the buffs from Burst less effective to level. Recommended to max if using alongside Prika. |
High |
2026-06-01 17:10