
As a seasoned gamer with over two decades of experience under my belt, I can confidently say that The Plucky Squire is a delightful addition to the adventure genre. However, it’s not just the charming graphics and engaging storyline that have kept me hooked; it’s the hidden glitchbirds scattered throughout each chapter that have added an extra layer of excitement to this game.
As an enthusiastic reader, I can’t help but sing praises for “The Plucky Squire” – a charming, albeit not without its puzzles! Nestled within every chapter are elusive creatures known as Glitchbirds. If you’re aiming to unlock all the game’s accomplishments/trophies, you’ll need to track down each of these ten feathery hidden gems. Here’s a guide to help you save every last one of them!
All 10 Glitchbird Locations in The Plucky Squire
Chapter 1
In the opening stages of the game, you’ll encounter the first Glitchbird quite readily. Not long after Violet teams up with Jot en route to Tome Tower, you’ll stumble upon it in an open area. It’s positioned conspicuously just behind a sign, ready for its savior.
Chapter 2

This is the elusive, camouflaged Glitchbird number one. It’s subtly concealed, a hint that not every Glitchbird will present itself as blatantly as the one we encountered in Chapter 1.
On the pages showing Jot being assaulted by luminescent beings resembling green lightning, there’s a damaged wall located near the top of the scene. Approach the wall from its left side, and it will vanish, uncovering the concealed glitchbird ready for saving, who was hiding behind it.
Chapter 3

To locate Moonbeard’s beverage, scooter over to Jot’s house on the left-hand side of the page. Upon entering, you’ll find the glitchbird right away.
Chapter 4
In Chapter 4, the elusive Glitchbird is tucked away and can be hard to spot. Advance through the chapter until you get the bow and arrow sitting on Sam’s desk outside the book. Complete the mini-game inside the book, then proceed till you reach a city inhabited by snails in need of your assistance for recovering some misplaced books. Eventually, leave the storybook using the portal located on the left side.
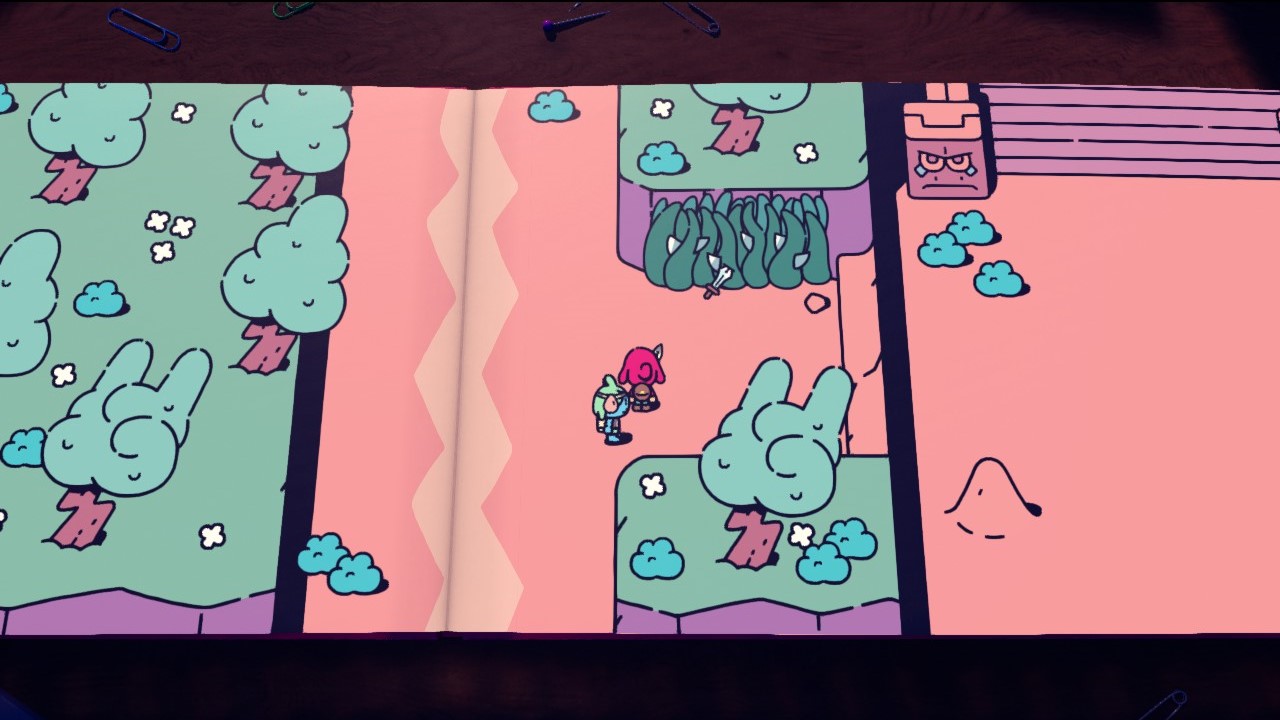
In the book, go back a few pages from where you are now. Find the spread where a tree on the right side hosts snails, and the left page is dark as ink. Cross over that dark page to uncover a concealed entrance. Jump into it to save the glitchbird.
Chapter 5
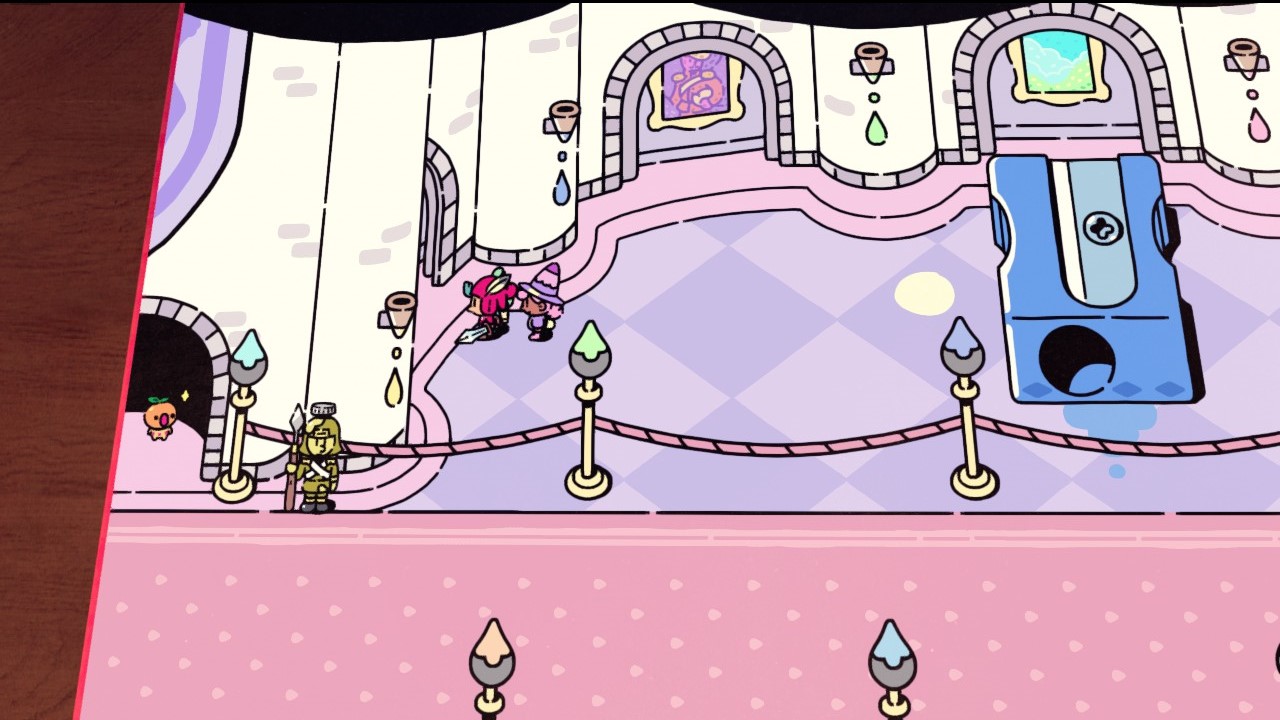
In Chapter 5, the glitchbird is conspicuously located in the queen’s castle on the left side. Unfortunately, a guard prevents access to save it. Don’t worry though – there’s a secret entrance! A doorway, subtly concealed behind a column, is found on the opposite side of the rope, above the guard. Simply walk through the arch and you’ll discover the hidden room where the glitchbird resides.
Chapter 6
As you traverse Trarrg Mountain, you’ll encounter some of Humgrump’s troops moving a bolt. On the page where Jot is currently, there’s a barrier of vines that you can’t interact with for now. Keep this location in mind as later in the game, Moonbeard will give Jot mushroom bombs designed to break vine barriers. Once you get the shroom bomb, leave the book and flip back its pages to where the rat and cheese puzzle was. Go through the portal and navigate down to the previous page where you can now use that bomb to destroy the vines, uncovering the glitchbird.
Chapter 7
In the beginning, The Cheerful Squire playfully hassles the malfunctioning bird from Chapter 7, but you won’t be able to interact with it until later within the level, once you’ve obtained a new device for Jot’s use.
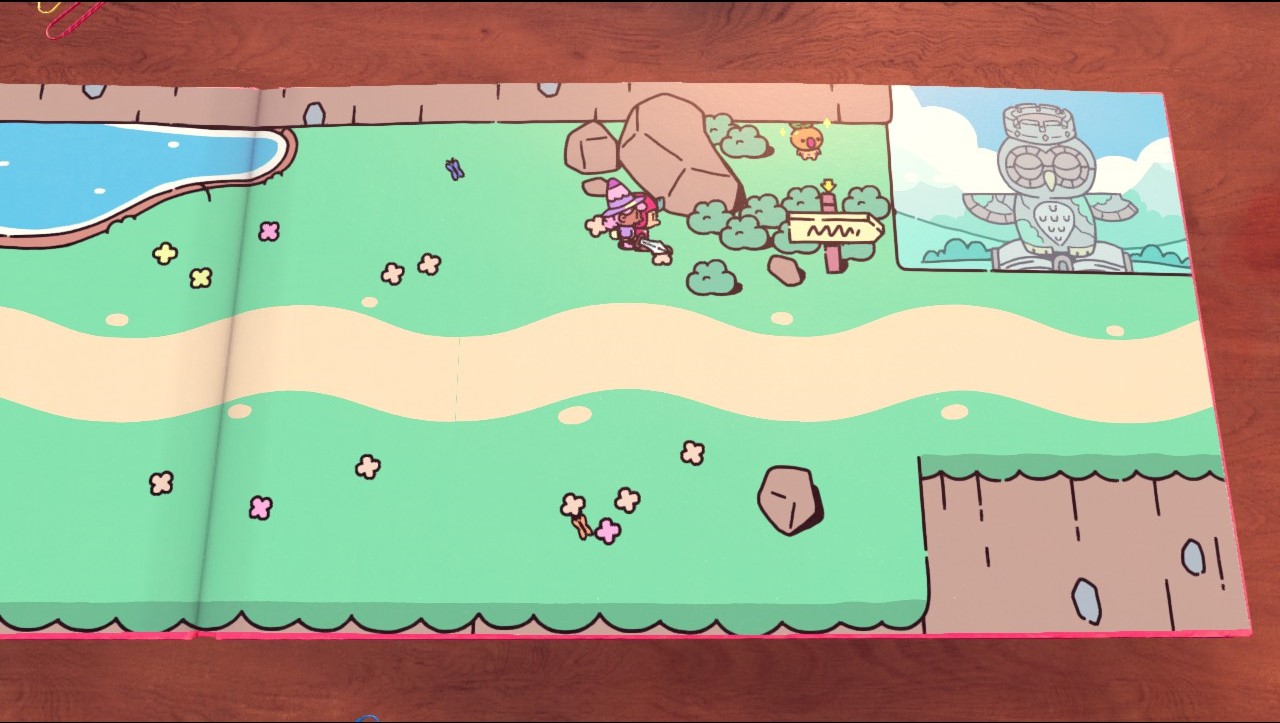
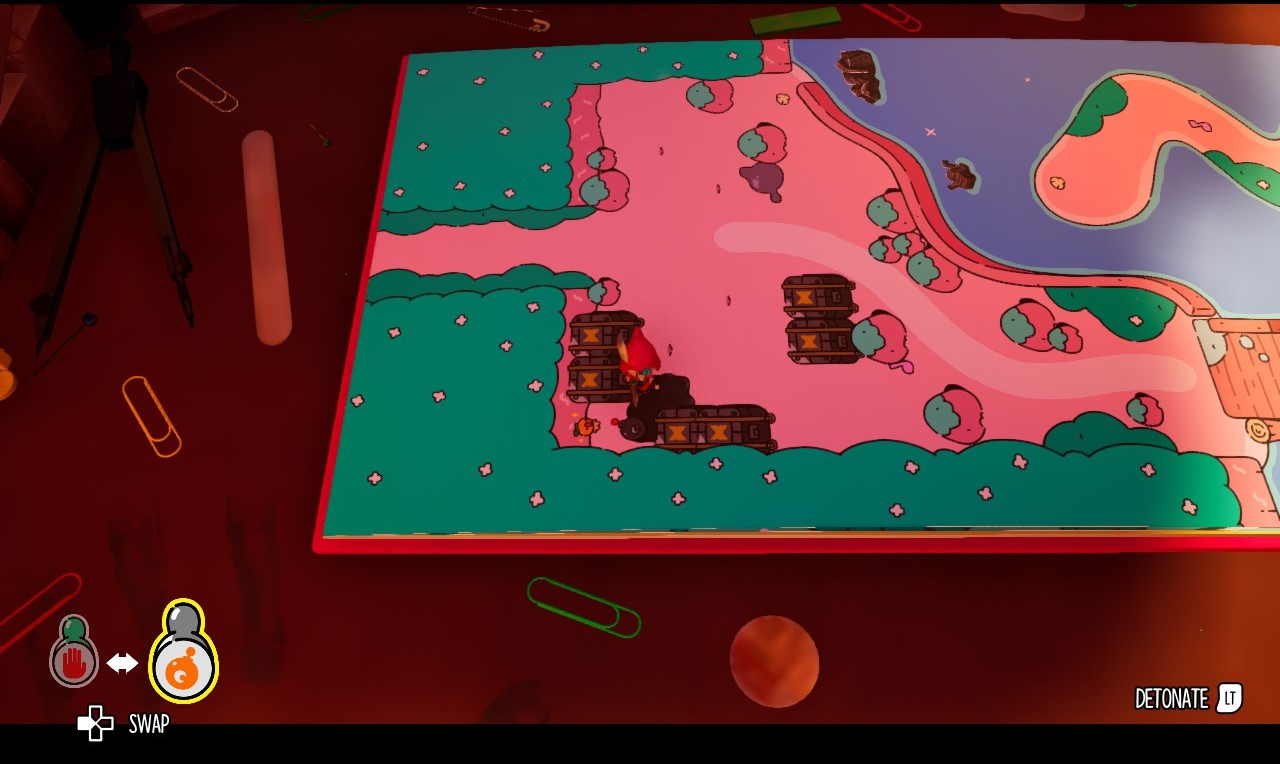
Keep moving forward within the book on the beach scene until you find the bomb symbol. This will allow you to destroy the tanks that had stopped Jot earlier, then retrace your steps back to the beach pages. Once outside of the book, utilize the bomb stamp to demolish the metallic obstacle in front of the glitchbird. Afterward, you’ll be ready to re-enter the book and save the glitchbird.
Chapter 8

Once Violet triumphs over the mage in Chapter 8, refrain from rushing into the castle right away. Instead, make your way to the left side of the castle’s entrance. There, you’ll find the glitchbird perched openly near a tree.
Chapter 9
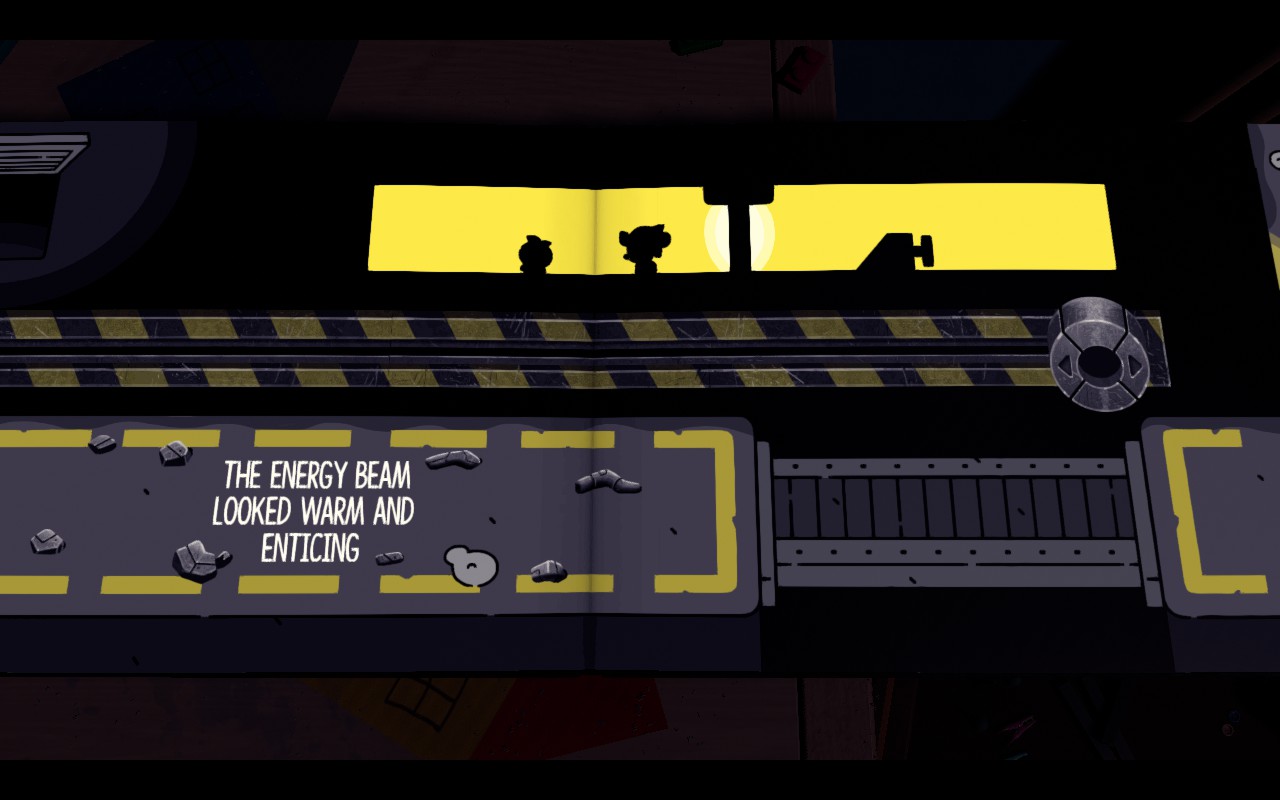
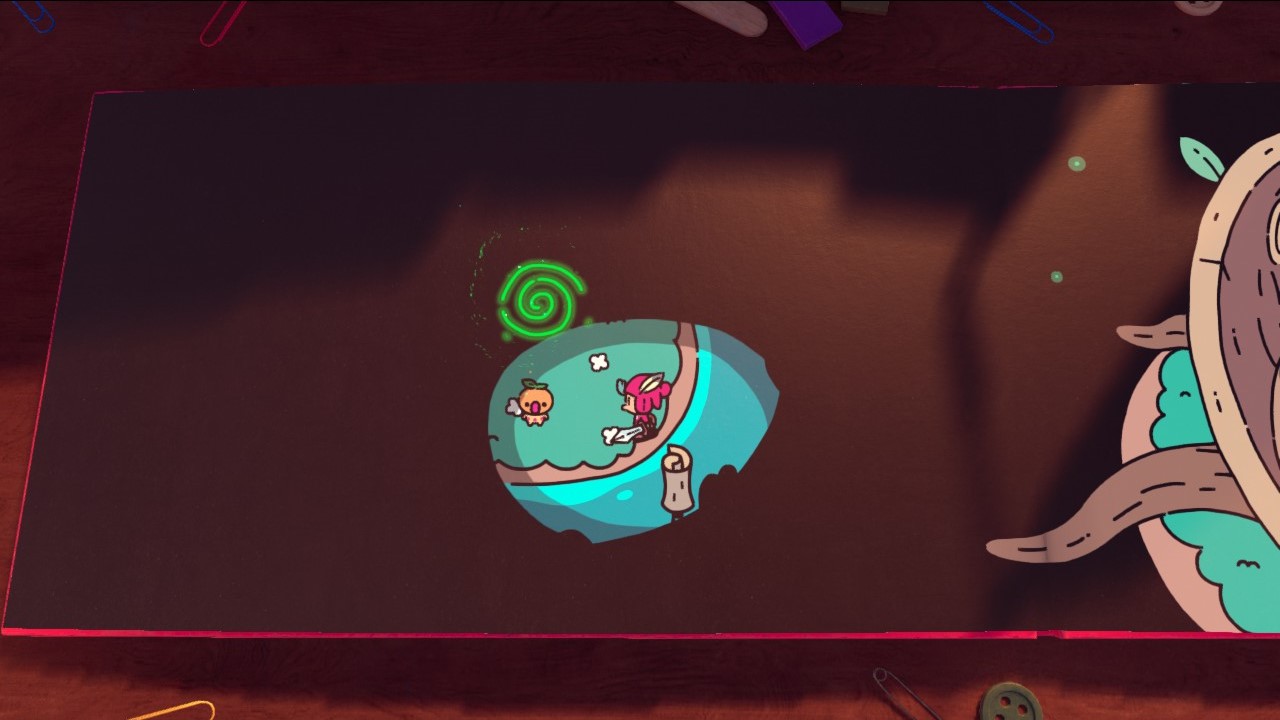
In Chapter 9, you’ll find the last remaining pair of glitchbirds. The first one is discovered not long after Jot manages to free himself from his cell within Deep Doom. With Pip the mouse by his side, Jot will narrowly avoid a lethal energy beam. Following this, Pip briefs Jot on the situation. Then, proceed towards the room on the left where Pip had been recently. Continue walking to the left, and a hidden chamber containing a glitchbird will be revealed.
In the closing act of Chapter 9, as I’m wrapping up my adventure, I find myself reunited with Jot’s companions and successfully escaping the Deep Doom. Once I’ve gained access to Humgrump’s royal residence, I veer to the right side. Towards the end of the palace, hidden behind a valve jutting from the floor, I stumble upon the elusive second Glitchbird – my final challenge in this epic game!
With all the glitchbirds successfully saved, you can now proceed to finish the game, overpower Humgrump, and obtain the platinum trophy. This, of course, is assuming you’ve managed to gather all 50 art scrolls in The Plucky Squire as per our guide. If you have, another achievement/trophy will be unlocked for you.
Read More
- Brawl Stars December 2025 Brawl Talk: Two New Brawlers, Buffie, Vault, New Skins, Game Modes, and more
- Clash Royale Best Boss Bandit Champion decks
- Best Hero Card Decks in Clash Royale
- Call of Duty Mobile: DMZ Recon Guide: Overview, How to Play, Progression, and more
- Clash Royale December 2025: Events, Challenges, Tournaments, and Rewards
- Mobile Legends: Bang Bang (MLBB) Sora Guide: Best Build, Emblem and Gameplay Tips
- Best Arena 9 Decks in Clast Royale
- Clash Royale Best Arena 14 Decks
- Clash Royale Witch Evolution best decks guide
- Brawl Stars December 2025 Brawl Talk: Two New Brawlers, Buffie, Vault, New Skins, Game Modes, and more
2024-09-21 19:40