In Monster Hunter Stories 3, players will encounter 9 powerful Invasive Monsters. Defeating them is crucial, as they threaten the survival of other species, so you’ll probably battle them as you play.
This guide will show you where to find and how to beat each Invasive Monster in Monster Hunter Stories 3. We’ll cover what you need to do to win your first battle against each one, and provide a step-by-step guide to the fights.
What are Invasive Monsters in Monster Hunter Stories 3?
Invasive Monsters are exceptionally strong creatures that have claimed territory previously inhabited by a species at risk of extinction. They’re typically stronger than others of their kind and often possess special abilities and attacks not usually seen within their species.
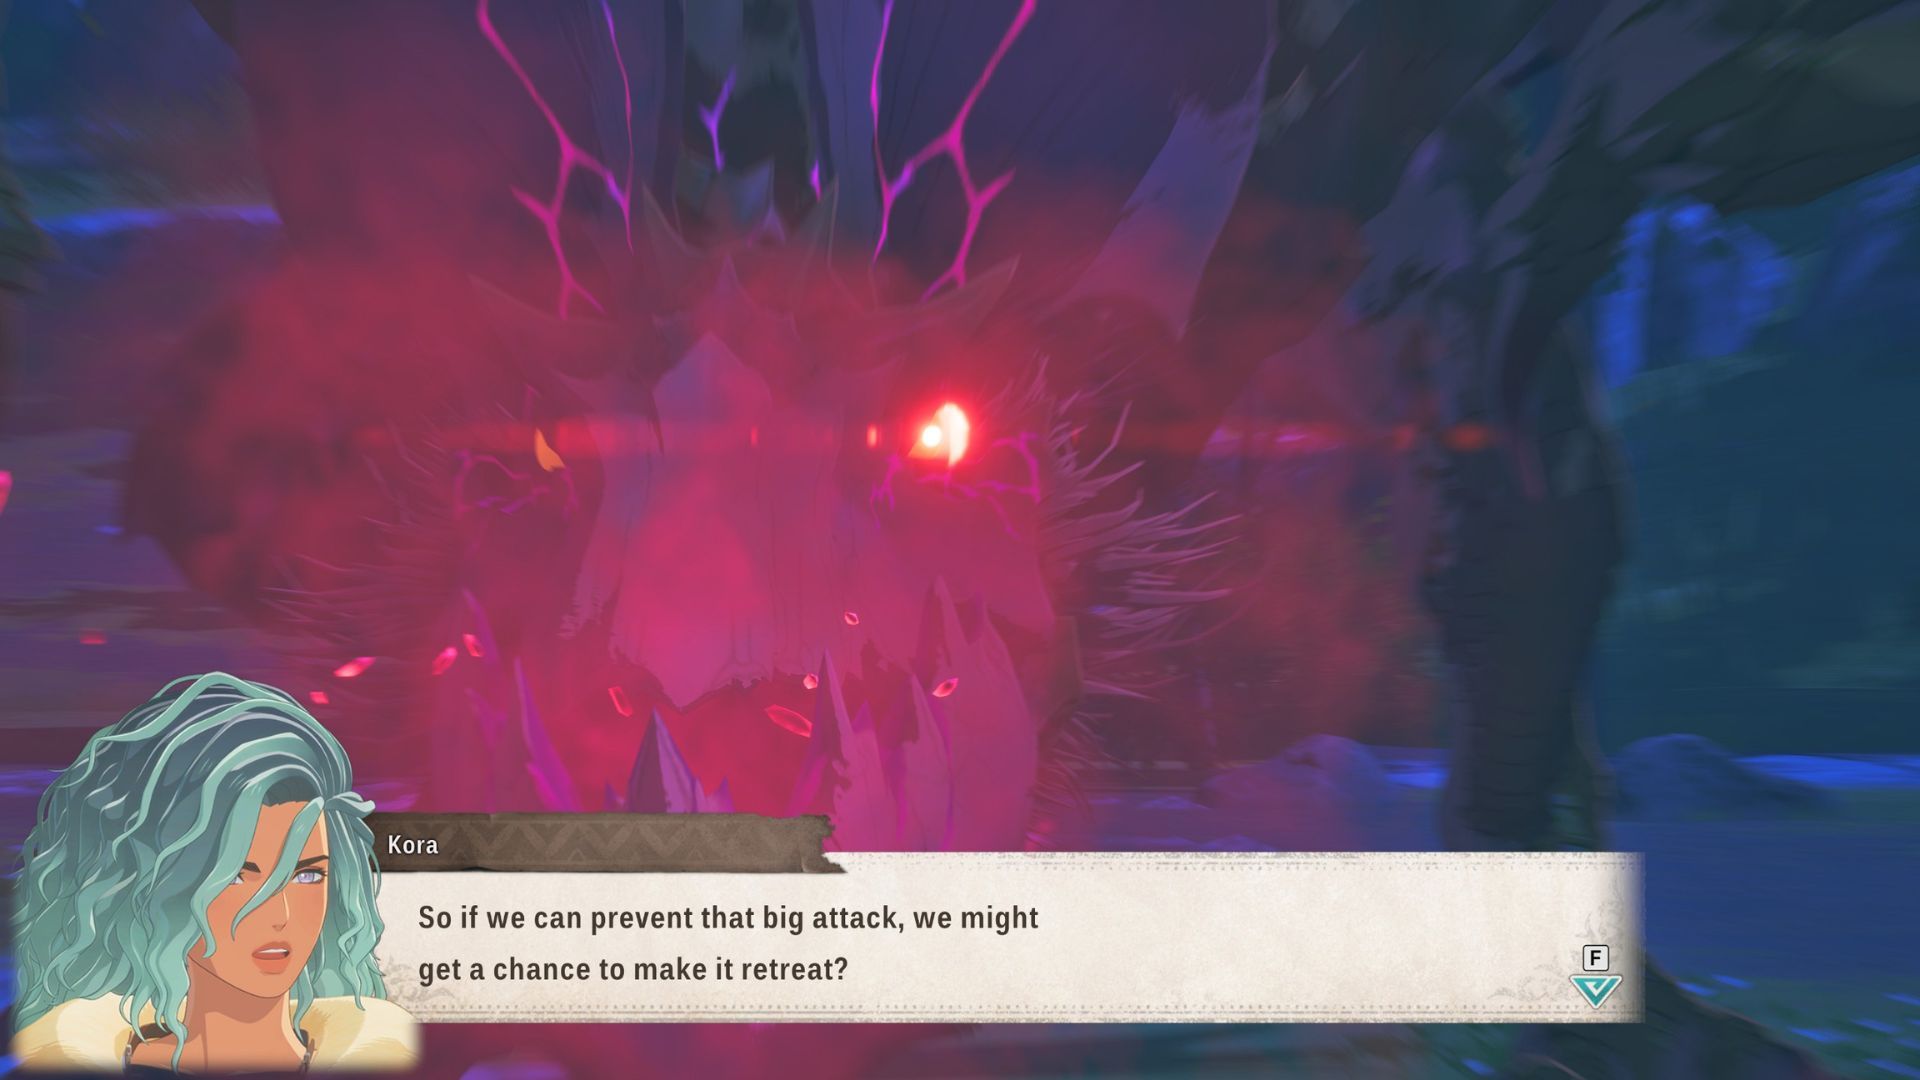
In Monster Hunter Stories 3, you’ll encounter 9 powerful Invasive Monsters. When you first battle these monsters, you’ll need to fulfill certain requirements to make them fall back. They’ll retreat to special areas called Endangered Dens, which you can then explore to find the egg of a rare monster.
So, those big Invasive Monsters? They’re gonna chill in dens for a bit. Once I’m ready for a rematch – leveled up and geared up, you know – I can go to their dens and start a proper, final battle to try and take them down for good.
This guide tells you where to find each Invasive Monster and what you need to do to beat them the first time. Here’s a list of the monsters covered:
- Invasive Yian Garuga
- Invasive Plesioth
- Invasive Sergios
- Invasive Arzuros
- Invasive Nerscylla
- Invasive Shogun Ceanataur
- Invasive Diablos
- Invasive Odogaron
- Invasive Khezu
How to Defeat Every Invasive Monster in Monster Hunter Stories 3
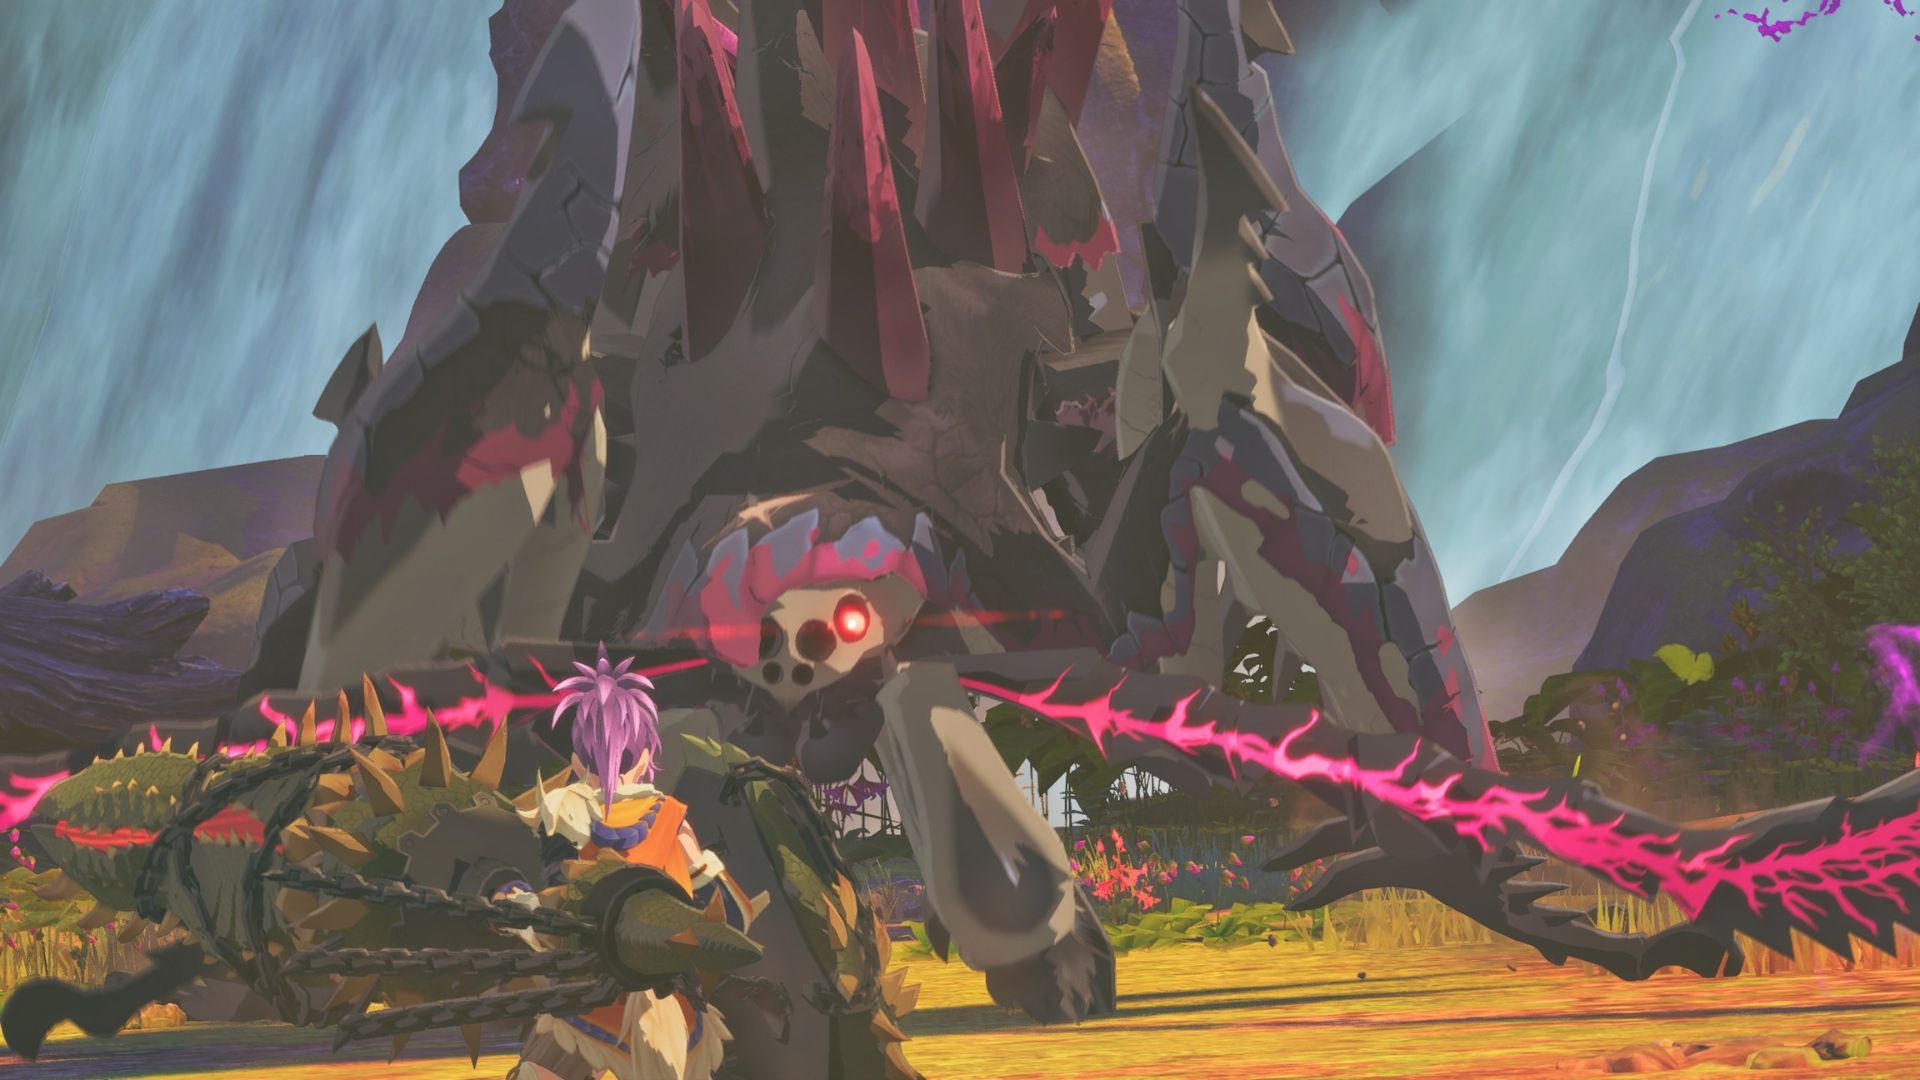
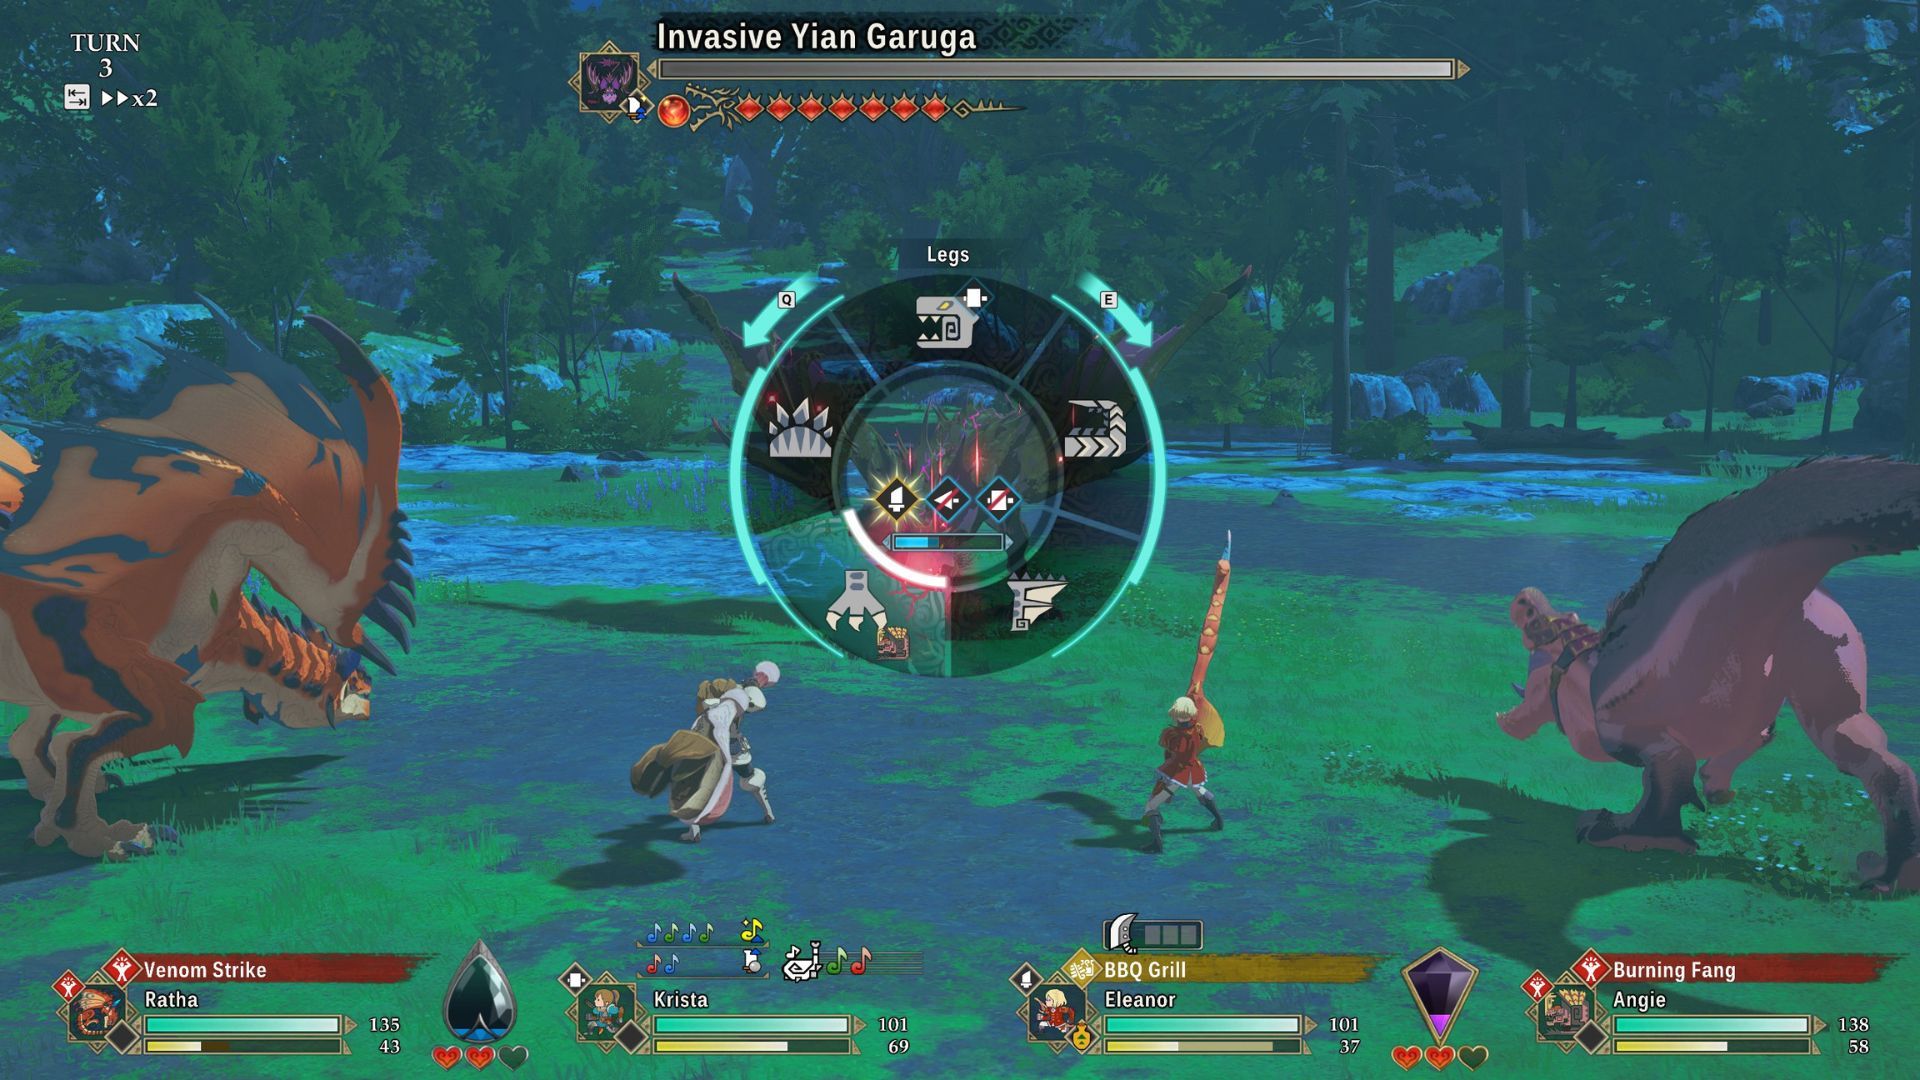
How to Defeat Invasive Yian Garuga
- Location: Azuria: Sunpetal Plains
- Requirements to defeat: N/A
- Element: Fire
- Attack Type:Technical
Okay, so after I set up my first campsite in Azuria, I ran into the Invasive Yian Garuga. It’s hanging out in the rocky area on the east side of the map – just a heads up for anyone else starting out!
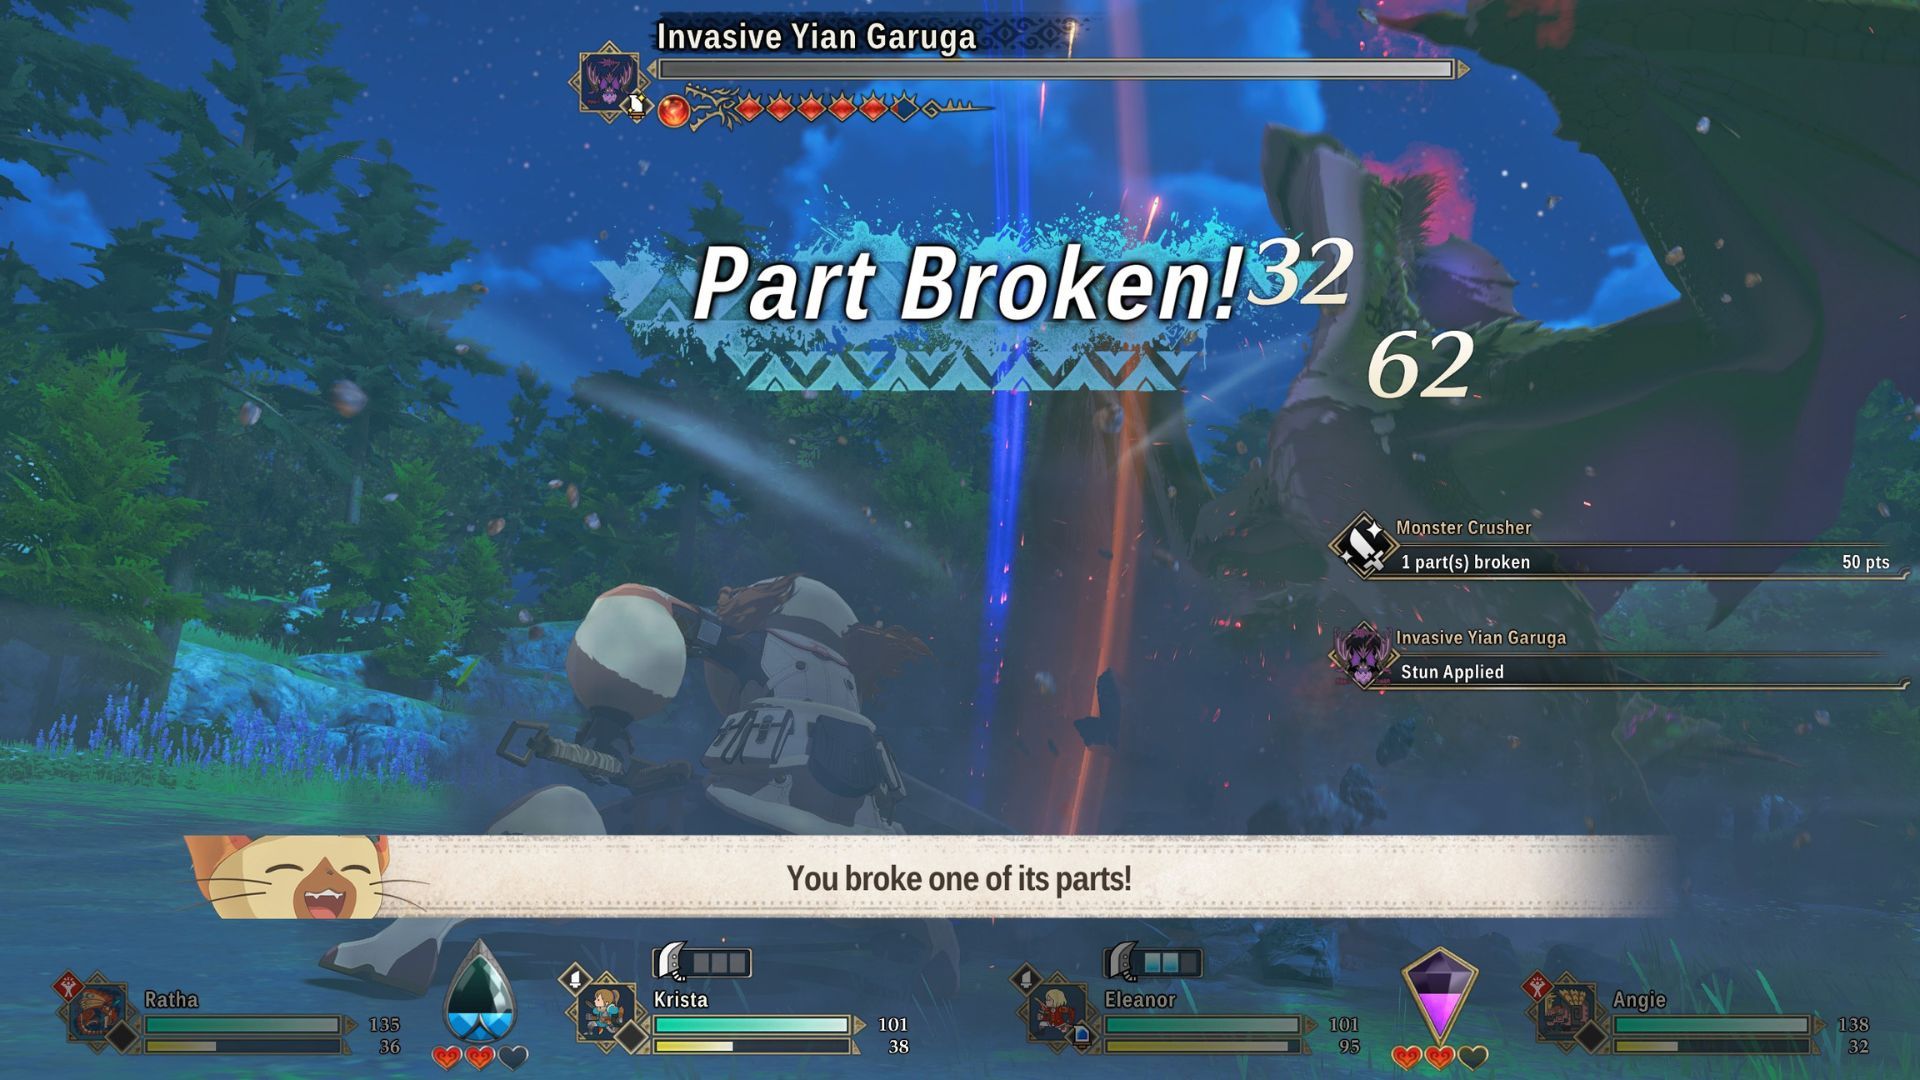
As your first Invasive Monster, the Yian Garuga isn’t overly challenging. When it gets angry, it’ll start charging up a powerful attack. The key to defeating it is to concentrate your attacks on breaking its legs.
If you break the Invasive Yian Garuga’s legs before it attacks, it will trip and fall during its next attempt. After falling, it will immediately fly away and retreat to its nest. Bringing the egg you find back to camp and hatching it will show you that it belongs to a Rathian.
How to Defeat Invasive Plesioth
- Location: Azuria: Mirror Lake
- Requirements to defeat: A Monstie with a fire attack.
- Element: Water
- Attack Type: Technical
You can find the Invasive Plesioth in a secret cave on the north side of Mirror Lake. It swims in a circle around the rock in the middle of the cave.
To beat the Invasive Plesioth, use a Monstie that attacks with Fire. At the beginning of the battle, your attacks won’t affect it, so just concentrate on dodging and staying alive until you can start dealing damage.
When the Plesioth becomes enraged, quickly have your fire-type Monstie attack its head with a fire-element move. Ratha’s Savage Fireball skill works perfectly for this. After the attack, the Plesioth will try to use a water attack, but it will fail and then give up the fight.
When the aggressive Plesioth is driven away, a new, fragile Den will appear in its place. Successfully hatching the egg found in this Den will reward you with your very first Lagiacrus Monstie.
Getting this endangered Monstie is vital for completing the An Adventuring State of Mind quest.
How to Defeat Invasive Sergios
- Location: Azuria: Mirror Lake
- Requirements to defeat: A hammer with a skill that hits all enemies.
- Element: Non-Elemental
- Attack Type: Technical
You can find the Invasive Sergios by gliding from one of the updrafts at Mirror Lake onto the hill in the northwestern part of Azuria. As you approach that corner, you’ll come to a large open area where the Sergios are roaming.
Similar to other invasive monsters, your first attacks won’t affect the Invasive Sergios. Instead of attacking, concentrate on dodging and boosting your defenses to survive.
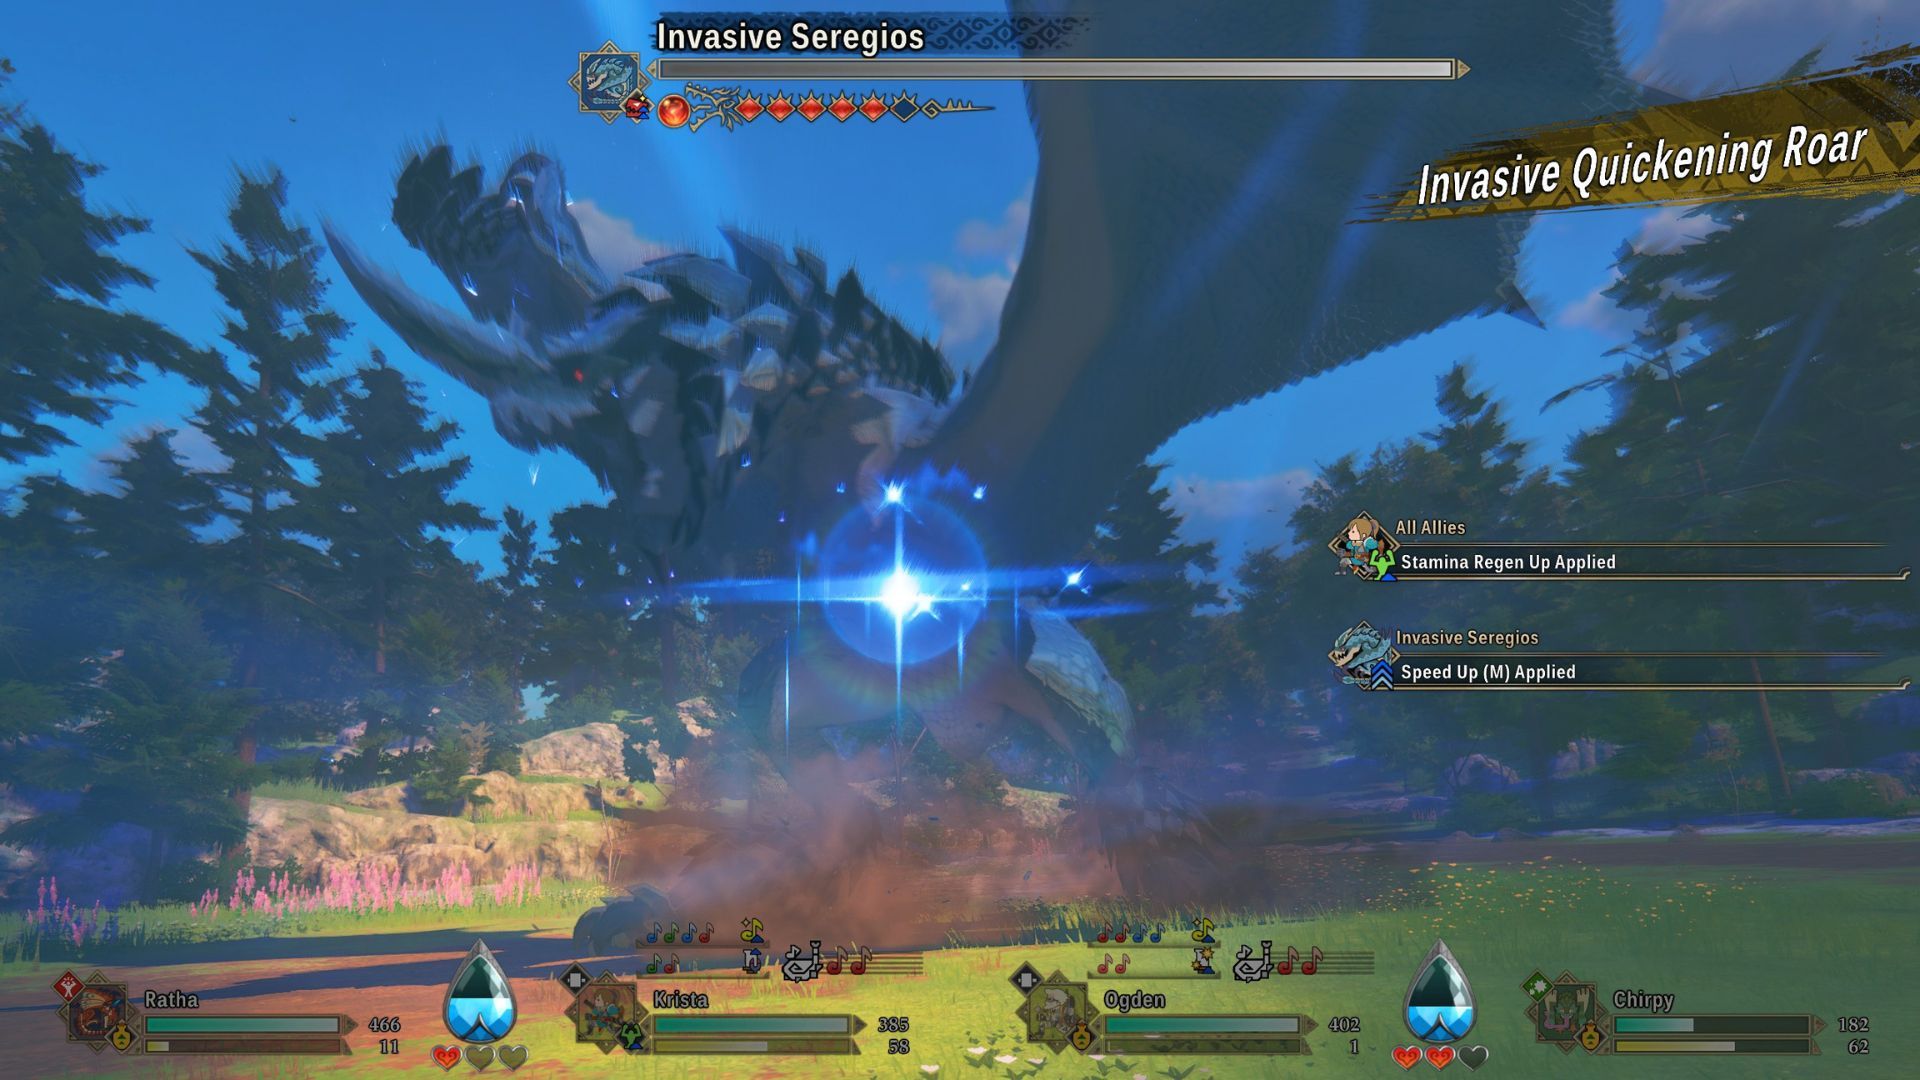
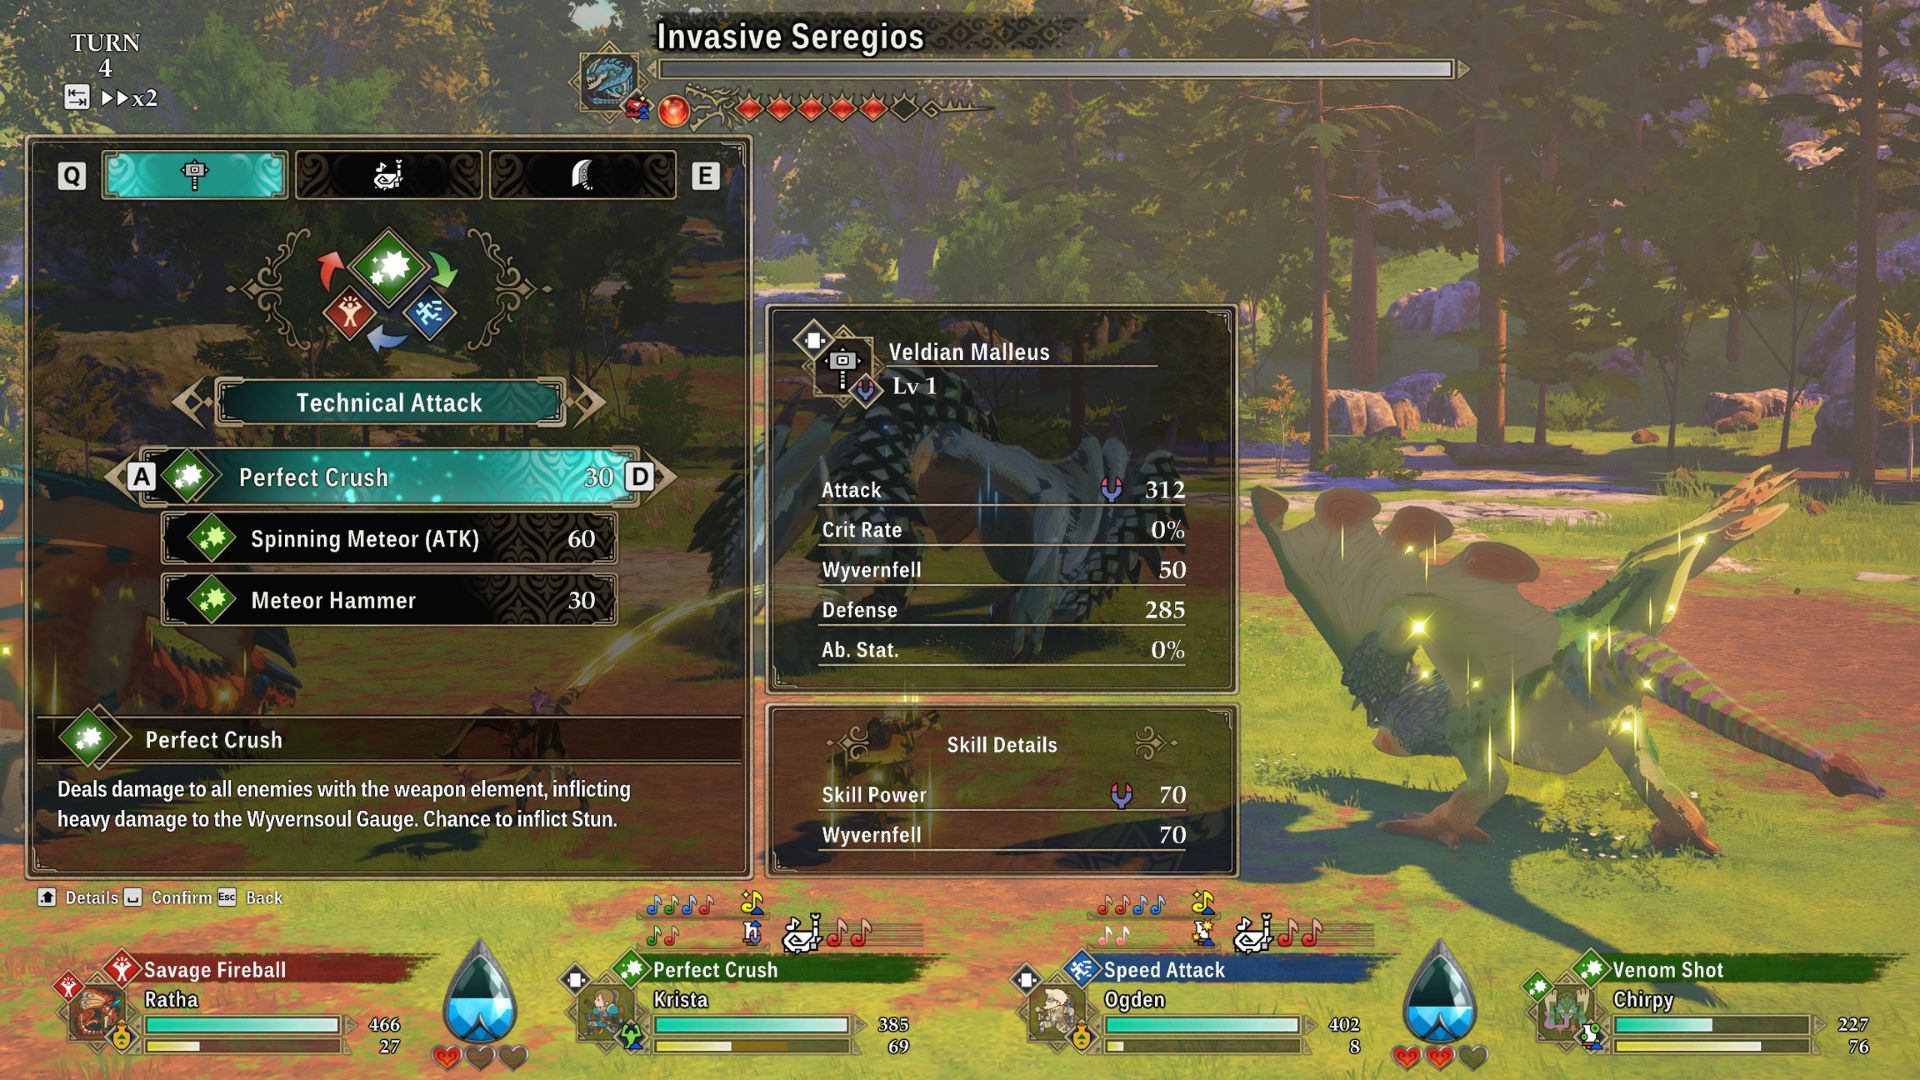
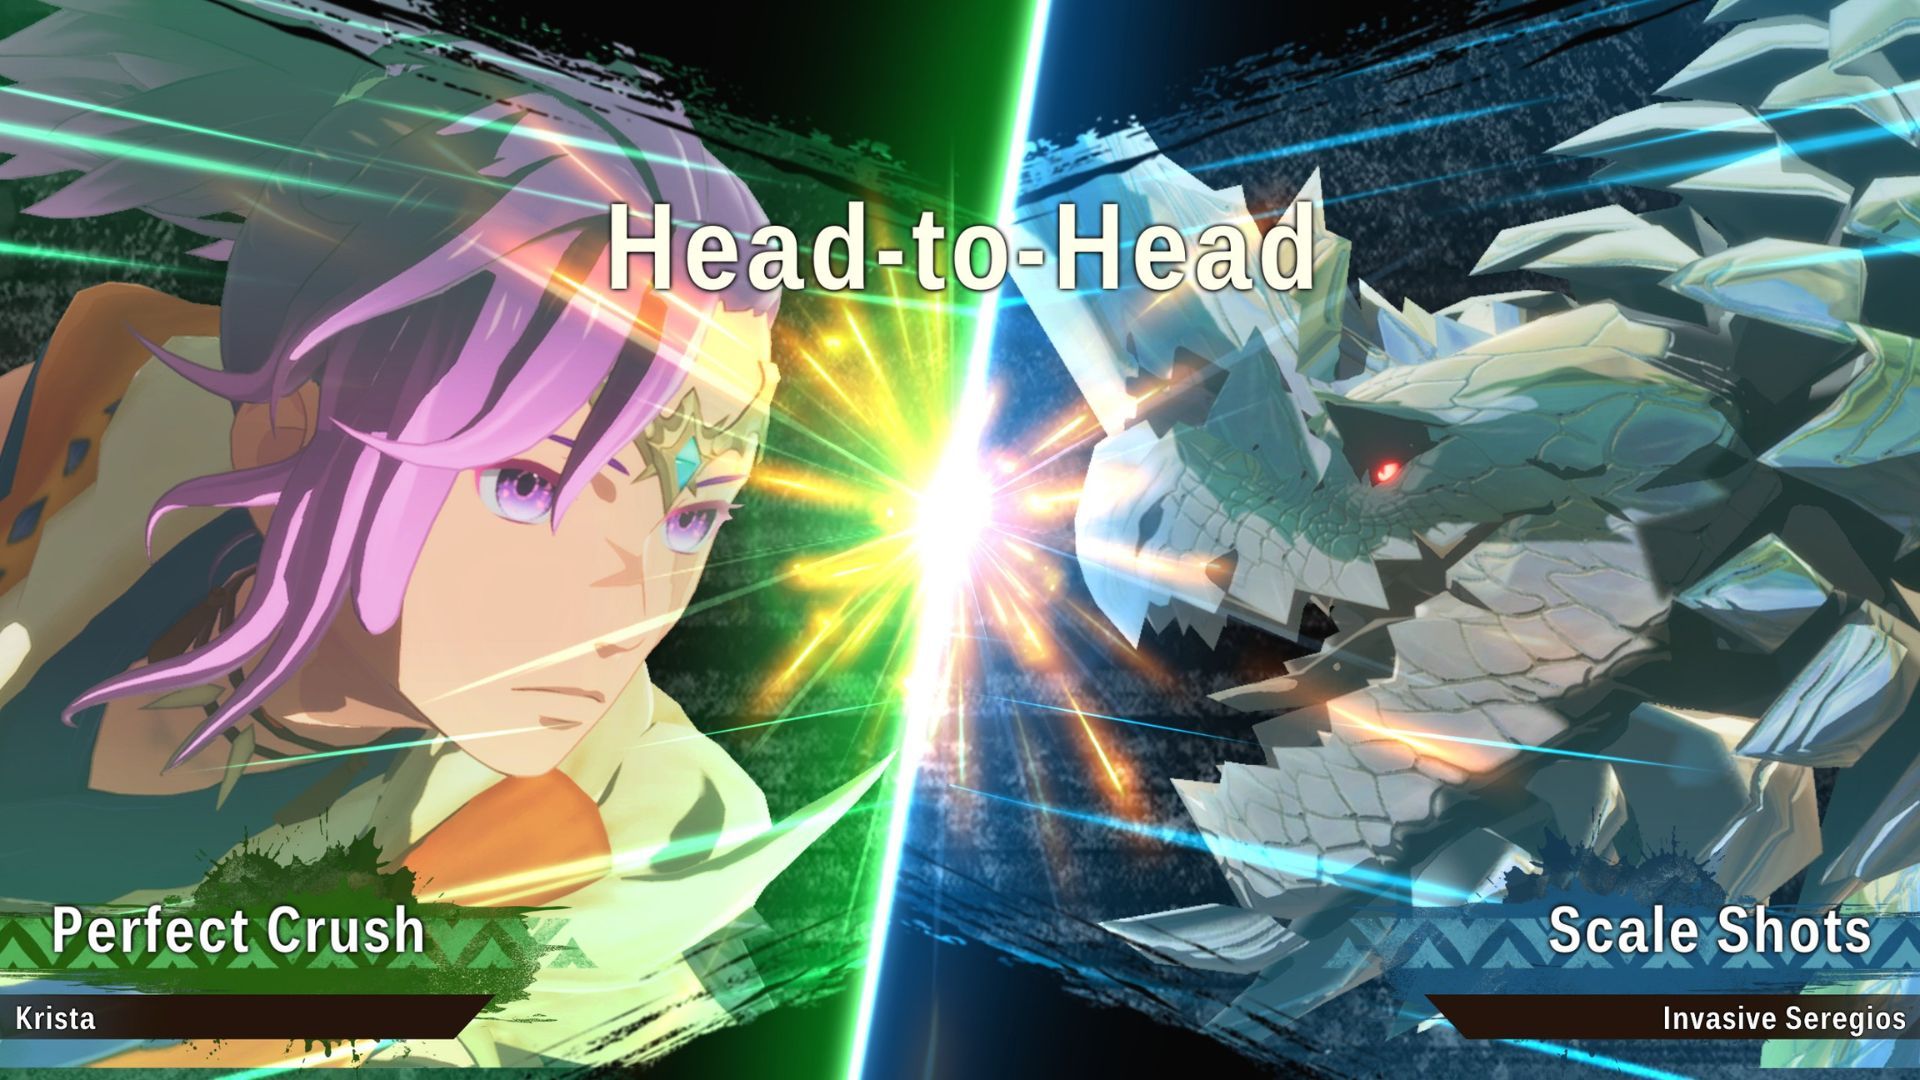
When Sergios gets angry, it will immediately use a powerful attack. The key to surviving this phase is watching for its Invasive Quickening Roar, which signals an upcoming Scale attack. This roar is accompanied by a colored spark that appears in front of Sergios, letting you know what kind of attack is coming.
The Sergios will directly challenge you with this attack. To win, you need to use a hammer skill that hits all enemies and is strong against the type of attack Sergios chooses. For instance, if a blue spark appears with the roar, you should use a technical attack like Perfect Crush.
If you fail the first attempt, you’ll get another chance right away in this one-on-one battle. If you win, the Sergios will retreat and establish a new, vulnerable nest. This nest contains an egg from the Astalos species.
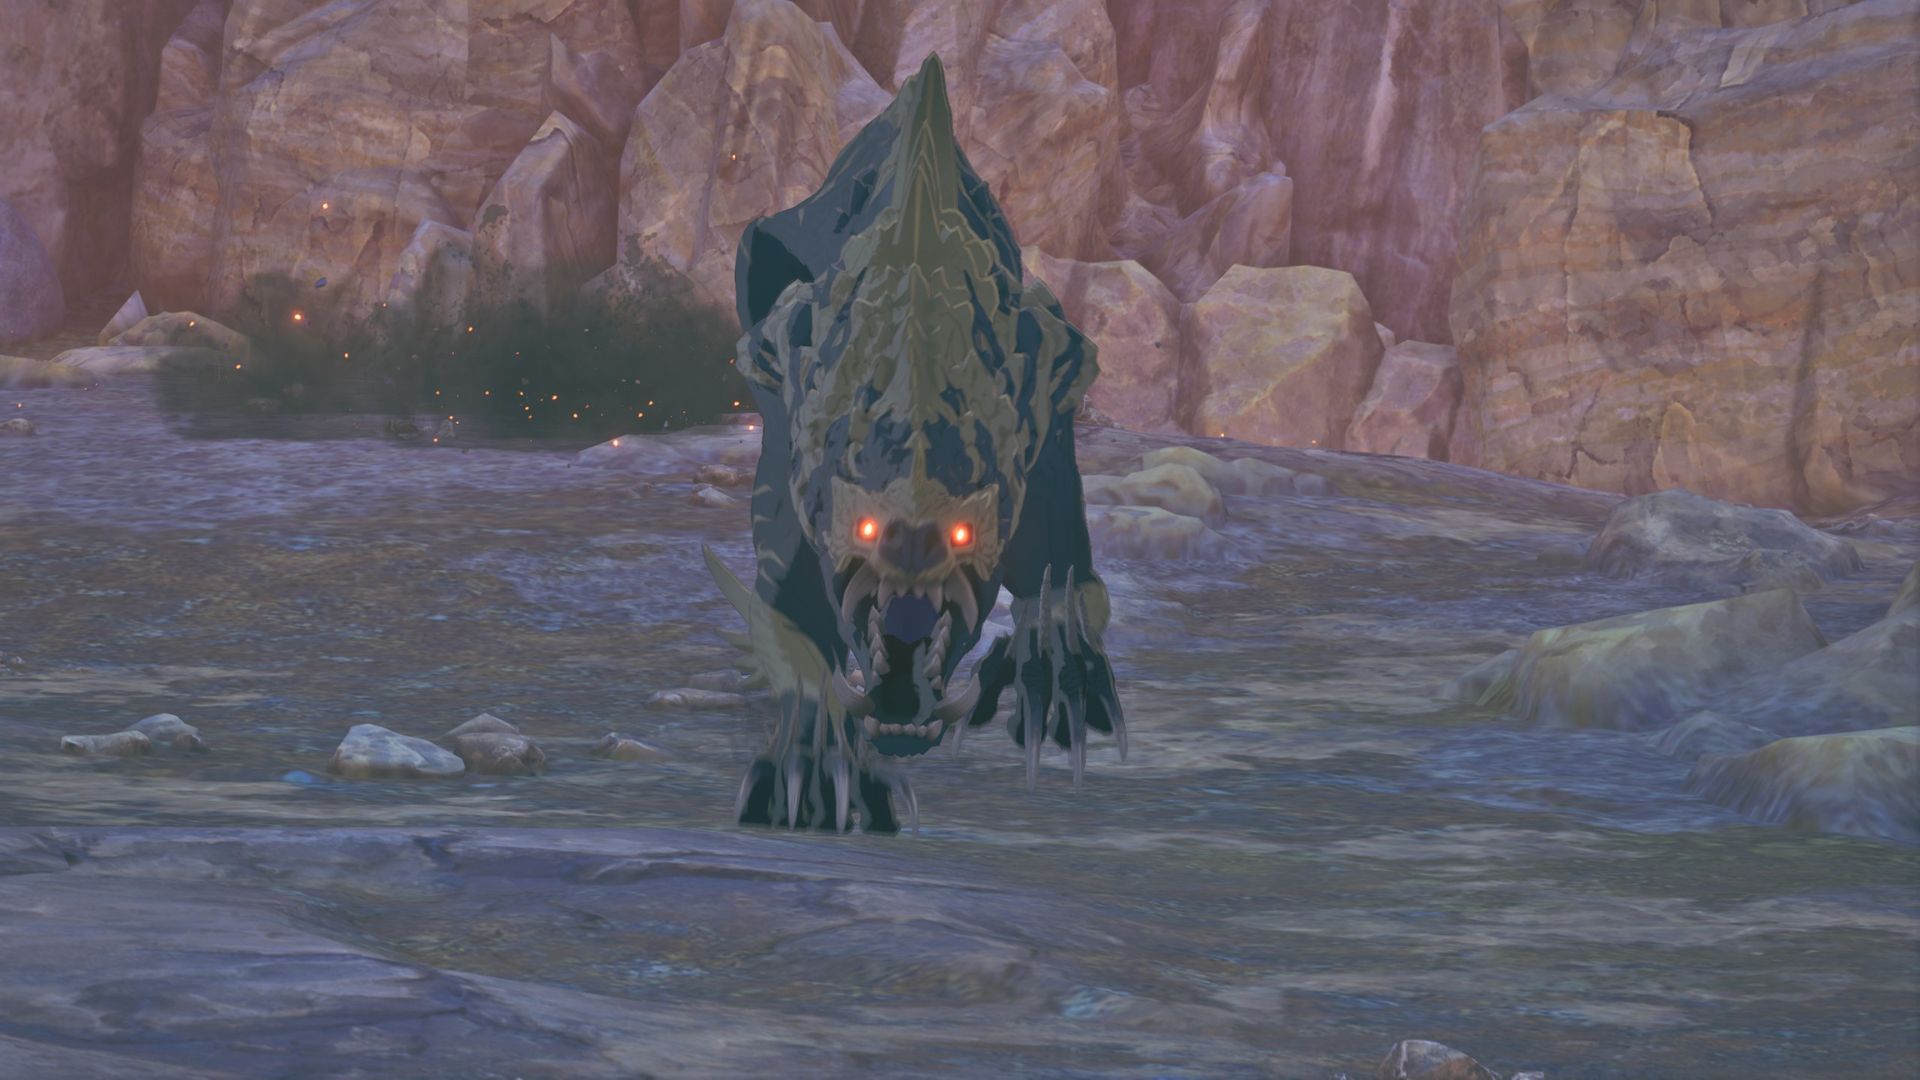
How to Defeat Invasive Arzuros
- Location: Canalta Timberland: Blessing Hill
- Requirements to defeat: N/A
- Element: Non-Elemental
- Attack Type: Power
The Invasive Arzuros is located at the southern edge of Canalta Timberland. Because you need to defeat it to progress the story, simply follow the orange markers on your screen to find it.
The Invasive Arzuros is the second monster you’ll face in the story, and it’s relatively straightforward. To win, you need to deplete its honey supply until it gives up and retreats. The easiest way to do this is by quickly defeating the monsters it summons using honey.
If you drive off the invasive Arzuros and follow it back to its nest, you’ll find a Canyne egg. Bring the egg to Sheparden, and you’ll be able to hatch the first Canyne Monstie in a long time – it will be your first Monstie capable of diving underground.
How to Defeat Invasive Nerscylla
- Location: Canalta Timberland: Blessing Hill
- Requirements to defeat: Gunlance with the Wyvern Fire skill.
- Element: Non-Elemental
- Attack Type: Technical
You can find the Invasive Nerscylla in a clearing on the southeastern edge of Canalta Timberland. To get there, jump across the river to a high ledge. The easiest way to find this ledge is to fast travel to the Catavan Stand at Blessing Hill camp and then walk east.
The Invasive Nerscylla is unique because it can turn invisible, which protects it from your attacks. When it does, it’s crucial to ensure you have plenty of stamina so you can use your Gunlance’s Wyvern Fire. Using a ration or other stamina-boosting item will help you prepare quickly.
The Invasive Nerscylla becomes more aggressive when enraged and starts using its most powerful attacks. Pay attention when it focuses on you – you’ll see a red line connect it to your character. This means it’s preparing to use its deadly ‘Invasive Death Scissors’ attack, which will immediately knock you out if it hits.
If the Nerscylla does this, use your Wyvern’s Fire skill on it. This will set it ablaze and cause it to flee. Chase it back to its nest to obtain a Nargacuga egg.
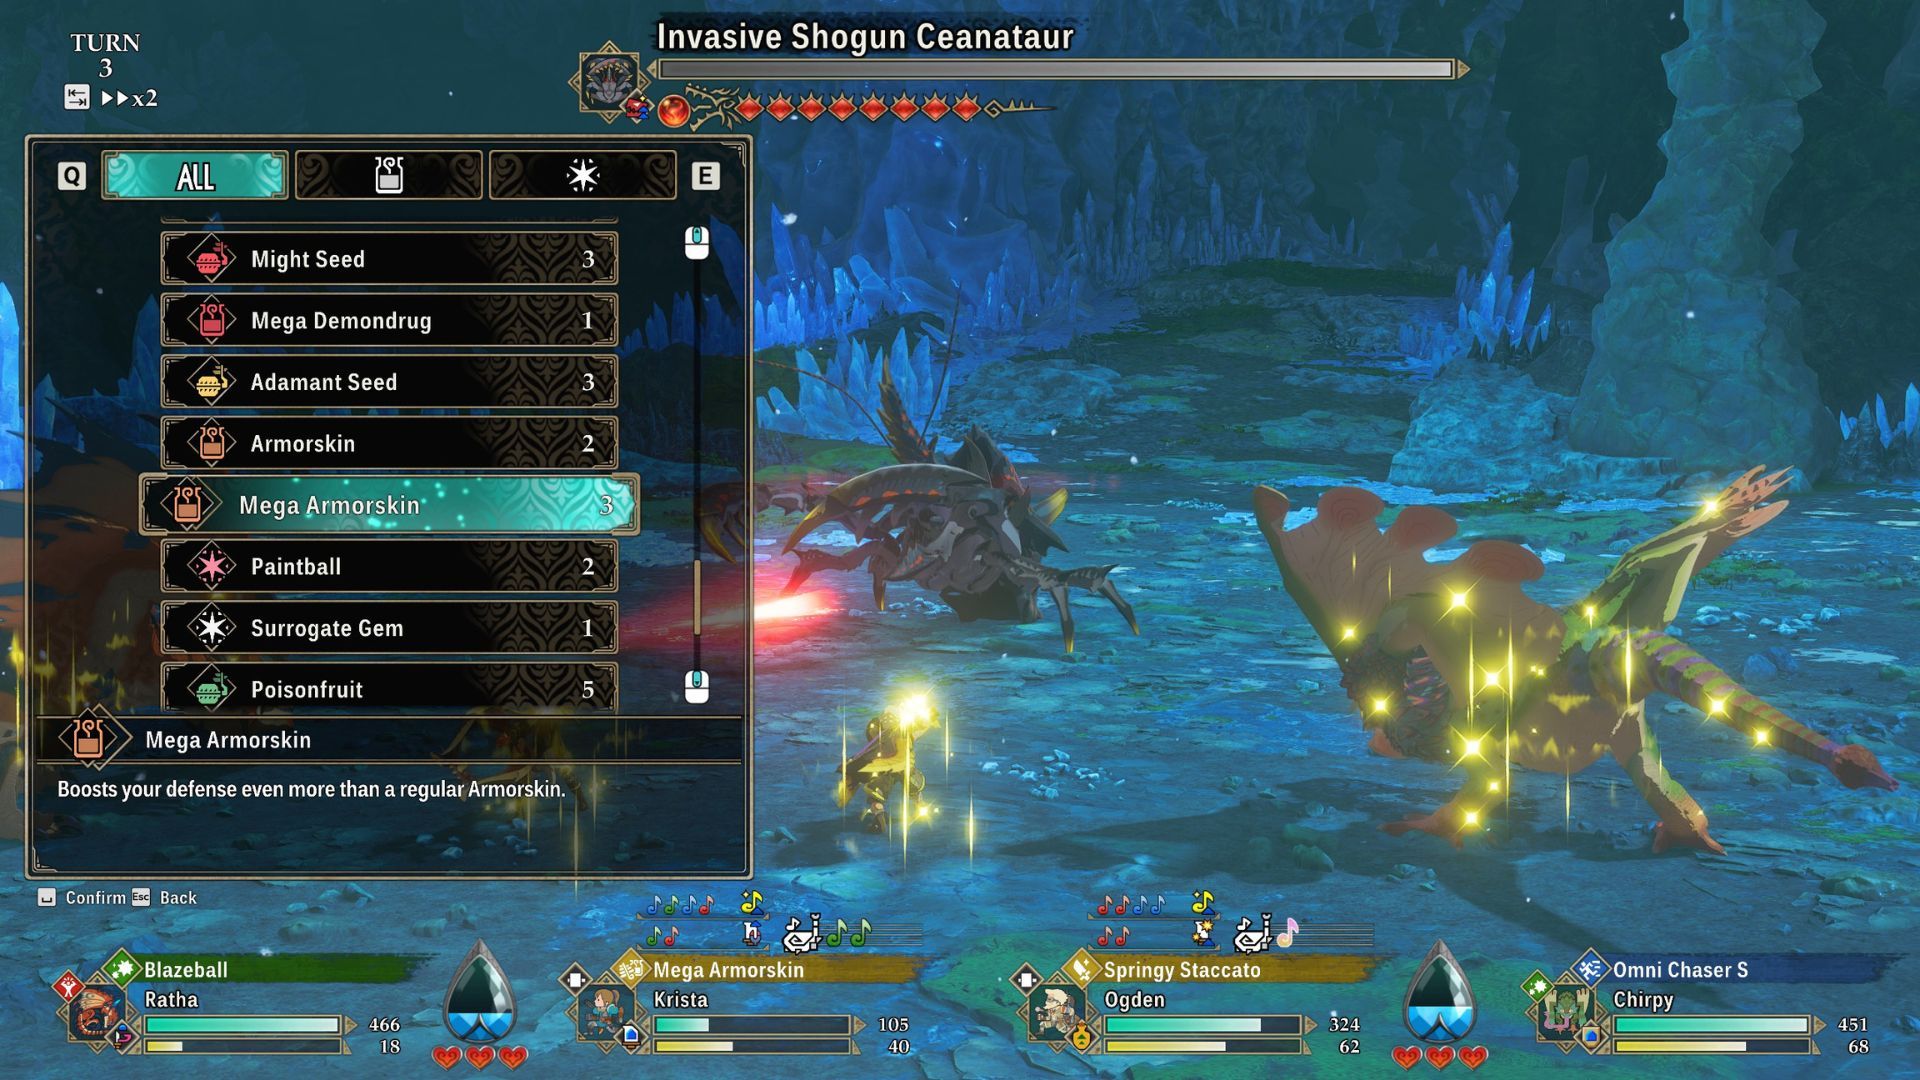
How to Defeat Invasive Shogun Ceanataur
- Location: Canalta Timberland: Frozen Grotto
- Requirements to defeat: Items or skills that greatly raise your defenses, preferably Mega Armorskin.
- Element: Water
- Attack Type: Power
You can find the Invasive Shogun Ceanataur in a secret part of the Frozen Grotto, close to the Howlinyowl Forest Lookout Point. Look for a waterfall – the entrance is hidden behind it.
Before this battle, make sure you have items to significantly increase your defense. For a major boost, Mega Armorskin is the best option. You can find it in chests or create it yourself using the Mega Armorskin recipe.
Okay, so I finally figured out how to get the Mega Armorskin recipe! You get it by finishing the third quest from that little girl hanging around the campsite near the Canalta Timberland Cataracts. It’s a pretty cool reward, definitely worth doing!
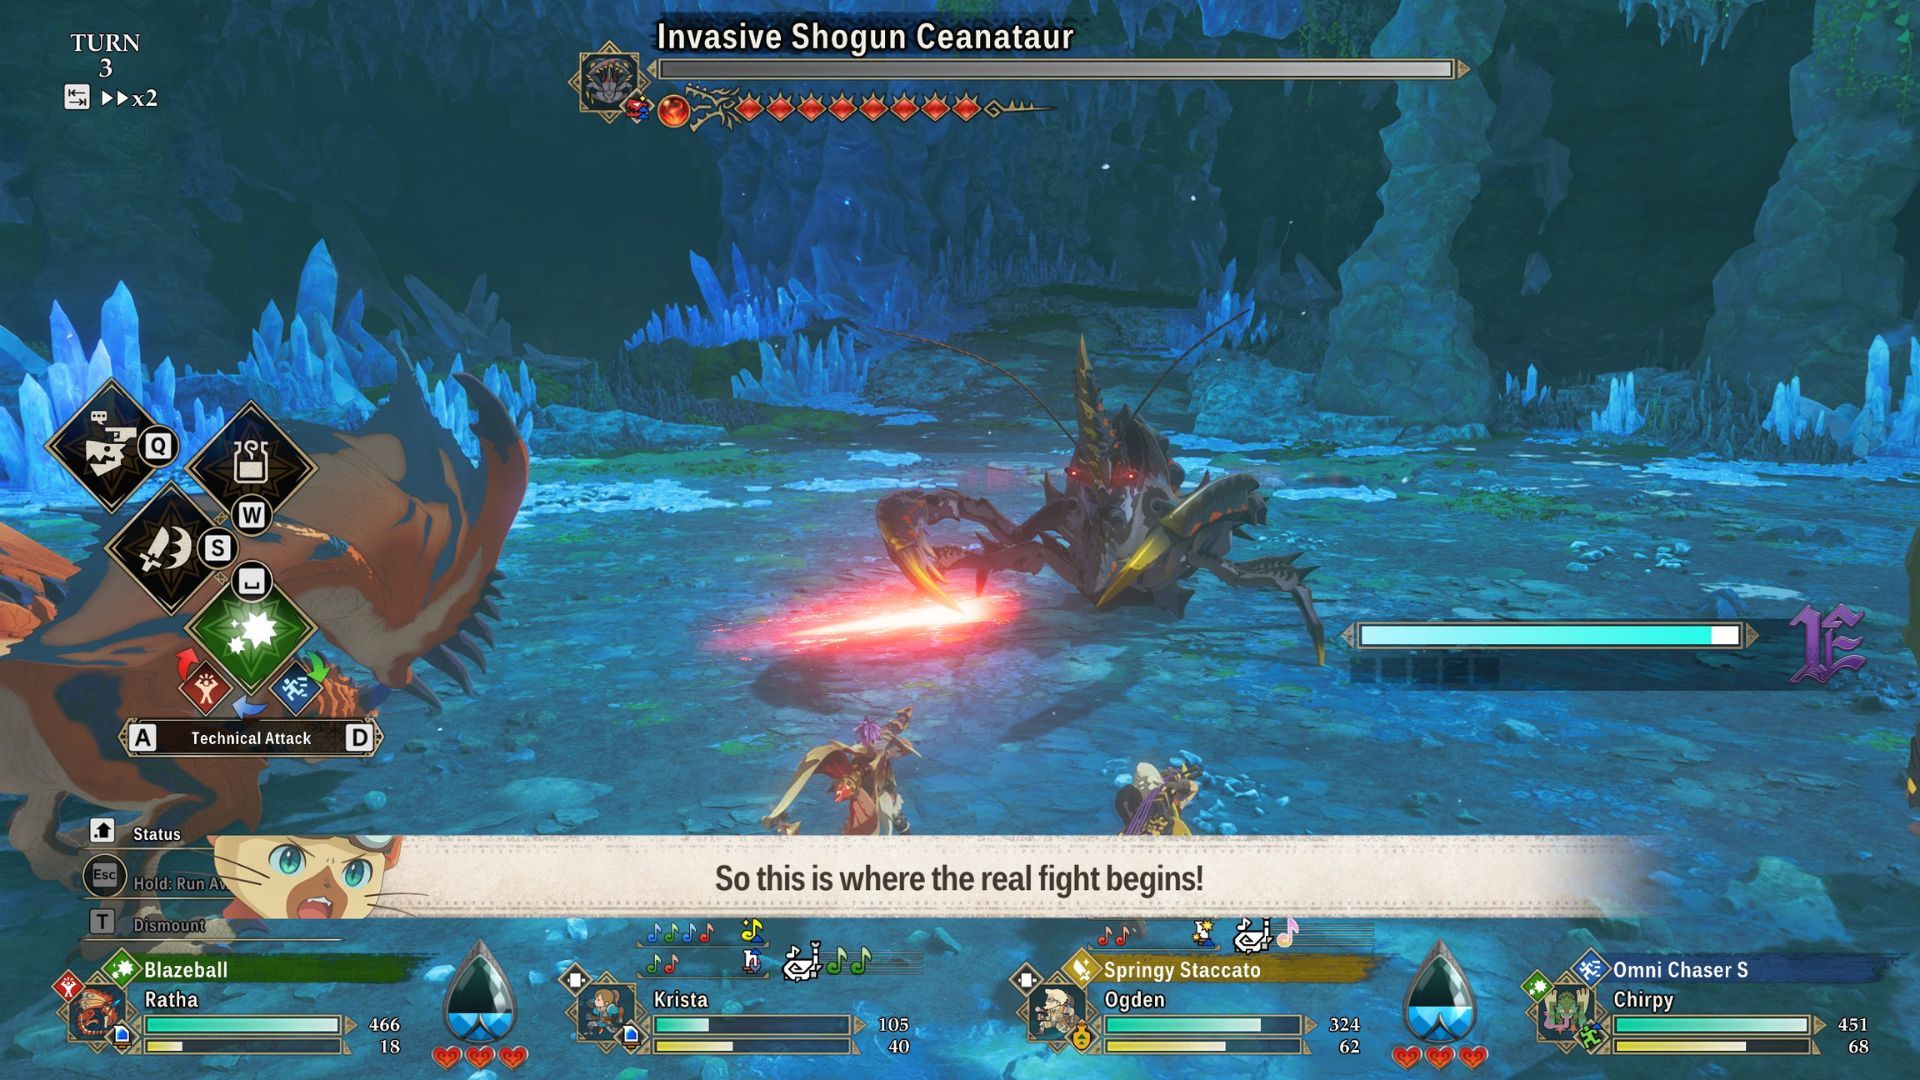
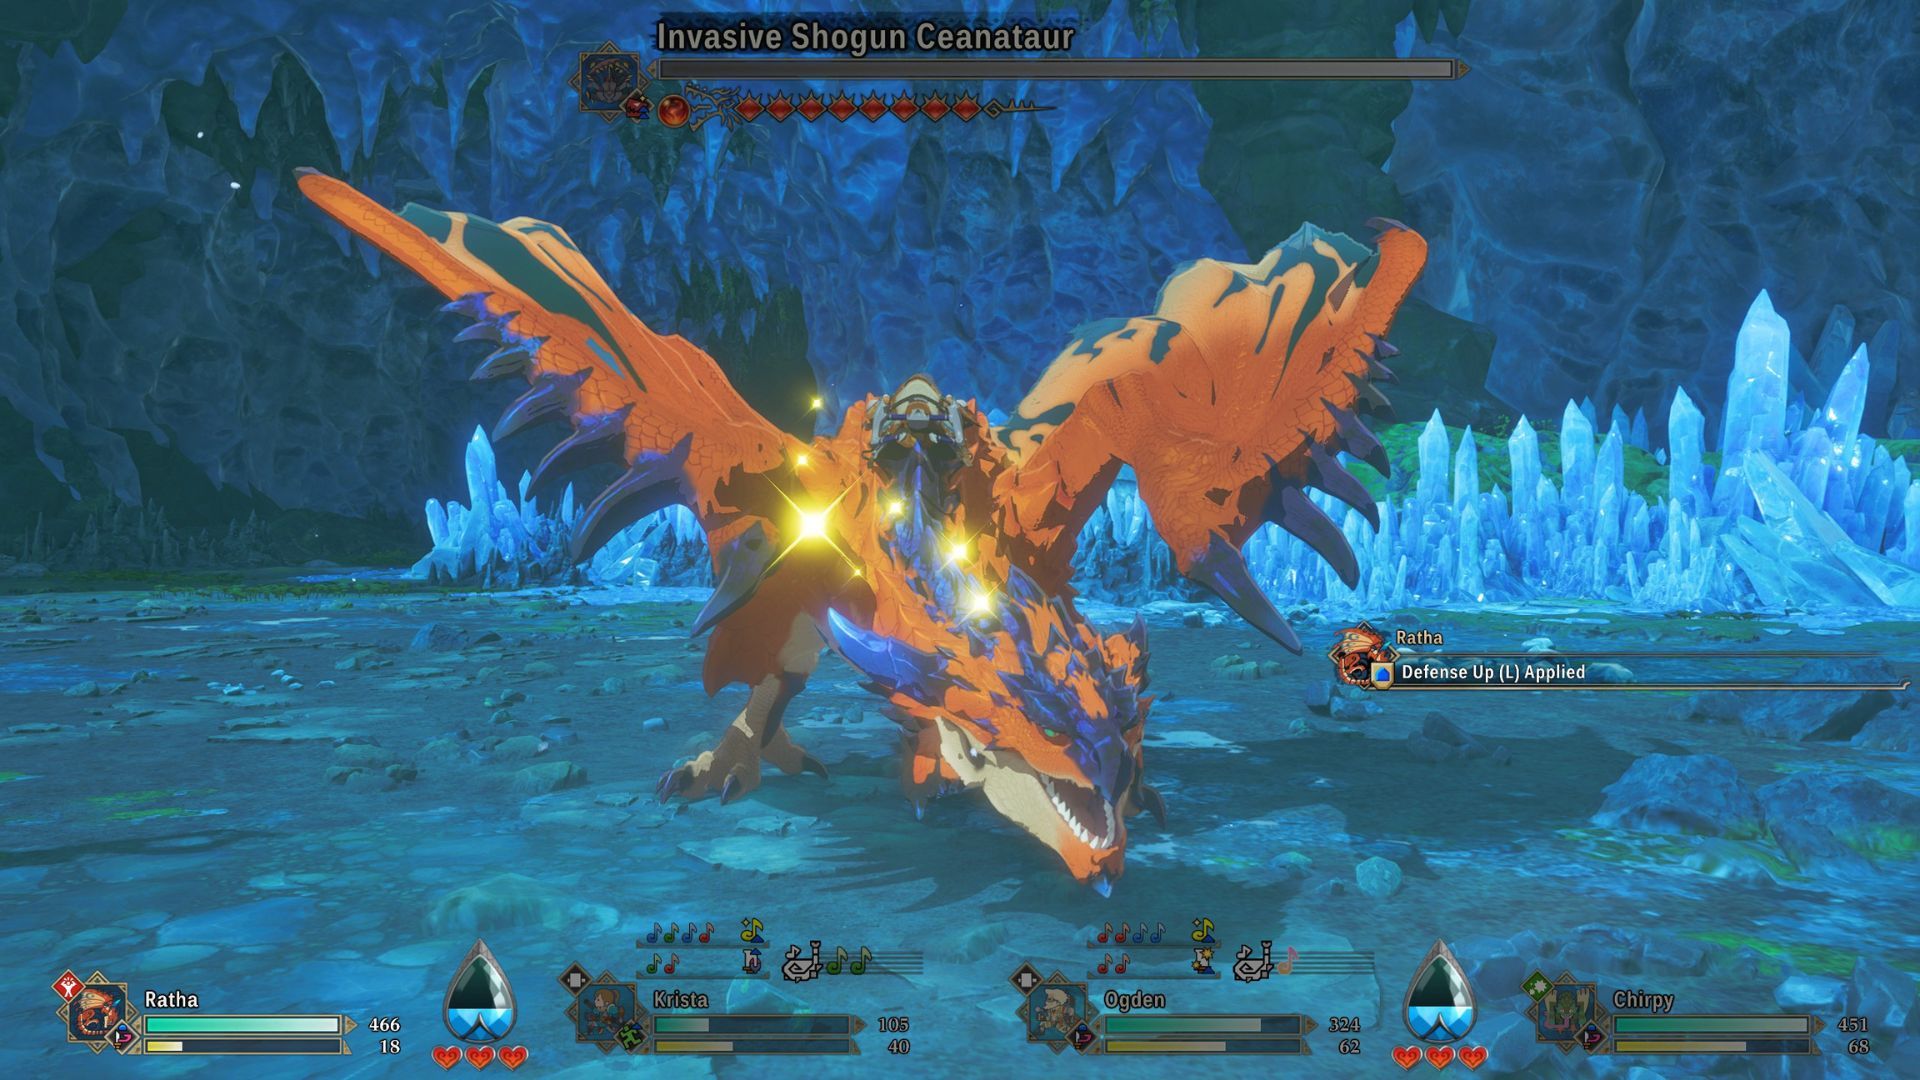
When the Invasive Shogun Ceanataur’s claws regenerate, it will single out one player. Quickly use the Mega Armorskin item on that player. If the Ceanataur attacks them while the item is active, the attack will reflect back, hurting the monster and forcing it to back off.
When the monster leaves, the cavern will become a protected den. You can hatch the egg you find there to obtain your first Mizutsune.
How to Defeat Invasive Diablos
- Location: Tarkuan: Colossal Dragon’s Remains
- Requirements to defeat: A hammer with a meteor skill; we used Meteor Hammer.
- Element: Non-Elemental
- Attack Type: Power
You can find the Invasive Diablos in the southeastern part of Tarkuan. To get there, climb to the top of the Colossal Dragon’s skeleton and head to the eastern side. From there, glide east towards the border and land on a small platform. This platform will lead you to the area where the Invasive Diablos is located.
Before fighting the Invasive Diablos, equip a Hammer that has a meteor-based skill. We recommend the Meteor Hammer, but any similar, powerful hammer skill with “meteor” in its name should be effective.
As with most of the fight, the beginning of the Invasive Diablos encounter focuses on staying alive. It’s also important to manage your stamina so you have enough energy to use your hammer’s meteor attack.
The key to winning this fight is recognizing when the Invasive Diablo uses its Helical Ambush. During this attack, the Diablo will quickly move between three holes in the ground, which you can identify by rocks and dust erupting from each one as it shifts position.
To defeat the Diablo, carefully observe its movements and time your Meteor Hammer strike to land when it passes through an opening. It’s crucial to use the Speed attribute during your attack; otherwise, you’ll miss, even if you aim correctly.
If you can fight off this attack, the Invasive Diablo will run away. Follow it back to its nest to find a Tigrex egg.
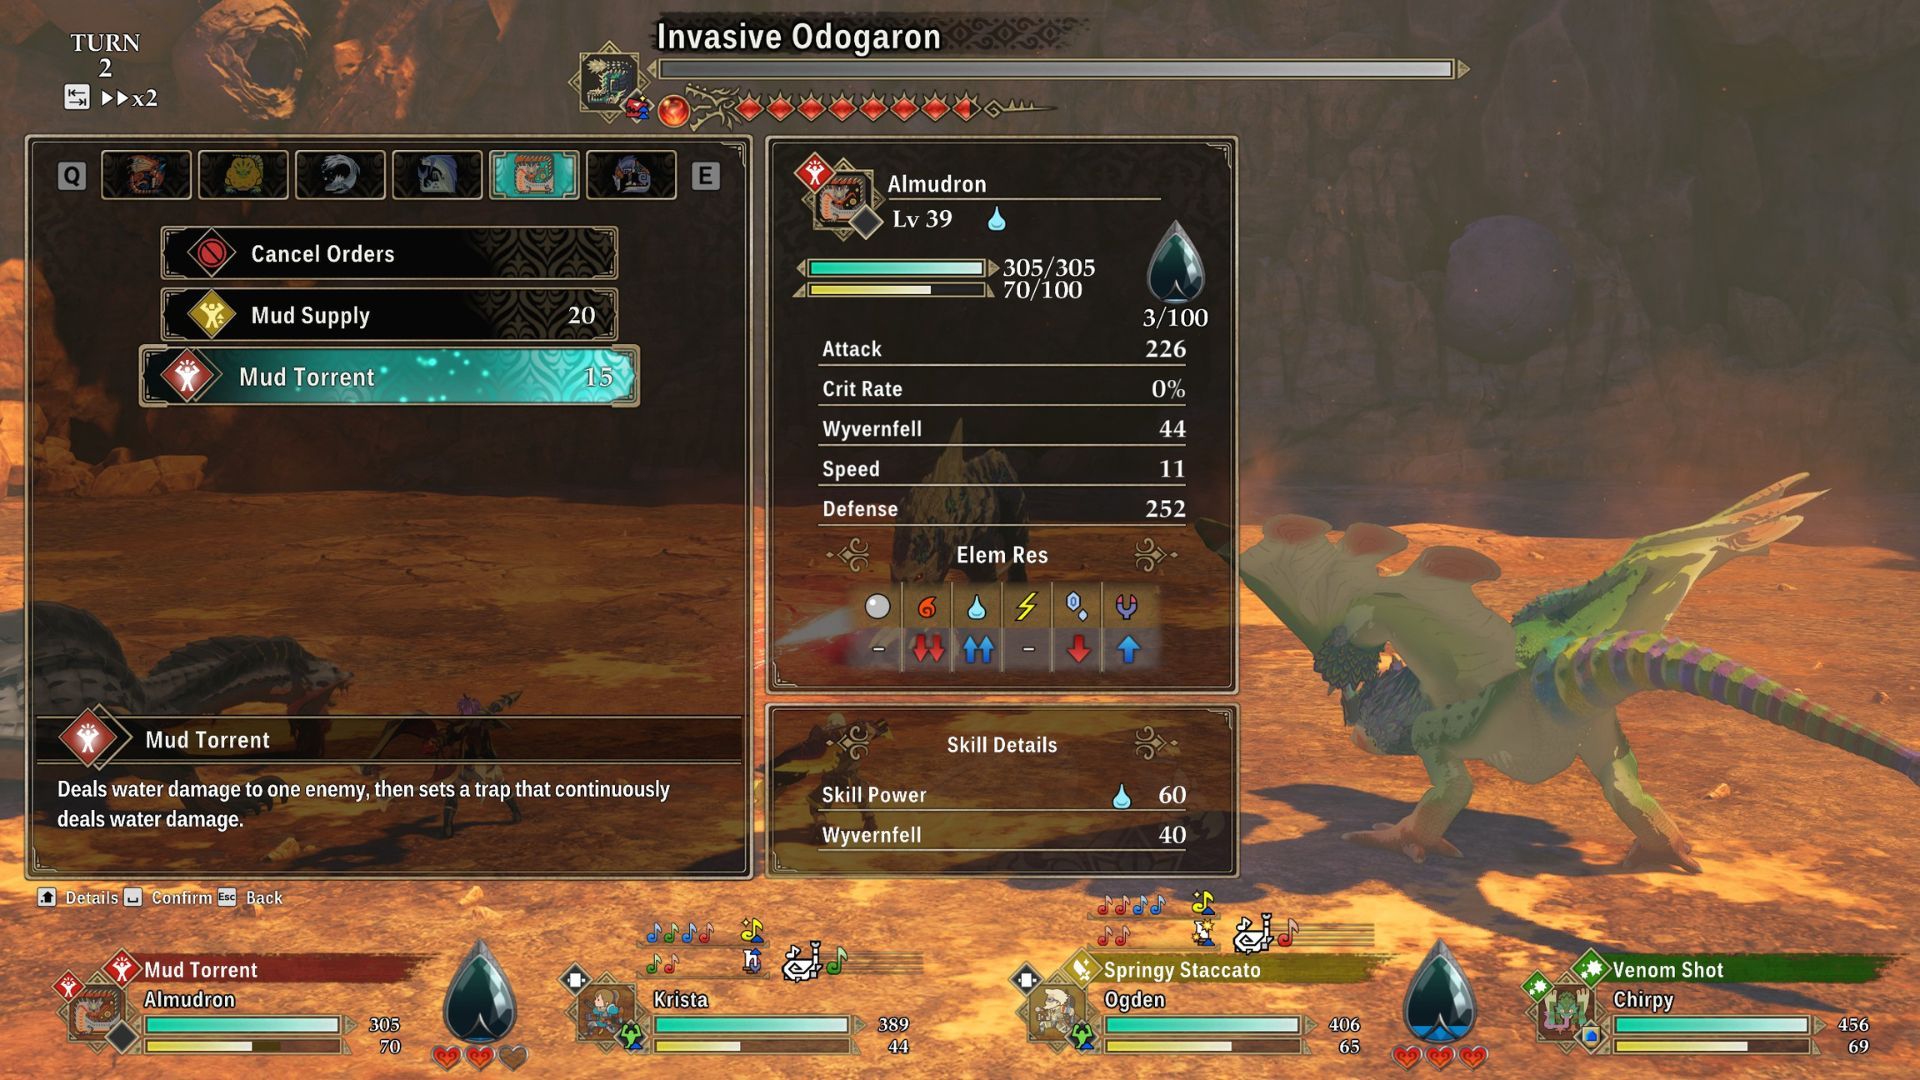
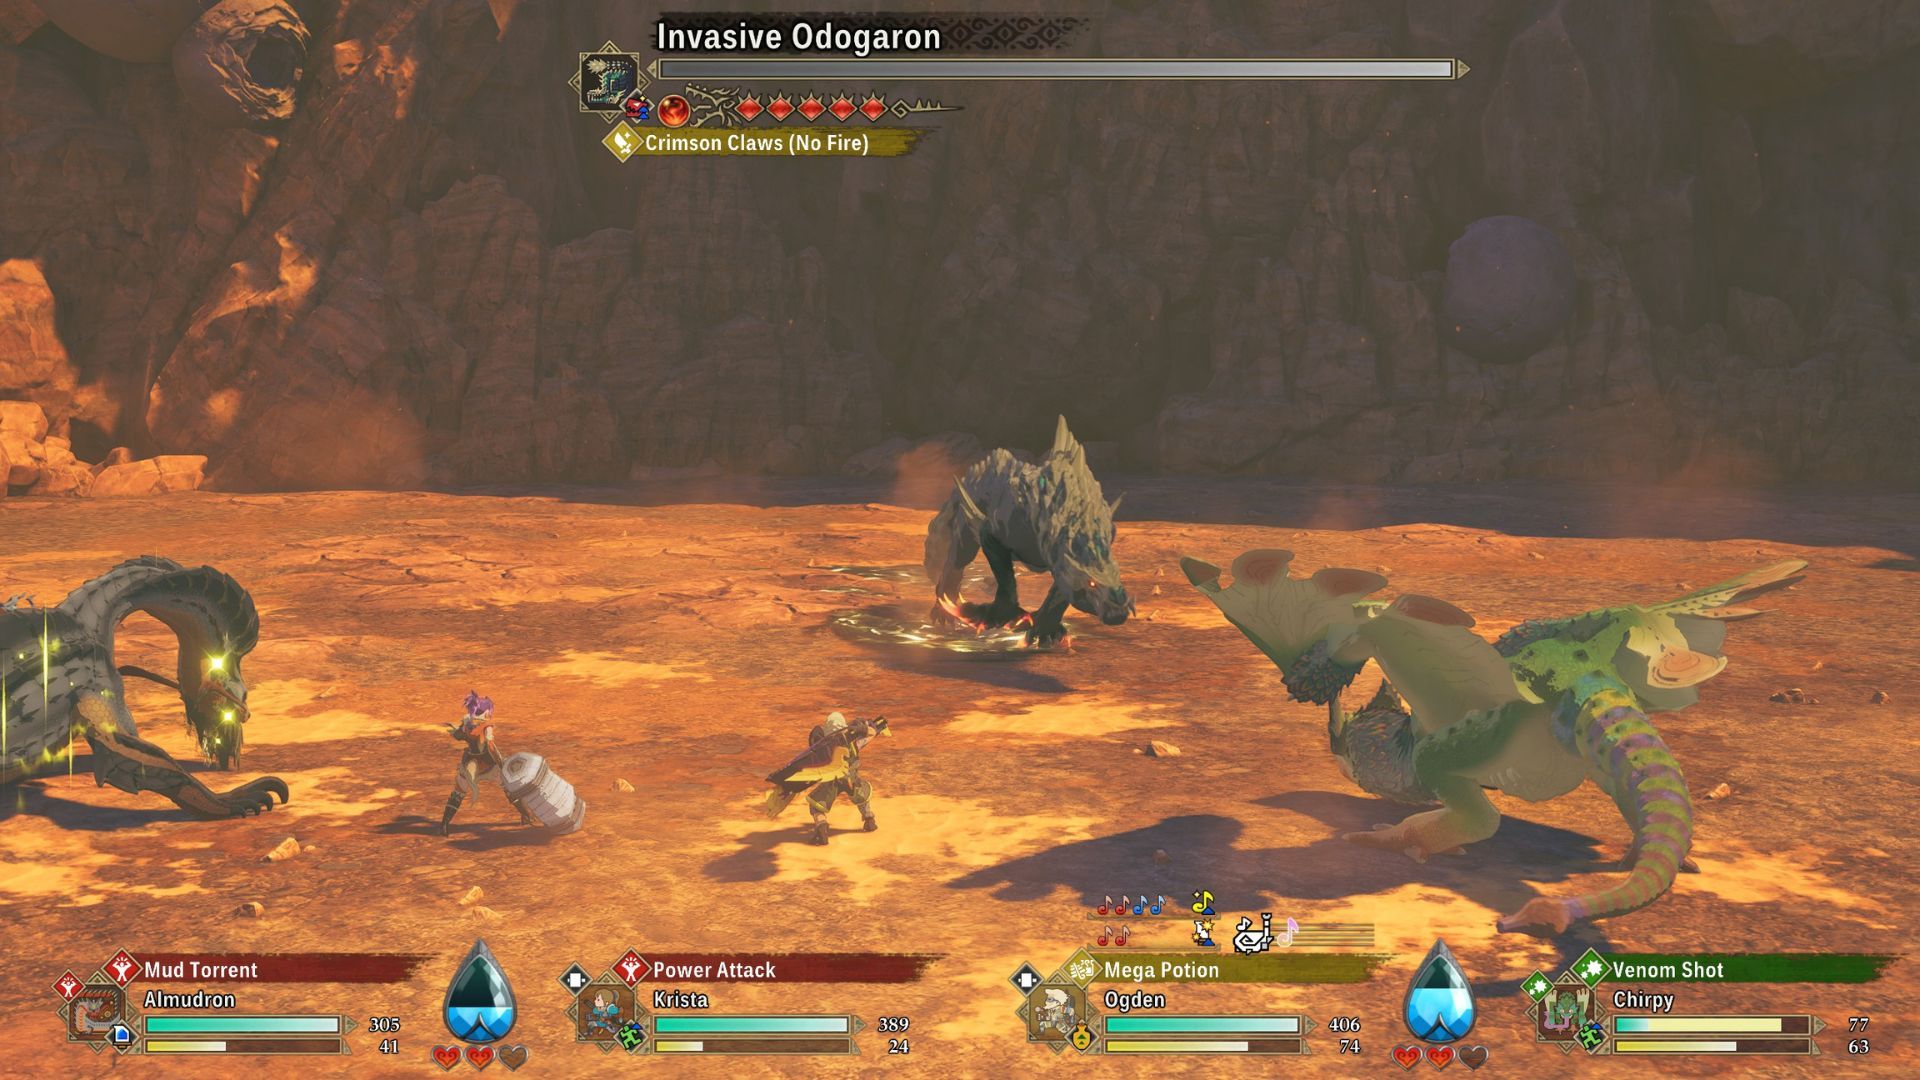
How to Defeat Invasive Odogaron
- Location: Tarkuan: Rococo Rocks
- Requirements to defeat: A Monstie that can inflict Mudbogged, like Almudron.
- Element: Non-Elemental
- Attack Type: Speed
To reach the area where you fight the Invasive Odogaron, head west from the Rococo Rocks Catavan Stand. You can jump from the platform’s edge and glide to the ledge to the west, but it’s a tight jump. A safer option is to glide south to the tallest updraft in Rococo Rocks and then fly to the ledge from there.
Before fighting the Invasive Odogaron, it’s helpful to have a Monstie that can inflict the Mudbogged status effect. The Almudron is a good choice for this, as any of its moves that lay a water-damage trap will apply Mudbogged to the enemy.
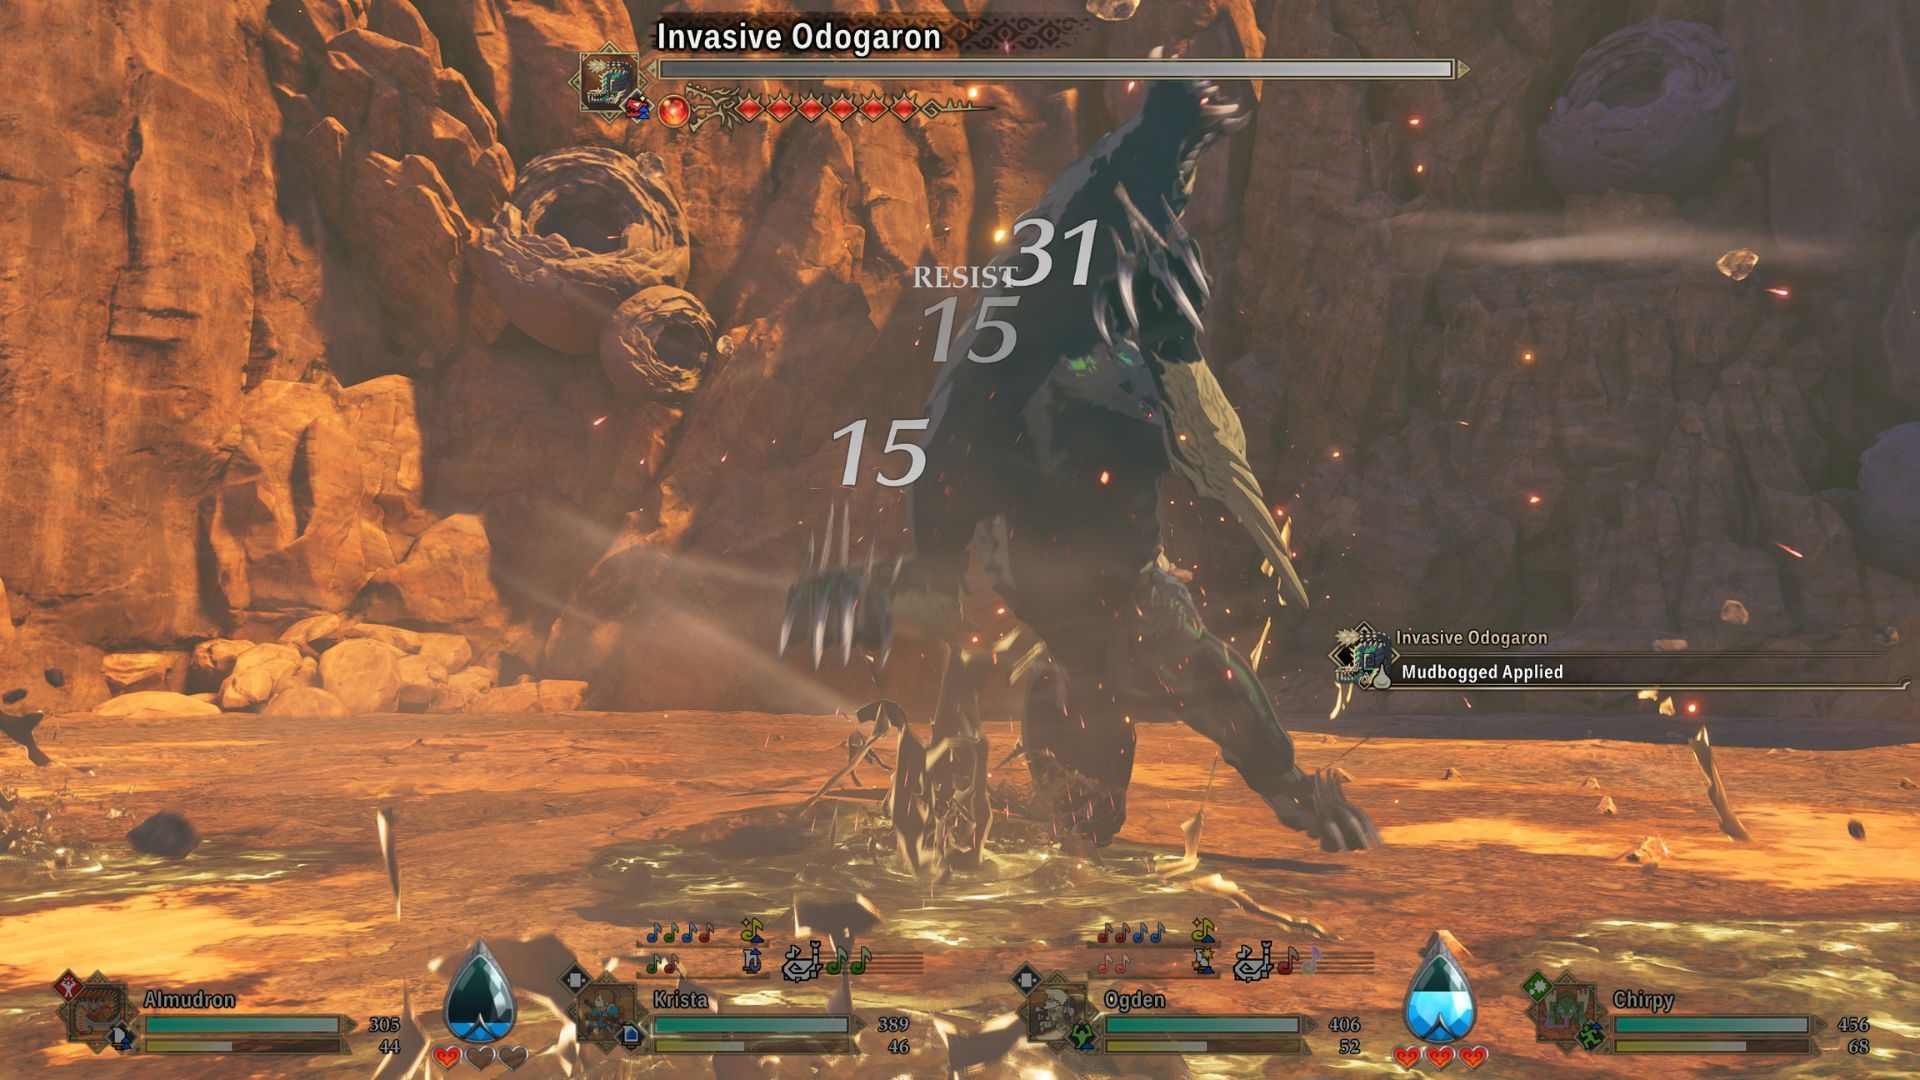
Okay, so I learned the hard way that when an Odogaron gets really mad and uses its Crimson Claws, you cannot interrupt it! From then on, the best thing to do is keep it stuck in the mud as much as possible. Seriously, pay attention when the game tells you to ‘focus on attacking the claws!’ – that’s when keeping it Mudbogged is super important!
When covered in mud (Mudbogged), the Odogaron’s usual Crimson Claws attack changes to a version that doesn’t cause fire damage. It will try to attack twice, but if both attacks are blocked while it’s Mudbogged, the Odogaron will run away.
The egg found in this Endangered Den belongs to the Zinogre species.
How to Defeat Invasive Khezu
- Location: Serathis: Glacial Caps
- Requirements to defeat: Paraheal Powder, or other items that cure and prevent Paralysis.
- Element: Thunder
- Attack Type: Technical (Normal); Power (Angry)
You can find the Invasive Khezu in the clearing just to the right of the Glacial Caps campsite. To get there, climb to the top of the Glacial Caps Lookout Point and glide towards the clearing. Look for the taller, ice-free pillars and land on one. Then, carefully jump between the pillars to reach the area where the Invasive Khezu is located.
Before you battle the Invasive Khezu, make sure you have items to cure Paralysis and, ideally, items that prevent it altogether. This fight is tough, and it’s much harder to win if your team gets paralyzed, as you’ll need to coordinate attacks with your Monstie. It’s also a good idea to eat a meal that boosts your Kinship Gauge, as you’ll need to use a Kinship Skill at a certain point in the battle.
At the start of the battle, focus on keeping your team from getting paralyzed and stopping the Khezu from using its powerful Double Attack. Rudy will warn you when the Khezu is about to unleash its Thunder Zone, giving you time to use an item and protect everyone.
Okay, so when you see “Wyvern Charge Complete” pop up, the Khezu is going to try and go head-to-head with either me or my Monstie. To win that head-to-head, I have to use a Double Attack. It’s important to know that during this phase, the Khezu only uses Power attacks, so I need to counter with a Speed Double Attack to really hit where it hurts!
Once you’ve weakened the Khezu with repeated attacks, your teammates will notice it’s starting to suffer. This signals the beginning of the next phase of the battle.
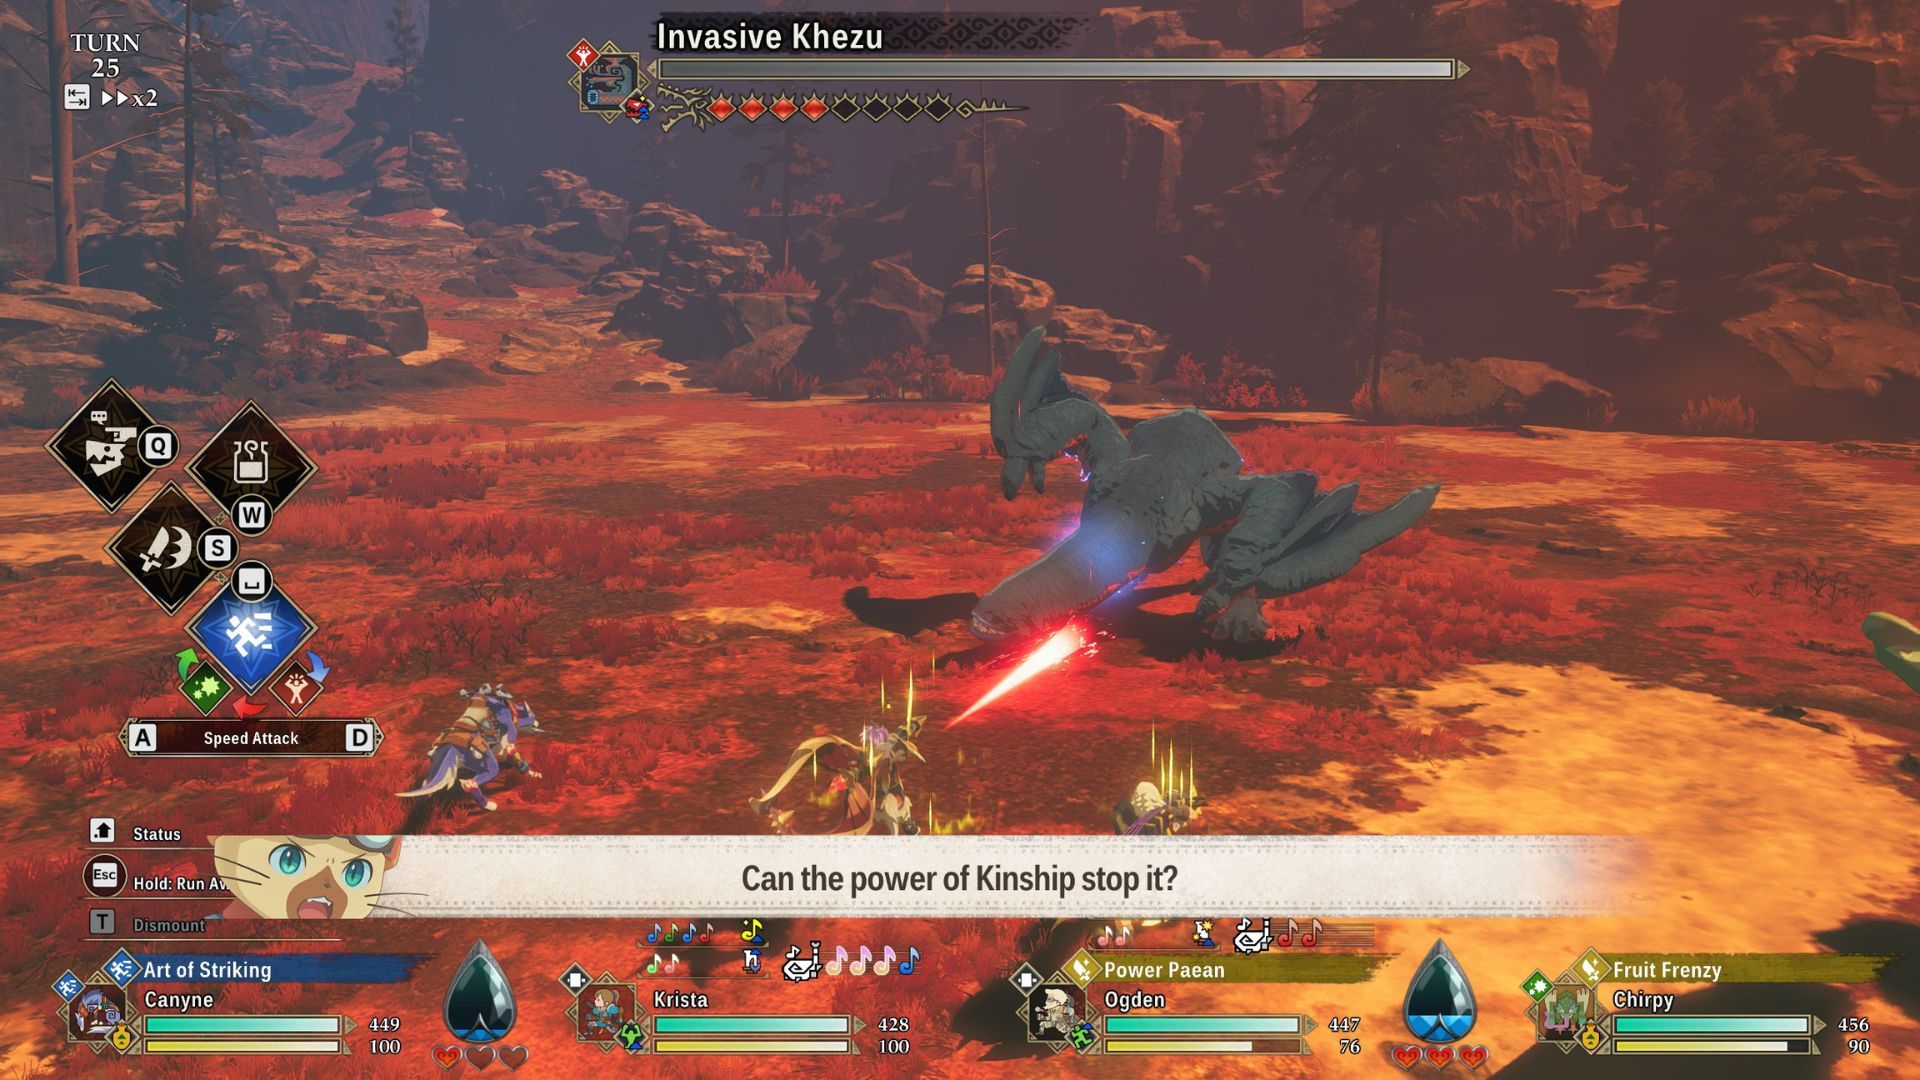
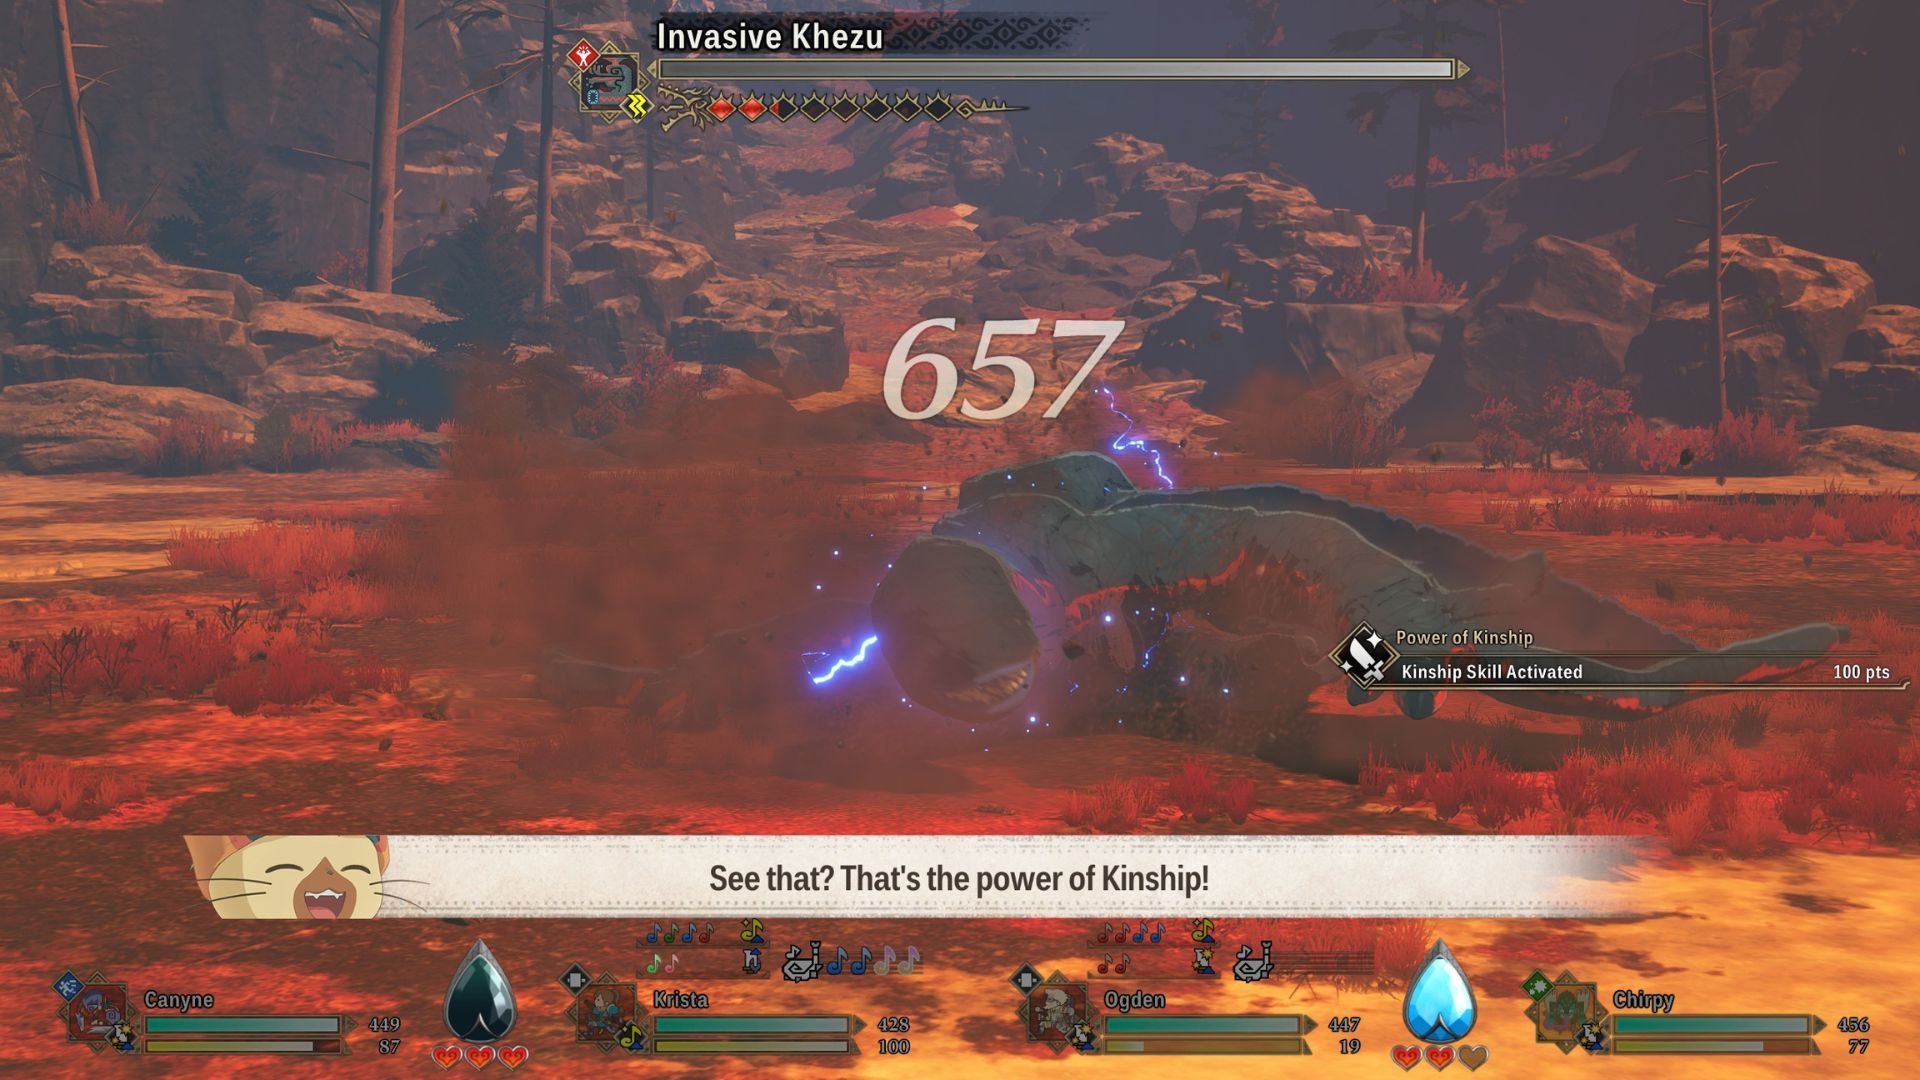
Once you’ve gone through a couple more attack exchanges, you’ll see the message “Learning Complete” on the screen, and Rudy will point out that the Khezu seems to be anticipating your actions. For the last phase of the battle, you’ll need to use a Kinship skill when prompted – you might see a message like “Can the Power of Kinship stop it?” or something similar asking you to try a new tactic against the Khezu.
As soon as you see that message, use your Kinship Skill on the Invasive Khezu. The fight will look normal, but the Khezu will mess up its next attack and flee to an Endangered Den. You’ll find a Barioth egg in that den.
2026-03-24 07:41